Installation Guide
|
Comfort Pack T Series
with up to
95% Gas Heat
8
installation. Should further information be desired or should
particular problems arise which are not covered sufficiently
for the purchaser’s purposes, the matter should be referred to
your installing dealer or local distributor before contacting the
manufacture.
NOTE: THE UNIT MUST NEVER BE PLACED ON ITS
SIDE OR UPSIDE DOWN AS THE COMPRESSOR
OIL WILL RUN IN THE COOLING CIRCUIT AND
SERIOUSLY DAMAGE THE UNIT.
Installation
NOTE: INSTALLATION AND MAINTENANCE
INSTRUCTIONS SHOULD BE LEFT WITH THE UNIT
FOR FUTURE REFERENCE.
This unit must be installed in accordance with all applicable codes.
This unit is not to be used for temporary heating of buildings or
structures under construction.
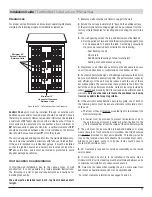
FOR MAXIMUM PERFORMANCE, IT IS IMPERATIVE THAT
THE COOLING CHASSIS AIR DIVIDER BE SEALED TO THE
CABINET AIR SEAL. ANY LEAKAGE WILL ALLOW OUTSIDE
UNCONDITIONED AIR TO INFILTRATE AND MIX WITH
THE CONDITIONED AIR. THIS CONDITION WILL DEGRADE
UNIT PERFORMANCE. ALL UNITS SHOULD BE INSPECTED
FOR THIS CONDITION, AS DURING TRANSPORTATION AND
INSTALLATION THE SEALS CAN BE DISTURBED. IF REQUIRED,
A LIGHT BEAD OF CAULKING IS RECOMMENDED TO SEAL
THE CHASSIS TO THE AIR SEAL TO ELIMINATE LEAKAGE.
Outside unconditioned air must not be introduced into the return
air stream of this unit if the mixed air temperature falls below
55°F in heating mode at design conditions. This condition
may also degrade the performance of the unit and improper
applications could void equipment warranty.
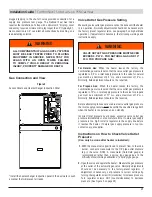
The unit must be installed through an exterior wall with the back
end extending 3/4” past the outside wall surface. Provide support
inside the building for the unit near the return air opening. There
should be enough clearance around the supports to route return
ductwork to the unit or allow for unrestricted airflow in an open
return configuration. To reduce the possible transmission of sound
and vibration, a resilient material such as rubber or cork should be
installed between the support and the base of the unit. All spaces
around the top, sides, and bottom of the exterior grille area should
be caulked and sealed to the wall, making sure that the openings
for drainage in the bottom edge are not blocked.
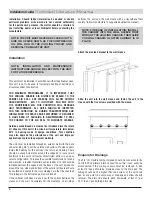
If the optional wall sleeve is used, caulk the spaces between the
sleeve and the wall. Completely fill the clearance on all sides
between the unit and the wall sleeve with a polyurethane foam
sealant (follow manufacturer’s suggested application manual).
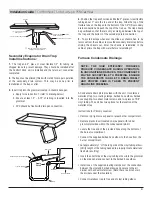
Attach the provided bracket to the wall sleeve
NOTE: FOR EASE OF INSTALLATION, INSTALL
THE CABINET INTO THE WALL SLEEVE FIRST
WITHOUT THE COOLING CHASSIS. THEN SLIDE
COOLING CHASSIS IN AFTER CABINET IS IN
PLACE.
Slide the unit into the wall sleeve and fasten the unit to the
sleeve with the five screws provided with the sleeve.
↓
↓ ↓ ↓ ↓
Evaporator Drainage
The 3/4" I.D. flexible tubing included should be connected to the
Comfort Pack primary drain connection so that it can easily be
disconnected if the cooling chassis must be removed. A trap
at least 2" deep should be provided close to the drain pan. The
tubing should not be higher than the bottom of the unit drain
pan at any point to assure proper drainage and allow chassis
removal. The drain line should pitch downward at least 1" per
10 ft. to an open building drain trap.
Содержание Comfort Pack CP9 T Series
Страница 2: ...2...


