


U S I N G T H E F R O N T P A N E L L C D
110
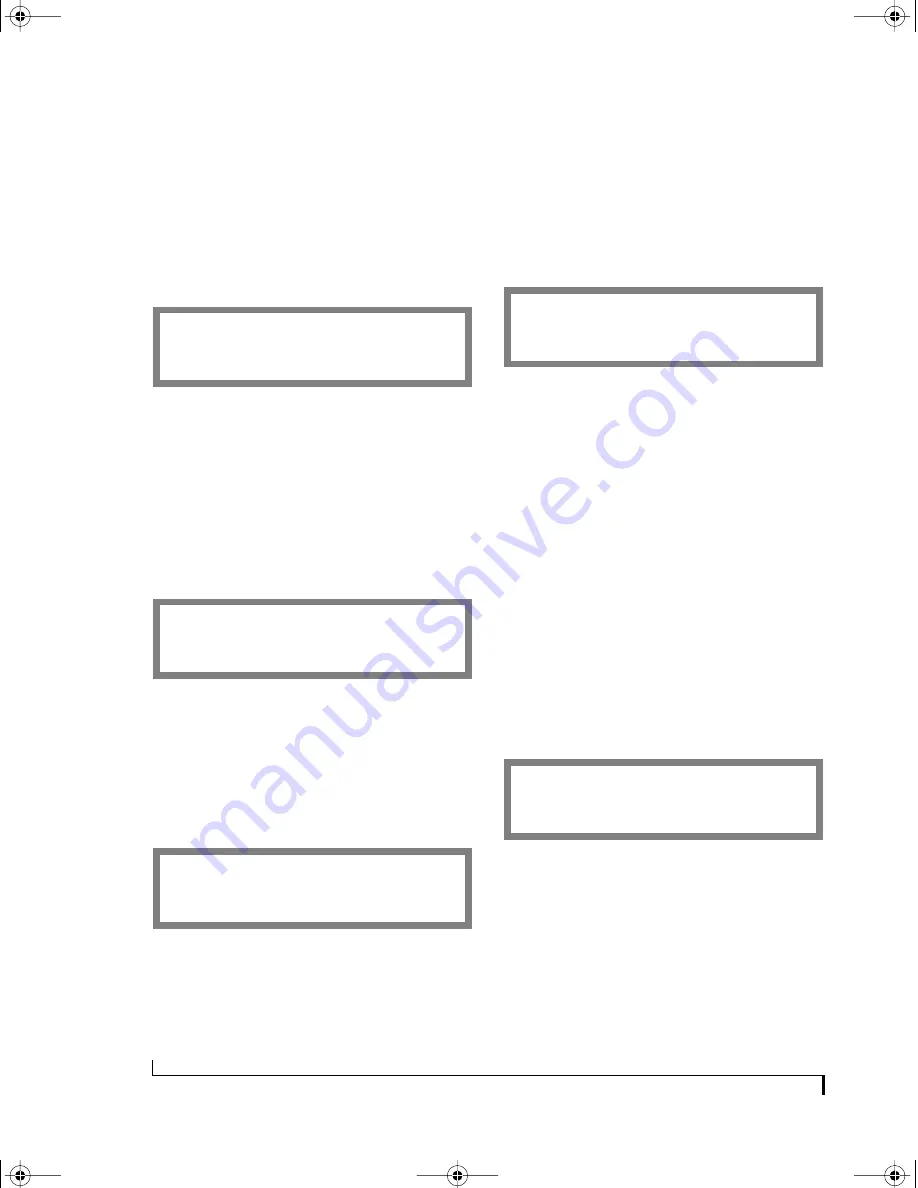
SMPTE Format
Use the VALUE knob to choose the desired frame
rate for striping — or any time the MIDI
Timepiece AV serves as the SMPTE time code
master. If you are working with video, be sure to
choose 29.97 (either drop or non-drop as needed
or desired) instead of 30.
SMPTE Destination
This window determines where the MIDI
Timepiece AV sends MIDI Time Code when it is
converting or generating time code. By default, it
sends time code to the computer only. To send time
code to another cable, use the SELECT knob to
choose the cable and use the VALUE knob to
enable time code (Y) or disable it (N).
Offset/Stripe
Use the CURSOR AND VALUE knobs to set the
start frame for striping. Press the ENTER button to
start striping. Press it again to stop striping. The
start time is expressed in hours, minutes, seconds,
and frames.
Jam SMPTE Frames
Use the VALUE knob to increase or decrease the
number of frames the MIDI Timepiece AV will
“jam sync” or “freewheel” for in order to bypass
drop outs in the time code. Choices are 0, 1, 2, 4, 8,
16, and 32 frames or “I”. Choose “I” for “infinite”
jam sync, which causes the MIDI Timepiece AV to
begin striping on its own when it encounters a drop
out. To stop striping in this case, use the CURSOR
knob to go back to the STRIPE START window and
press ENTER.
Getting a running update of SMPTE in the LCD
While the MIDI Timepiece AV is either converting
or generating SMPTE time code, use the
WINDOW knob to go to the SYNC window. The
SYNC window provides a running update
(hours:minutes:seconds) of the time code.
PROGRAMMING THE PEDAL INPUTS
Use the WINDOW knob to go to the PEDALS
window.
Pedals display
The first pedal window provides a running update
of pedal values, which shows you the current value
of the pedal as you press it. Turn the CURSOR
knob to the right to make the pedal settings
described in the following sections.
Pedal Type
Use the SELECT knob to choose between pedal A
and pedal B. Use the VALUE knob to choose a type
of pedal. You have five choices:
■
Roland expression
■
KORG expression
■
Click-to-MIDI (pedal A only)
S M P T E F O R M A T
D
3 0
E
S M T P E D E S T I N A T O N
D
C A B L E
1 N
E
o f f s e t / s t r i p e < E >
D
+ 0 0 : 0 0 : 0 0 / 0 0
E
J A M S M P T E F R A M E S
D
4
P E D A L S
A - _ 0 B - _ 0
E
!USB Interfaces Manual Book Page 110 Tuesday, October 10, 2000 12:43 PM
Содержание micro express-USB
Страница 1: ...C M Y CM MY CY CMY K...
Страница 6: ...IV USB Interfaces Manual Book Page iv Tuesday October 10 2000 12 43 PM...
Страница 7: ...All Users PartI ForAllUsers USB Interfaces Manual Book Page 5 Tuesday October 10 2000 12 43 PM...
Страница 8: ...All Users USB Interfaces Manual Book Page 6 Tuesday October 10 2000 12 43 PM...
Страница 27: ...XT Micro Users PartII ForXT MicroUsers USB Interfaces Manual Book Page 25 Tuesday October 10 2000 12 43 PM...
Страница 28: ...XT Micro Users USB Interfaces Manual Book Page 26 Tuesday October 10 2000 12 43 PM...
Страница 83: ...MPT AV Users PartIII ForMTPAVUsers USB Interfaces Manual Book Page 81 Tuesday October 10 2000 12 43 PM...
Страница 84: ...MPT AV Users USB Interfaces Manual Book Page 82 Tuesday October 10 2000 12 43 PM...
Страница 132: ...S Y N C H R O N I Z A T I O N W I T H T H E A V 130 USB Interfaces Manual Book Page 130 Tuesday October 10 2000 12 43 PM...
Страница 141: ...Appendices PartIV Appendices USB Interfaces Manual Book Page 139 Tuesday October 10 2000 12 43 PM...
Страница 142: ...Appendices USB Interfaces Manual Book Page 140 Tuesday October 10 2000 12 43 PM...


