


CHAPTER
9
2
Installing Your MOTU Interface
FOR ALL MOTU INTERFACE MODELS
Connecting the power cord. . . . . . . . . . . . . . . . . . .9
Connecting a USB computer . . . . . . . . . . . . . . . . .9
Connecting MIDI gear . . . . . . . . . . . . . . . . . . . . . . .9
MIDI connections worksheet . . . . . . . . . . . . . . . .11
SMPTE Time Code sync connections . . . . . . . . .12
Connecting a pedal or foot switch . . . . . . . . . . . .13
Connecting an audio click source . . . . . . . . . . . .13
Connecting multiple USB interfaces. . . . . . . . . .17
Connecting multiple USB interfaces. . . . . . . . . .17
FOR MIDI TIMEPIECE AV USERS
Connecting ADATs . . . . . . . . . . . . . . . . . . . . . . . . .14
Connecting Video . . . . . . . . . . . . . . . . . . . . . . . . . .14
Connecting Word clock . . . . . . . . . . . . . . . . . . . . .15
Connecting Pro Tools “SuperClock” . . . . . . . . . .15
Connecting an Alesis LRC. . . . . . . . . . . . . . . . . . .15
Connecting a Macintosh . . . . . . . . . . . . . . . . . . . .16
CONNECTING THE POWER CORD
Plug the power cord into your MOTU MIDI
Interface and then plug the other end into a
grounded power outlet. We recommend that you
leave the interface switched off while making cable
connections during installation.
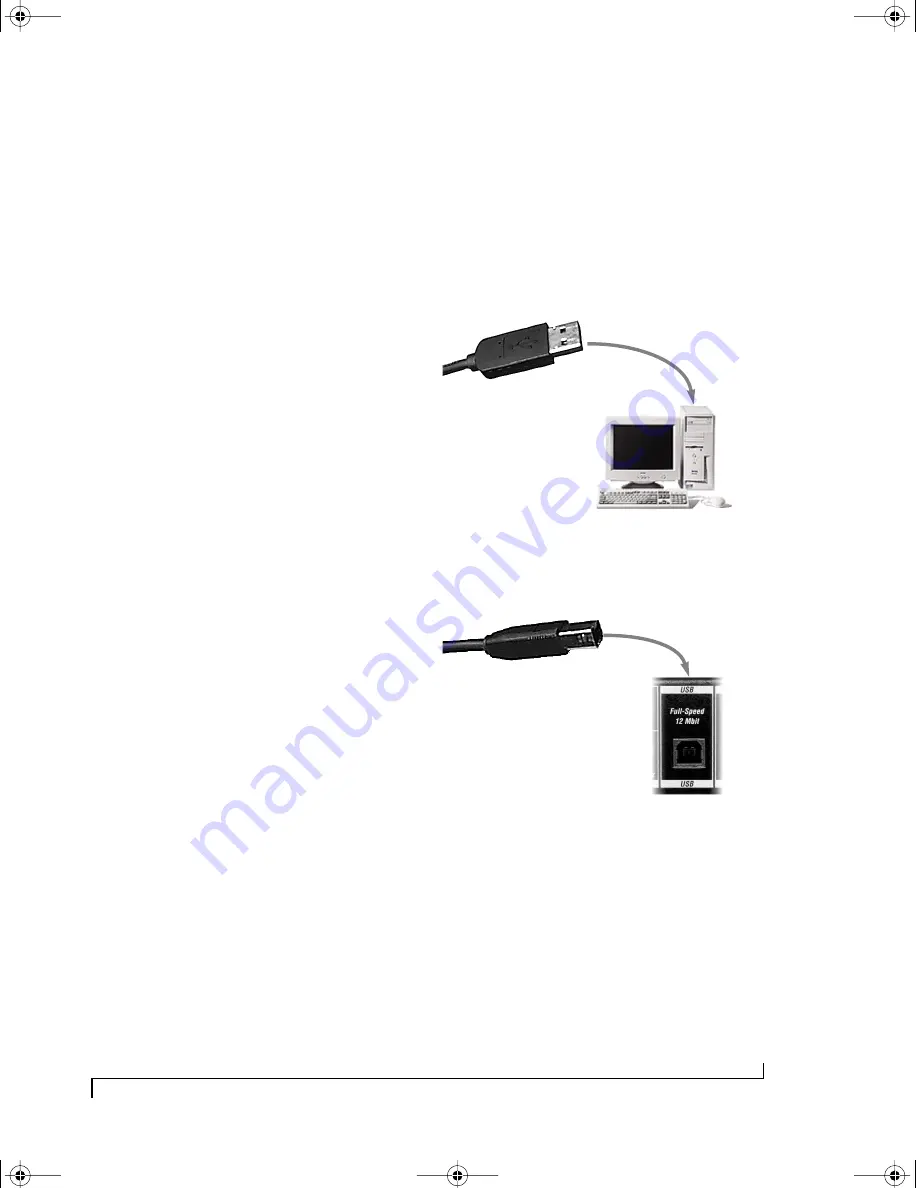
CONNECTING A USB COMPUTER
First, make sure that the interface’s power switch is
turned off. Using the USB cable included with your
MOTU MIDI interface, put the Type A plug into a
Type A USB jack on the computer, a USB hub, or
any other USB device connected to the computer
that has an available Type A USB jack. The USB
cable allows the computer to communicate with all
MIDI devices connected to your MOTU MIDI
interface.
If you have several MOTU interfaces, see chapter 3,
“Installing Multiple Interfaces” (page 17).
Figure 2-1: You can plug the Type A connector into a Type A jack
directly on the computer itself, a USB keyboard connected to the
computer, or any other USB device already connected to the
computer that has an available Type A USB jack.
Figure 2-2: The square Type B plug goes into your MOTU interface.
CONNECTING MIDI GEAR
Connect each MIDI device’s MIDI IN jack to a
MIDI OUT jack on your MOTU MIDI interface as
shown by Connection A below. Conversely,
connect the MIDI OUT jack on the MIDI device to
one of the MIDI IN jacks on your MOTU MIDI
interface as shown by Connection B.
The flat, “Type A” USB plug
connects to the computer.
The square, “Type B” USB plug
connects to the MIDI interface.
!USB Interfaces Manual Book Page 9 Tuesday, October 10, 2000 12:43 PM
Содержание micro express-USB
Страница 1: ...C M Y CM MY CY CMY K...
Страница 6: ...IV USB Interfaces Manual Book Page iv Tuesday October 10 2000 12 43 PM...
Страница 7: ...All Users PartI ForAllUsers USB Interfaces Manual Book Page 5 Tuesday October 10 2000 12 43 PM...
Страница 8: ...All Users USB Interfaces Manual Book Page 6 Tuesday October 10 2000 12 43 PM...
Страница 27: ...XT Micro Users PartII ForXT MicroUsers USB Interfaces Manual Book Page 25 Tuesday October 10 2000 12 43 PM...
Страница 28: ...XT Micro Users USB Interfaces Manual Book Page 26 Tuesday October 10 2000 12 43 PM...
Страница 83: ...MPT AV Users PartIII ForMTPAVUsers USB Interfaces Manual Book Page 81 Tuesday October 10 2000 12 43 PM...
Страница 84: ...MPT AV Users USB Interfaces Manual Book Page 82 Tuesday October 10 2000 12 43 PM...
Страница 132: ...S Y N C H R O N I Z A T I O N W I T H T H E A V 130 USB Interfaces Manual Book Page 130 Tuesday October 10 2000 12 43 PM...
Страница 141: ...Appendices PartIV Appendices USB Interfaces Manual Book Page 139 Tuesday October 10 2000 12 43 PM...
Страница 142: ...Appendices USB Interfaces Manual Book Page 140 Tuesday October 10 2000 12 43 PM...


