background image

1424-EN/LZT103 089 D1 2016-03-04

Mitel DT4x3 Cordless Phones for MiVoice MX-ONE

42

8.1.5 ACCEPT AN INVITATION 

Accept Invitation Received as Incoming Call

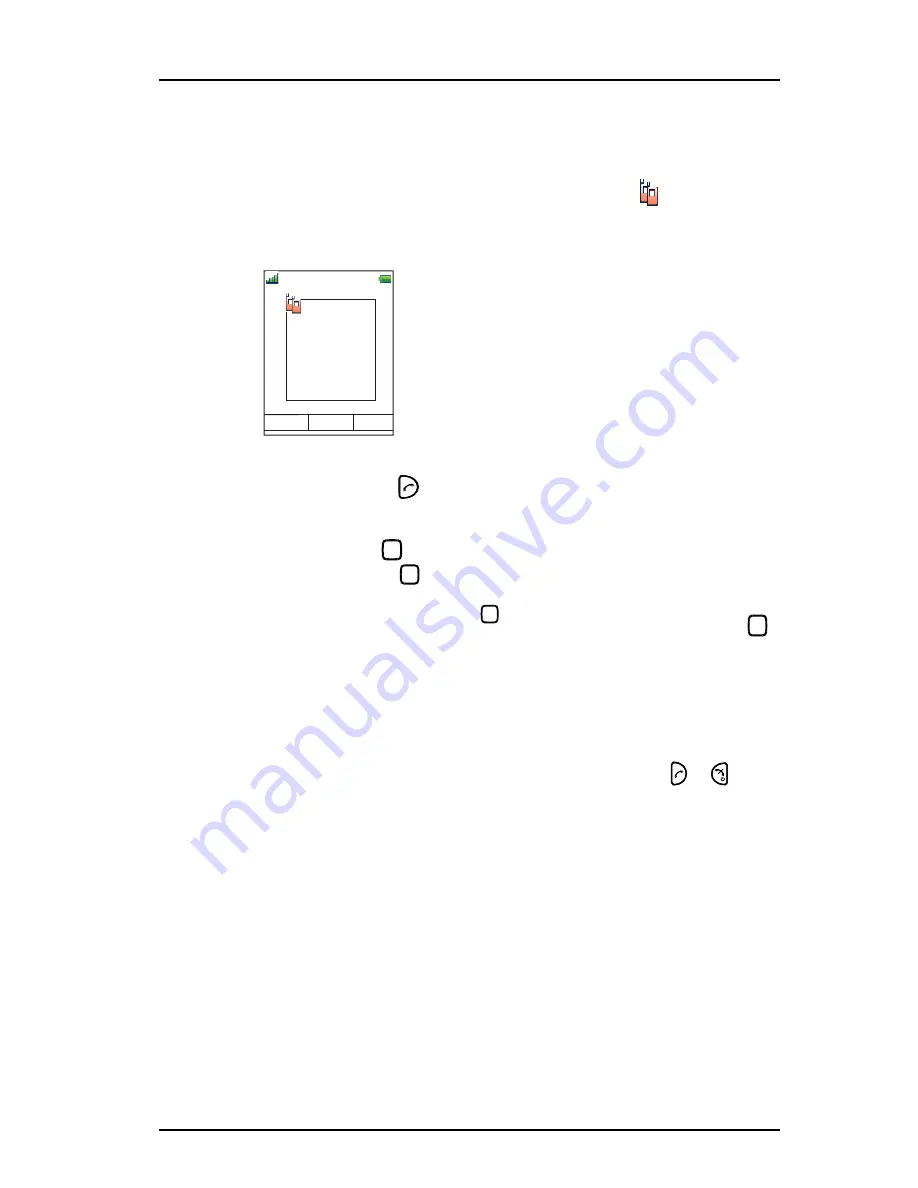
A PTT invitation received as an incoming call is indicated by the 

 icon. In the dialog 

window, a message containing maximum 24 characters can also be shown. See

Figure 

5

Figure 5. Incoming Invitation Received as a Call.

1

Press “Accept”, or 

.

Default the handset will start in inverted mute and loudspeaking mode, but it can 
be configured differently in a PTT group.

2

Press and hold 

 to open the microphone for transmitting. The microphone is 

muted again when 

 is released.

Note:

 Some legacy systems/PBXs require that the handset sends a pre-defined 

DTMF when pressing/releasing 

.

If DTMF is activated, it is not possible to mute the microphone by releasing 


during a call. Instead, select More > Microphone off during the call.

Invitation Received as Incoming Call during an Ongoing Call

If a user receives an invitation during an ongoing call, it will be displayed as an ordinary 
invitation, see 

Figure 5

. The user can either accept or decline the invitation by pressing 

"Accept" or "Decline", respectively. 

Note:

 It is not possible to accept or decline the invitation by pressing 

 or 

respectively.

If the user presses  “Accept”, the ongoing call will be disconnected and the PTT call will 
be connected.

Alternatively, the ongoing call can also be disconnected and the PTT call connected if 
the following is fulfilled:

• The handset is configured to answer invitations automatically
• The user does not respond to the invitation within 10 seconds

If the user declines the invitation, the he/she can re-join the PTT later on, see 

8.1.8 

Re-

join a Group 

on page 43.

12:34

Accept

Decline

009

PTT Group 1

X-ray 

Содержание DT4X3

Страница 1: ...Mitel DT4X3 Cordless Phones for MiVoice MX ONE USER GUIDE ...

Страница 2: ...f this document or new editions of it may be issued to incorporate such changes No part of this document can be reproduced or transmitted in any form or by any means electronic or mechanical for any purpose without written permission from Mitel Networks Corporation TRADEMARKS The trademarks service marks logos and graphics collectively Trademarks appearing on Mitel s Internet sites or in its publi...

Страница 3: ...your telephone is connected to it can be that some of the functions and features described in this user guide are not available There can also be some differences in the way your telephone is programmed Please consult your system administrator if your need further information Some markets use different codes for some features In this user guide the features are described using the most common code...

Страница 4: ...ry pack Disassembly or alteration may result n electrical shock or irreversible damage to the equipment Only a qualified service personnel or an authorized Mitel partner should conduct internal inspections alterations and repairs Do not drop throw or bend your products This may cause malfunction or electric shock Do not paint your product Do not use your product in an area where a potentially expl...

Страница 5: ...tery Never heat or dispose of the battery into a fire which or else may cause leakage burst or fire Remove the carrying case from the product while in charger Do not cover the product while being charged Do not charge the phone in a closed cabinet or drawer The charging of the battery is a chemical process and causes the battery to become warm during charging Make sure the environment in which the...

Страница 6: ...ween furniture and your body when carrying the phone in your pocket or attached to clothing 2 2 EX SAFETY INSTRUCTIONS Intrinsically safe use Non incendive use SPECIAL CONDITIONS OF USE The symbol X placed after the explosion proof marking indicates that during the use of the handset the following special conditions shall be met The handsets may only be used with a lithium ion battery having elect...

Страница 7: ... pack upwards and remove the protection tape Insert the battery pack and fasten it using the provided screws that require the provided special tool Battery pack opener To remove the battery pack use the opener and untighten the screws Remove the battery pack by lifting it upwards To fasten the battery pack use the opener and tighten the screws IMPORTANT Removing the battery pack is NOT permitted i...

Страница 8: ...uency Range The handset is a radio transmitter and receiver When it is on it receives and sends out radio frequency RF energy The handset operates on different frequency ranges depending on market and employs commonly used modulation techniques Chemical Resistance The alpha and numeric characters printed on the exterior of the handset have been tested and found resistant to chipping fading or wear...

Страница 9: ...338 03 Maximum Allowable Concentrations MACs of Pollutants in the Air of Residential Settings SanPin 2 1 8 2 2 4 1190 03 Hygiene requirements on the installation and implementation of terrestrial mobile radio communication systems Modifications Changes or modifications to the equipment not expressly approved by the party responsible for compliance could void the user s authority to operate the equ...

Страница 10: ...andset IPEI and IPDI are the same and either can be used for network subscription If one handset is replaced with another using the Easy replacement procedure the IPDI will be exchanged and IPEI and IPDI will no longer be the same If the IPEI and the IPDI differ the IPDI shall be used for network subscription PBX Private Branch Exchange handset system within an enterprise that switches calls betwe...

Страница 11: ...a with Prefix2 x Acoustic Location Signal ALS 1 x Location Base Station1 x x x Centralized Management2 x x x Push To Talk PTT 1 x x x Downloadable Languages1 x x x Easy replaceable battery x x Easy replacement of handset x x x Clear lists in charger x x x Site Survey tool x x x Bluetooth x x x 1 This function feature requires PDM CPDM3 2 This function feature is system dependent Accessories DT412 ...

Страница 12: ... cover See 13 1 4 Replace the Battery on page 77 The battery is fully charged within four hours See 13 1 2 Charge the Battery on page 76 The non EX classified battery can be charged separately with a battery pack charger See 13 1 3 Charge Spare Batteries on page 77 IMPORTANT When charging the EX classified handset it is only permitted to use a charger marked with DC3 BxxB DC4 BxxB or CR3 BxxC on t...

Страница 13: ...ight and up down in the menu The navigation key can be programmed the is by default a short cut to the Inbox and is a short cut to Call contact See also 8 7 3 Define Navigation Key on page 61 During a call it is possible to increase decrease the volume by pressing and 5 On hook and On Off key Combined button to end a call to return to idle mode and to switch the handset on off by long press 6 Tact...

Страница 14: ...ts 12 Voice mail access1 A quick access to the handset s Voice mail See also 10 1 Voice Mail on page 74 1 This is a system dependent feature 13 Off hook key To answer a call to pre dial a number and as a short cut to the Call list 14 Soft keys The three Soft keys are located just beneath the display and the function of each Soft key is indicated by text in the display just above the keys In idle m...

Страница 15: ...the character The can also be used to display only the digits To add space in the text make a short press on key 0 The first character entered in a message or when adding editing a name in the Contacts menu will be an upper level character followed by lower level characters unless is pressed before entering the character To switch between Abc ABC abc and 123 press A long press on displays special ...

Страница 16: ... Scroll bar 4 is placed to the right of the Active area It becomes visible when a menu screen has more than six menus or if the complete text in a message cannot be displayed on the screen simultaneously The Soft key bar 5 is used for Soft keys which can be used as short cuts for functions in the handset See 3 1 DT4x3 DECT Telephone on page 12 Icons Figure 2 Signal strength icon is visible in the ...

Страница 17: ...ed Read message icon in front of a message shows that this message once has been read Unsent message icon Sent message icon Key lock icon indicates a locked keypad Locked entry icon indicates that the contact can not be edited or deleted by the user Phone lock icon indicates a locked handset Bluetooth icon indicates that Bluetooth is enabled Bluetooth headset icon indicates that a Bluetooth headse...

Страница 18: ...T4x3 Cordless Phones for MiVoice MX ONE 18 Man down icon indicates that the Man down alarm is enabled No movement icon indicates that the No movement alarm is enabled Profile active icon Alarm icon indicates that the handset is a DT423 DT433 ...

Страница 19: ...ins menu short cuts used to customize an own menu The Messaging menu contains all message handling such as reading and writing messages The Calls menu contains call lists call time and call services Call services is configured in the PDM The Connections menu contains Bluetooth connection headset selection System selection and In charger selection The Settings menu contains personal handset setting...

Страница 20: ...n power supply can charge up to six handsets See the Charging Rack s Installation and Operation Manual 3 2 3 BATTERY PACK CHARGER The Battery Pack Charger is used for charging up to six spare batteries IMPORTANT It is not permitted to charge EX classified batteries using the battery pack charger See the battery pack charger s Installation Guide 3 2 4 CLIPS Tip It is possible to use the handset wit...

Страница 21: ... Switch off the Handset Prerequisite The handset is in idle mode Tip While in a menu press to return to idle mode 1 Press and hold 2 A Switch off dialog window is displayed Confirm by pressing Yes 4 2 TURN THE AUDIBLE SIGNAL ON OFF Prerequisite The handset is in idle mode Tip While in a menu press to return to idle mode A long press on or changes between ring signal on off The icon indicates a sil...

Страница 22: ...he volume buttons and the mute button during the call If the DT423 DT433 is used it is also possible to use the alarm button 4 4 LOCK UNLOCK THE HANDSET The handset can be protected for unauthorized use If this function is activated a PIN code has to be entered for example to switch on the handset to answer an incoming call etc The default phone lock code 0000 can be changed to any 4 8 digit perso...

Страница 23: ... Sep 09 Total call time 03 47 06 Last call 00 00 07 7891 01 30 7827 03 35 7682 05 26 7845 20 Oct 09 Call list Call time Absence Deactivate Lunch Meeting Internal External Call More Call More Edit number Save number Send message Delete Delete all Divert calls No reply When busy Back Back Time of call Edit number Save number Send message Delete Delete all Time of call Visible if defined in the PDM P...

Страница 24: ...l list Ring signal Name Work number Mobile number Other number Search by name Search by number Last result Search From contact list Search From contact list View contact Add to contacts Send message Delete contact Search From contact list Call More Back System dependent Answering behaviour Name Volume Ring signal Message alert Vibrating alert Key sound Automatic Loudspeaker Meeting example Silent ...

Страница 25: ...e all More Close Visible if the number consists of minimum 3 digits Inbox Message List Message List Enter text Write new message Message List Delete Call no in text Save number Forward More Close Enter text Unsent More Back View Delete Delete all More Back View Send Delete Delete all Clear Back More Back Edit Enter number My service example Phone call Send data Send message Add new Enter name Back...

Страница 26: ...l phonebook Message inbox Send message Enter number Change profile Profile A example Open a menu Call absence Services Edit alarm data Name Function Value Control question Main menu Calls Connections Contacts Messaging Services Profiles Settings Absence Call services Activate alarm This is a system dependent feature Visible if defined in PDM or CPDM3 Only for DT423 DT433 Long press Multi press On ...

Страница 27: ...y Time Date Answering Owner ID Answering behaviour Volume Message alert Key sound Brightness Screen saver Date format Automatically Loudspeaking Messages Text Size Any key Answering key Internal call Callback PTT External call On Off On if silent Click Silent Tone hh mm am pm hh mm dd month yy month dd yyyy yyyy mm dd mm dd yyyy dd mm yyyy dd mm yyyy dd mm yyyy Contrast Information Black Normal Po...

Страница 28: ...from a locked handset it is only possible to access the Microphone on off function in the In Call menu However the entire In call menu is accessible when calling the emergency number from a handset with locked keypad Contacts2 Microphone on off Audio transfer1 1 Visible if a Bluetooth headset is connected New call2 2 Visible if enabled defined in handset via PDM CPDM3 Call Phonebook access Cancel ...

Страница 29: ...red in the local phonebook 6 1 1 ANSWER A CALL When the signal sounds press to answer the call or press to answer the call in loudspeaking mode1 The name number of the calling party is displayed if calling line information is available Tip When a headset is connected to the handset the headset button can be used to answer the call In addition it is possible to configure the headset button with a s...

Страница 30: ...ation key2 Hot key1 Soft key1 or a headset button3 can be programmed with a number Press the pre programmed key button to dial the number The call will automatically be connected 6 2 4 DIAL A NUMBER FROM THE CALL LIST Tip It is also possible to dial a number from the Call list by pressing selecting a number in the list and then press Call or 1 Open the menu by pressing the Menu soft key 2 Select 3...

Страница 31: ...al and company phonebook appears in the same list but the company names are indicated by a icon in front of the name Select contact from list or search name number by entering characters and select search 4 Press the soft key Call or to make the call 6 2 9 DIAL A NAME FROM THE CENTRAL PHONEBOOK 1 Open the menu by pressing the Menu soft key 2 Select 3 Select Central phonebook 4 Select Search by nam...

Страница 32: ...on off function by pressing the soft key More However the entire In Call menu is accessible when calling from a handset with locked keypad 6 3 1 ADJUST THE VOLUME DURING A CALL Press to increase the volume and to decrease the volume The handset will now store and keep the new volume level It is also possible to use the and on the navigation key to adjust the volume 6 3 2 OPEN CONTACTS DURING THE C...

Страница 33: ...tomatically call back when the busy extension is free If you order call back when there is no answer you will be called back when the extension has been used the next time 1 Press More 2 Select Callback 3 Press Select Note If Callback is not programmed and does not appear when you press More you can press 6 to initiate callback France New Zealand and Sweden Press 5 4 Press and wait until the hands...

Страница 34: ...during conversation see 6 3 5 Start a New Call during Conversation on page 33 1 Press More during the call 2 Select Switch 3 Press Select to switch to the other call The first call is on hold If needed repeat the steps above to switch between the calls 6 3 9 END A CALL Prerequisite a new call has been started during conversation see 6 3 5 Start a New Call during Conversation on page 33 1 Press Mor...

Страница 35: ...nt members of the conference call Note If Conference does not appear when you press More you can also do the following to establish a conference Press R dial the number to include and press 3 6 3 13 CALL WAITING During an ongoing conversation and a short tone for another incoming call appears do as follows 1 Press More 2 Select Call waiting 4 3 Press Select The new call is now connected and the fi...

Страница 36: ...est alarm see 7 1 1 Test Alarm and multiple press is defined for personal alarm see 7 1 2 Personal Alarm 7 1 1 TEST ALARM Press and hold the push button until a dialog window Test Alarm default is displayed Depending on set parameters a beep is heard the orange LED flashes twice the vibrator stirs the handset receives a notification that the alarm has been received by the system This is a system d...

Страница 37: ... before the alarm is sent To prevent the alarm from being sent and silencing the warning tone do one of the following Press any key button The alarm will be reset Put the handset in a charger The alarm will be temporarily disabled indicated by that the corresponding alarm icon is hidden The alarm will be enabled when removing it from the charger If no key button is pressed during the warning tone ...

Страница 38: ... turning the ALS off The password is the same as the phone lock password ALS is configurable for Man down No movement alarm and Push button alarm See the handset s Configuration Manual for more information 7 6 AUTOMATIC CALL AFTER ALARM A handset can be setup to call a pre defined number after an alarm has been sent It is also possible to dial the number without sending an alarm by pressing a push...

Страница 39: ...ll list 4 Step with the and to select number in the list 5 Press Call or to dial View the Time of a Call 1 Enter the menu by pressing the Menu soft key 2 Select in the menu 3 Select Call list 4 Step with the and to select number in the list 5 Press More 6 Select Time of call The time and date is displayed Tip The duration of the last call is displayed under Call time see 8 1 3 Call Time on page 41...

Страница 40: ...y pressing the Menu soft key 2 Select in the menu 3 Select Call list 4 Step with the and to select number in the list 5 Press More 6 Select entry to delete 7 Select Delete 8 Select Yes to delete the entry from the list Delete all Entries from the Call list 1 Enter the menu by pressing the Menu soft key 2 Select in the menu 3 Select Call list 4 Step with the and to select number in the list 5 Press...

Страница 41: ...TO TALK GROUP CALL The push to talk PTT function can be described as a group conference call to a predefined group of members If one of the group members wants to get in contact with the others he she simply presses and holds to open the microphone Note Some legacy systems PBXs require that the handset sends a pre defined DTMF tone when pressing releasing See the handset s Configuration Manual for...

Страница 42: ...e to mute the microphone by releasing during a call Instead select More Microphone off during the call Invitation Received as Incoming Call during an Ongoing Call If a user receives an invitation during an ongoing call it will be displayed as an ordinary invitation see Figure 5 The user can either accept or decline the invitation by pressing Accept or Decline respectively Note It is not possible t...

Страница 43: ...the PTT group can be dialed from the Call list or Missed calls respectively The PTT invitation is indicated by the icon in the list See 8 1 1 Call List on page 39 or 8 1 2 Missed Calls on page 40 8 2 OPTIONAL CALL HANDLING SERVICES These functions are system dependent and may not be available in your telephony system Besides the default Call services functions it is possible to define 10 extra sys...

Страница 44: ...Select Call services 4 Select Absence 13 5 Select Deactivate 6 Press Select Note Following procedure can be used to cancel Absence Press 23 and Press and U S 24 8 2 2 ORDER ABSENCE FOR ANOTHER EXTENSION If you are authorized you can also enter Absence information for another extension from your own extension 1 Press 230 Dial Extension number and Press 2 Enter the Absence code 0 9 3 Press and enter...

Страница 45: ...zed to use an common authorization code 1 7 digits you can change temporarily any phone used within the exchange to the authority level connected to this code You can use the code for one call only or you can open the phone for some calls and lock it when leaving the phone For a single call 1 Press 72 Germany The Netherlands and Sweden Press 75 U S and Canada Press 6 2 Enter Authorization code and...

Страница 46: ...cation tone 3 Dial the digits to get an external line and the external number To open the phone 1 Press 76 2 Enter Authorization code and press and 3 Press to finish the procedure To assign your own authority level to another phone 1 Press 75 Germany The Netherlands and Sweden Press 72 2 Enter Authorization code and Press 3 Dial your own extension number and Press and Wait for a verification tone ...

Страница 47: ...r own external number Press Wait for the dial tone 5 Dial external number 8 2 7 DIVERT INTERNAL EXTERNAL CALLS All calls to your extension can be diverted to an internal or external extension of your choice 1 Enter the menu by pressing the Menu soft key 2 Select in the menu 3 Select Call services 4 Select Divert calls 10 5 Select Internal or External 6 Select Activate 7 Enter number to divert to o...

Страница 48: ...iversion 1 Press 21 2 Press and wait for the call timer to start in the display 3 Press Diversion on No answer Press 211 2 Press and wait for the call timer to start in the display 3 Press Follow the steps below to terminate Diversion on no answer 1 Press 211 2 Press and wait for the call timer to start in the display 3 Press Diversion on Busy Press 212 2 Press and wait for the call timer to start...

Страница 49: ...g calls Order External Follow me 1 Press 22 U S and Canada 23 2 Dial digit or digits to get a line and enter the external number 3 Press and Wait for the call timer to start in the display 4 Press to finish the procedure Cancel External Follow me 1 Press 22 U S and Canada 23 2 Press Wait for the call timer t start in the display 3 Press to finish the procedure 8 2 10 FREE SEATING The free seating ...

Страница 50: ...Press to answer Common Bell Group Calls are signalled on a common bell To answer 1 Press 8 Finland and Sweden Press 0 U S and Canada Press 59 2 Press to answer Group Hunting As a member of a group of extensions that is called by a common number you can temporarily leave the group To leave the group 1 Press 21 U K 2 2 Dial own extension number Press and press Wait for the call timer to start in the...

Страница 51: ...on any of the phones The feature requires all the phones involved to be defined in parallel ringing list which must be configured and initiated by the system administrator To disable the parallel ringing temporarily 1 Press 21 U K 2 2 Dial extension number and press and press Wait for the call timer to start in the display 3 Press to finish the procedure Restoring the Parallel ringing do the follo...

Страница 52: ...cated by a icon which means that they are not editable It is also possible to access a central phonebook11 see 6 2 9 Dial a Name from the Central Phonebook on page 31 or 8 3 5 Central Phonebook on page 54 8 3 1 CALL CONTACT 1 Enter the menu by pressing Menu 2 Select in the menu 3 Select Call contact 4 Select contact from the list or enter name or number in the Search field 5 Press Call or It is al...

Страница 53: ...Enter name see 3 1 2 Alphanumeric Keys on page 15 10 Press OK 11 Press Save Different ring signals can be set to distinguish this contact from another contact by selecting Ring signal 8 3 3 EDIT CONTACT Note It is not possible to edit a company phonebook contact The contacts are indicated by a icon in front of the name 1 Enter the menu by pressing Menu 2 Select in the menu 3 Select Edit contact 4 ...

Страница 54: ...e 5 Enter First name and or Last name 6 Press Search The search result will be displayed Search by Number 1 Enter the menu by pressing Menu 2 Select in the menu 3 Select Central phonebook 4 Select Search by number 5 Enter number 6 Press Search The search result is displayed View Last Search Result 1 Enter the menu by pressing Menu 2 Select in the menu 3 Select Central phonebook 4 Select Last resul...

Страница 55: ...in the menu 3 Select profile from list When a profile is activated the icon an the name of the profile are displayed in idle mode Delete Profile 1 Enter the menu by pressing Menu 2 Select in the menu 3 Select profile from list 4 Press More 5 Select Delete from menu 6 Press Select 7 Press Yes to confirm Edit Profile 1 Enter the menu by pressing Menu 2 Select in the menu 3 Select the profile to edit...

Страница 56: ...he inbox Time and date information is included in the message Tip New messages and information about incoming calls can be displayed upside down This can be useful if you wear the handset in a belt and want to read the message call information without rotating the handset When pressing any key the messages will be displayed in the normal way See the handset s Configuration Manual for more informat...

Страница 57: ... 9 Press Send 10 Enter number or press to access contacts in the local phonebook and the company phonebook 11 Press Send to forward the message Call Sender 1 Enter the menu by pressing Menu 2 Select in the menu 3 Select Inbox to view the message list 4 Select a message by using the and on the navigation key 5 Press View 6 Press More 7 Select Call Sender Call Number in Text NOTE Only possible if th...

Страница 58: ... be saved in the contact list 8 5 2 WRITE NEW MESSAGES 1 Enter the menu by pressing Menu 2 Select in the menu 3 Select Write new message 4 Enter text See 3 1 2 Alphanumeric Keys on page 15 5 Press Send It is possible to save the message and send it later by pressing the soft key Back and select Yes The message will be stored under Unsent messages See 8 5 3 Unsent Messages 6 Enter number or press t...

Страница 59: ...enu 3 Select Sent to view the list 4 Select message in the list 5 Press View 6 Enter additional text if needed 7 Enter number or press to access contacts in the local phonebook and the company phonebook 8 Select Send Delete Message 1 Enter the menu by pressing Menu 2 Select in the menu 3 Select Sent to view the list 4 Select message in the list 5 Press View 6 Select Delete 7 Select Yes to delete t...

Страница 60: ...licable for some of the functions 7 Press Back 8 6 2 EDIT SERVICES 1 Enter the menu by pressing Menu 2 Select in the menu 3 Mark a service using the and on the navigation key 4 Press More 5 Select Edit 6 Edit the service parameters 7 Press Back 8 6 3 DELETE SERVICES 1 Enter the menu by pressing Menu 2 Select in the menu 3 Mark a service using the and on the navigation key 4 Press More 5 Select Del...

Страница 61: ...Select 0 2 to 9 5 Select Function 6 Select function from list and press Back 7 Select Value only for some of the functions and press Select Enter a value for example a number Press Back 8 Select Control question and press Select It is off by default If the control question is enabled a Proceed dialog window is displayed when pressing the defined Hot key Press Yes to proceed 9 Press Save 8 7 3 DEFI...

Страница 62: ...rent ring signals Note Additional ring signals might be selectable if them are configured via WinPDM CPDM3 See the handset s Configuration Manual for more information 6 Press Back Set Alert for Messages 1 Enter the menu by pressing Menu 2 Select in the menu 3 Select Sound Alerts 4 Select Message alert 5 Select the wanted message alert from the list By pressing Play it is possible to listen to the ...

Страница 63: ...T4x3 Cordless Phones for MiVoice MX ONE 63 1 Enter the menu by pressing Menu 2 Select in the menu 3 Select Sound Alerts 4 Select Vibrator alert 5 Select On On if silent that is the vibrator is on when the handset is muted or Off 6 Press Back ...

Страница 64: ...ect in the menu 3 Select Locks 4 Select Automatic key lock 5 Select On for activation of automatic key lock Deactivate the Automatic Key lock 1 Enter the menu by pressing Menu 2 Select in the menu 3 Select Locks 4 Select Automatic key lock 5 Select Off for deactivation of automatic key lock Activate the Phone Lock The handset can be protected for unauthorized use If this function is activated a PI...

Страница 65: ...e is forgotten it can be removed by your distributor Change PIN Code 1 Enter the menu by pressing Menu 2 Select in the menu 3 Select Locks 4 Select Phone lock 5 Select Change PIN code 6 Enter the old PIN code 7 Press OK 8 Enter the new PIN code 9 Press OK and enter the new PIN code again 10 Press Save 8 8 3 DISPLAY SETTINGS Screen Saver 1 Enter the menu by pressing Menu 2 Select in the menu 3 Sele...

Страница 66: ... decrease the contrast 6 Press Back 8 8 4 TIME DATE SETTINGS The time and date are received from the DECT system If the time and date are changed in the system it takes up to 24 hours before the changes appear in the handset If the handset is turned off and then turned on the changes will be applied immediately However it is possible to change the format of the time and date Set Time Format 1 Ente...

Страница 67: ...ossible to set the answering behaviour to any key If Any key is selected any key except and can be used to answer a call Answering Key The answering key is by default set to Hook off 1 Enter the menu by pressing Menu 2 Select in the menu 3 Select Answering 4 Select Answering key 5 Select Hook off or Any key 6 Press Back to save the settings Answering Behaviour 1 Enter the menu by pressing Menu 2 S...

Страница 68: ...ID The Owner ID is set to identify the handset 1 Enter the menu by pressing Menu 2 Select in the menu 3 Select Owner ID 4 Enter name identity See 3 1 2 Alphanumeric Keys on page 15 5 Press Save 8 8 9 ALARM SETTINGS Tip It is recommended to configure a short cut to this menu if it is frequently used see 8 7 Short Cuts on page 60 Activate alarm Note This menu is applicable for DT423 DT433 only 1 Ent...

Страница 69: ...rted Disable Bluetooth Connection 1 Enter the menu by pressing Menu 2 Select in the menu 3 Select Bluetooth 4 Select Disable Note When disabling Bluetooth on an intrinsically safe handset it will be restarted Pair Connect Bluetooth Headset In order to use a Bluetooth headset it must first be paired with the handset It is only needed to pair the Bluetooth headset once A paired Bluetooth headset wil...

Страница 70: ...dset with microphone on a boom The headset type can be changed in the menu by doing as follows 1 Enter the menu by pressing Menu 2 Select in the menu 3 Select Headset 4 Select the corresponding headset type from list that is Mic on boom or Hearing protection Additional headsets15 might be visible in the list 5 Press Select Tip It is possible to configure the headset button with a specific function...

Страница 71: ...lay Management Layout setting See the handset s Configuration Manual 7 Press Next 8 Enter PARK code max 31 digits The PARK code may not be needed if there is no alien DECT system within the coverage area 9 Enter AC code The AC code length must be between 4 8 digits 10 Press Next 11 An information text Protection on is displayed Select Yes if the new system is to be protected It is not possible to ...

Страница 72: ... Back is selected 8 9 4 IN CHARGER ACTION WHEN IN CALL It is possible to determine actions to be performed when a handset is placed in charger during a call 1 Enter the menu by pressing Menu 2 Select in the menu 3 Select In charger 4 Select Call behavior 5 Select one of the following No action no action will be performed when handset is placed in charger during a call Loudspeaking The loudspeaker ...

Страница 73: ...d profile By default only the profile Normal is selectable but additional profiles will be visible if they are configured See 8 4 Profiles on page 54 9 ADVANCED FUNCTIONS 9 1 ADMIN MENU The handset has a hidden menu for system administrators See the handset s Configuration Manual The Admin menu contains Software hardware IPEI IPDI and user ID DECT information Centralized Management showing online ...

Страница 74: ... displayed press Call to dial the voice mail If Close is selected it is possible to dial the voice mail by a long press in idle mode or from the Inbox menu Information is stored in the Messaging inbox until all voice mail messages have been listened to See 10 1 2 Check the Voice Mail inbox 10 1 2 CHECK THE VOICE MAIL INBOX 1 Enter the menu by pressing Menu 2 Select in the menu 3 Select Inbox The v...

Страница 75: ...ming the Service see 8 6 Services on page 60 11 OPERATION NOTICE 11 1 ACCESSIBILITY AND VOICE QUALITY The base network is not always available If you do not get in contact with your system contact your system administrator For best voice quality avoid positioning near computer radio or similar equipment Operating Area You can only use the handset in the area that is covered by your system Outside ...

Страница 76: ...lenced by pressing or 13 1 2 CHARGE THE BATTERY Place the handset in the desktop charger or in the rack charger The battery is being charged when the LED on the handset is steady orange When the battery is fully charged the LED will be green An animated battery icon is also shown in the display indicating charging by starting with its current charge and ending with the full charge A filled battery...

Страница 77: ...d to the handset in such a way that no miss contact is possible Note Use the battery pack opener to untight the screws on the intrinsically safe handset Figure 7 Replaceable battery Unlock the lid untighten the screws and remove the battery according to the illustration 13 2EASY REPLACEMENT OF HANDSET Easy replacement can be used if a handset needs to be replaced due to for example a broken displa...

Страница 78: ... on the handset can be used to follow the replacement procedure Before and after easy replacement the LEDs may have different LED indications For more details see LED Indications during Easy Replacement on page 79 IMPORTANT Never remove a handset from the charger until the instructions in the display or the LED tells you to do so see status on the LED if the display is broken If there is an error ...

Страница 79: ...andset cannot communicate with the charger put the new handset in the charger to restore its settings that is the handset s IPDI If this step is not performed the new handset must be sent for service The old handset s settings might be transfered to the new handset by using PDM See the handset s Configuration Manual 6 7 When the text Please insert new phone in charger is displayed replace the old ...

Страница 80: ...H THE HINGE TYPE CLIP Attach the hinge type belt clip as described in Figure 8 Figure 8 Screw the hinge type clip into position 13 4ATTACH THE SWIVEL TYPE CLIP Attach the swivel type belt clip as described in Figure 9 Figure 9 Screw the swivel type clip into position Figure 6 Figure 7 012 013 ...

Страница 81: ... Figure 10 Screw the cover into position 14 TROUBLESHOOTING This section contains information on how to solve common operational problems and warnings you may receive Go through the following lists if you encounter any problems If this checklist does not solve the problem contact your system administrator If others have similar problems there may be a system error Figure 8 014 ...

Страница 82: ...m administrator No System The handset beeps once a minute during max 30 minutes with a low tone followed by a high tone if enabled the vibrator also follows the beeps The handset is out of coverage or handset is defective Stop the beep with the Sound off key and go into range Note When re entering the coverage area it can take a couple of minutes before the handset automatically has registered int...

Страница 83: ...own in English Enter PIN code The handset s lock is activated Enter the required PIN code If PIN code lost enter new via PDM or do a factory reset via PDM Battery low charge now The battery level is low Charge or replace the battery Phonebook is not available at the moment The phonebook does not respond not available at the moment Try again later or if fault persists do a factory reset via admin m...

Страница 84: ... a call Play ring signal in the Bluetooth headset Answer and connect sound to the Bluetooth headset when answering with the headset s button End call with the Bluetooth headset s button Transfer audio to from Bluetooth headset during call using the menu in the handset Increase decrease the volume in the Bluetooth headset with the volume buttons on the handset A 2 Icon See 3 1 3 Icons and Text in t...

Страница 85: ...ct Headset 8 Select Add new An information text Put headset in Pairing mode is displayed 9 Press OK It will now search for a Bluetooth headset for connection 10 When headset is found press Pair 11 If needed enter PIN code see user manual for the Bluetooth headset Press OK The dialog Successful pairing appears if the pairing process was successful The Bluetooth headset will also be connected indica...

Страница 86: ...set and press Call or When Transfer call to phone is displayed press No or ignore the message to use the Bluetooth Headset Press Yes to use the handset A 5 2 Answer a Call A ring signal sounds in both the selected Bluetooth headset and the handset to signal an incoming call To answer the call in the Bluetooth headset press the button19 on the headset To answer the call in the handset press on the ...

Страница 87: ...eration Notice A 11 1 Accessibility and Voice quality Bluetooth uses the frequency of 2 45 GHz WLAN microwave oven and other devices that use the same frequency can disturb the use of a Bluetooth headset A 11 2 Operation Area Maximum distance between the headset and the handset is 10 metres The communication distance between the handset and headset may vary considerably due to the environment and ...

Страница 88: ...l for details Connecting fails Failed to connect headset Headset is not turned on Turn on headset Headset is out of range Move headset closer to handset Link key in headset has been deleted Repeat pairing procedure Headset is already connected to another handset Disconnect headset from the other handset Too close to disturbing devices Disturbing devices can be WLAN equipment microwave etc Headset ...

Страница 89: ... only for SIP AS Standard Alternatives Alternation on Inquiry N A Sweden R Conference 3 Intrusion 4 France New Zealand Sweden 8 Call Waiting Indication 5 France New Zealand 6 Sweden 4 Call Back 6 France New Zealand Sweden 5 Common Parking or Individual Call Pick up 8 France New Zealand 4 Sweden 6 Feature Codes and shall be added before and after the codes as applicable General Deactivation 001 U S...

Страница 90: ...tion Per Call 42 By pass of Diversion 60 U S and Canada 1 Account Code Predialing 61 Finland Norway 71 Authorization Code Predialing 72 Germany The Netherlands Sweden 75 U S and Canada 6 Authorization Code Lock Unlock Common code 73 U S and Canada 71 Authorization Code Change Individual code 74 Authorization Code Dial With Individual code 75 Germany The Netherlands Sweden 72 Authorization Code Loc...

Отзывы: