2AR
3-3-49
Caution:
• After replacing the drum, run maintenance items U110 “Checking/clearing the
drum count” and U111 “Checking/clearing the drum drive time.”
• When fitting the drum, orient it correctly so that the gear is positioned at the
machine rear.
• After replacing the drum, run maintenance item U101 and set the DB DATA value
to the figure corresponding to the letter indicating the drum rank (A, B or C) printed
on the drum flange (see page 3-2-44).
Drum
Machine rear
Machine front
Gear
12348
A9422
Drum flange
Drum rank
Figure 3-3-53
• When detaching and refitting the drum separation claw assemblies, take care not
to lose the M3 retainer (P/N 33302080).
Fitting the drum
<Procedure>
1. Remove the one screw from each of the drum separation claw assemblies and then
the assemblies from the cleaning lower seal assembly.
2. Refit the cleaning lower seal assembly using the two screws.
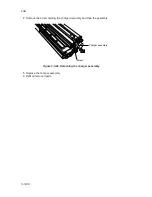
3. Fit the drum.
4. Insert the drum shaft into the drum by turning in the forward direction only.
• Never allow the drum to turn in the reverse direction when the drum shaft is
inserted.
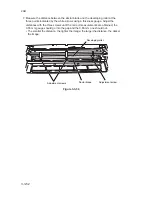
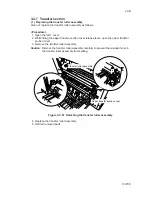
5. Refit the transfer right guide using the two screws.
6. Refit the separation claw assemblies using one screw for each.
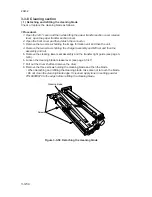
7. After replacing the drum, secure the cleaning blade release lever so that the
cleaning blade makes contact with the drum.
2AR-1
Содержание PointSource Ai 3010
Страница 1: ...3010 S M MCA SERVICE MANUAL Published in Apr 00 2AR70765 Revision 5 PointSource Ai 3010 R...
Страница 2: ...Service Manual PointSource Ai 3010...
Страница 13: ...3010 S M MCA THEORY AND CONSTRUCTION SECTION I I Theory and Construction Section...
Страница 14: ...2AR CONTENTS 1 1 Specifications 1 1 1 Specifications 1 1 1...
Страница 18: ...2AR CONTENTS 1 2 Handling Precautions 1 2 1 Drum 1 2 1 1 2 2 Developer and toner 1 2 1...
Страница 61: ...3010 S M MCA ELECTRICAL SECTION II II Electrical Section...
Страница 62: ...2AR CONTENTS 2 1 Electrical Parts Layout 2 1 1 Electrical parts layout 2 1 1 1 Copier 2 1 1...
Страница 92: ...3010 S M MCA III Set Up and Adjustment Section III SET UP AND ADJUSTMENT SECTION...
Страница 108: ...3 1 15 2AR This page has been left blank intentionally 2AR 5...
Страница 136: ...3 2 11 2AR 1 This page is intentionally left blank...
Страница 191: ...3 2 62 2AR 1 This page is intentionally left blank...
Страница 196: ...3 2 61 2AR 1 This page is intentionally left blank...
Страница 255: ...3 2 38 2AR 1 This page is intentionally left blank...
Страница 384: ...2AR 1 3 6 15 This page is intentionally left blank...
Страница 398: ...3 6 27 2AR 1 3 Main PCB CN9 CN5 CN2 CN3 CN4 IC11 IC12 CN1 CN8 CN10 CN11 CN6 CN7...
Страница 431: ...2AR General connection diagram 3 7 43 General wiring diagram 3 7 44 2AR 1...


