4-40
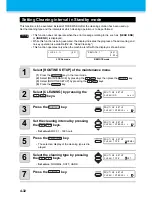
How to shake the ink cartridge
To prevent ink from leaking when you shake the cartridge, wear gloves and firmly cover the A part of the
upper surface of the cartridge and the B part of the bottom surface of the cartridge with paper towels. Then,
shake it more than twenty times right and left so that ink flows inside the cartridge.
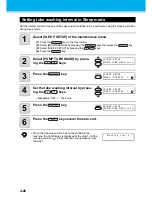
Set the interval to display the warning message
Depending on the ambient temperature, set the interval to display the warning preventing color material settling.
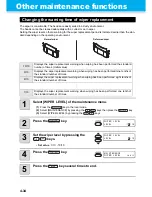
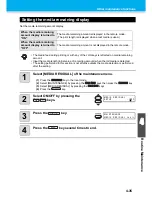
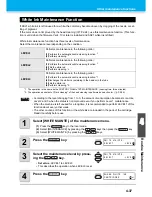
1
Select [ROUTINE SETUP] of the maintenance menu.
(1)
Press the
key in LOCAL.
(2)
Press
to select [MAINTENANCE] and press the
key.
(3)
Press
to select [ROUTINE SETUP].
(4)
Press the
key.
2
Press the
key to select [Sub-
INK WARNING].
• If you shake it too strong, the pack inside may be damaged and it may cause ink leakage.
Therefore, perform this carefully.
• If the remaining amount of ink is less, ink in the cartridge cannot be beaten enough. Tilt the
cartridge until it becomes vertical.
• If you shake the ink cartridge too strong, it may damage the inside pack and it may cause
ink leakage. Be careful about it.
• When the cartridge is new, shake it before taking it out of bag.
• When the cartridge is in-use, be sure to wear the gloves, press waste close to the inserted
side and shake it.
• If the remaining amount of ink is less, tilt it until it becomes vertical, as you cannot shake it
enough in some cases.
• When you use MBIS, do not shake the eco case and the intermediate cartridge.
• Do not insert and pull out the intermediate cartridge as much as possible. It may cause ink
leakage.
• When you use sublimation transfer ink Sb52 or Sb53, the display interval of the message is
set to 72 hours in the initial condition.
• When you use sublimation transfer ink Sb51 or Sb60, this function is disabled (OFF) in the
initial condition.
A part
(the place to stick a
needle)
B part
(the slot on the
bottom)
Cover with paper towel firmly and shake ink slowly
Repeat
this
A part
ROU T I N E S E T U P
S u b - I N K WA RN I NG < e n t >
Содержание JV33-130
Страница 1: ...MIMAKI ENGINEERING CO LTD URL http www mimaki co jp D201694 16 ...
Страница 7: ...vi ...
Страница 99: ...3 35 Machine settings 3 Convenient use Examples of Output ...
Страница 101: ...3 37 Machine settings 3 Convenient use 7 Press the key 8 Press the key several times to end ...
Страница 114: ...3 50 ...
Страница 147: ...Setting Routine operations 4 33 4 Routine Maintenance 8 Press the key several times to end ...
Страница 162: ...Replacing the cutter blade 4 48 4 Close the front cover 5 Press the key The machine returns to LOCAL mode ...
Страница 181: ...Warning labels 6 7 6 Appendix No Reorder Label 1 M901549 2 M903239 3 M903330 4 M903405 5 M904810 ...
Страница 185: ...6 11 Function Flowchart 6 Appendix To P 6 12 To P 6 18 To P 6 24 To P 6 25 To P 6 26 ...
Страница 189: ...6 15 Function Flowchart 6 Appendix OFF LEVEL 1 3 1 Wh i t e L a y P r t SE L OF F ...
Страница 201: ...D201694 16 31012012 ...
Страница 202: ...NH FW 5 3 MIMAKI ENGINEERING CO LTD 2012 ...

