158
-
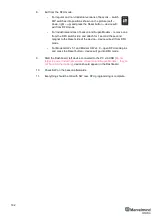
Wait until beacon update finishes
-
Repeat for all your beacons
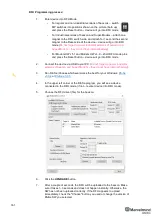
SW update via DFU Programming
Not applicable
to “Outdoor” versions of originally non-outdoor versions
Usually, SW update happen using regular USB or Radio SW update. But in case when
you didn’t update your system for a long time (and get a big SW version gap), or you
faced with some unexpectable troubles
– please do the DFU Programming SW update.
This chapter describes DFU update for different types of devices.
Pros:
Ultimatum SW update
– erases all glitches, settings and etc. Makes it possible to
revive beacon if “everything goes bad”
Cons:
More complicated than a regular SW update, clears all settings
–
Save map file
not to lose your map
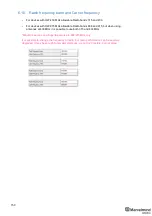
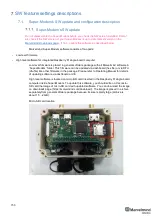
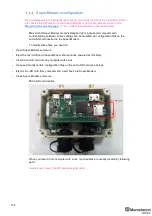
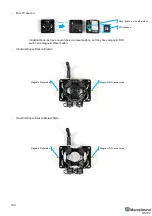
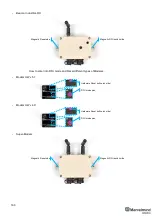
To make a DFU Programming, you need to know where hardware reset button and DIP
switches placed.
Reset button and DIP switch placement for non-industrial beacons:
-
Super-Beacon:
-
HW v4.9 Beacon:
-
Mini-RX beacon:
Reset button
DIP switches
DIP switches
R
e
s
e
t
Reset button (on side)
DIP switches
Disassemble
Carefully
Reset button
Содержание Mini-RX
Страница 1: ...Marvelmind Indoor Navigation System Operating manual v2020_12_14 www marvelmind com ...
Страница 16: ...16 HW v4 9 beacon with Mini TX size comparison Beacon Industrial RX Beacon Industrial Super ...
Страница 30: ...30 Figure 6 Two external microphone connection ...
Страница 34: ...34 Figure 9 One external microphone soldering Figure 10 Two external microphones soldering ...
Страница 36: ...36 Figure 13 Two external microphones final view Figure 14 Two external microphones final view ...
Страница 60: ...60 Help video https www youtube com watch v NHUnCtJIYXc ...
Страница 69: ...69 The system is now fully operational ...
Страница 97: ...97 The system is now fully operational ...
Страница 106: ...106 The system is now fully operational ...
Страница 115: ...115 The system is now fully operational ...
Страница 136: ...136 Advanced settings TBD Enabling will allow direction along with location TBD TBD TBD ...
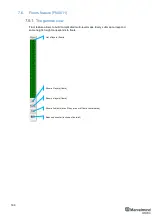
Страница 171: ...171 Floor 5 is enabled Floor 4 is enabled ...
Страница 175: ...175 Z X ...
Страница 190: ...190 Choose color and press OK Color applied Now background matches floorplan ...
Страница 192: ...192 Choose any color which suits you and press OK Now the hedgehog and its tracking path will be colored ...
Страница 196: ...196 7 18 IMU axis positioning Super Beacon IMU axis positions HW v4 9 IMU axis positions ...
Страница 197: ...197 Mini TX IMU axis positions Mini RX beacon IMU axis positions ...
Страница 201: ...201 Real time player turned on ...
Страница 204: ...204 8 1 Super beacon external interface pinout top view ...
Страница 205: ...205 8 2 Beacon HW v4 9 external interface 4x4 pinout top view ...
Страница 206: ...206 8 3 Modem HW v4 9 external interface pinout top view ...
Страница 225: ...225 How to change modes Choose hedge Go to Ultrasound TDMA mode Left mouse button click to change ...
Страница 240: ...240 Right mouse button on it Set movement path Shift Left mouse click to add point ...
Страница 241: ...241 Shift Left mouse click on point to remove that point Click on Upload path to send it to robot Path loaded ...
Страница 250: ...250 Contacts For additional support please send your questions to info marvelmind com ...


