75
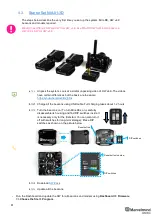
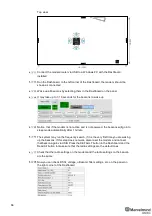
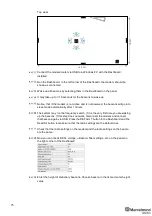
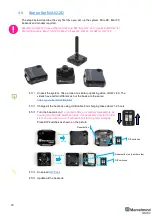
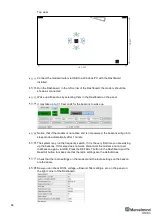
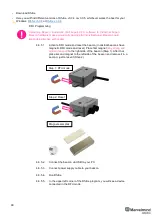
Top view:
Connect the modem/router via USB to a Windows PC with the Dashboard
installed
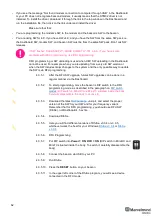
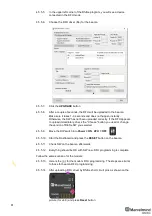
Run the Dashboard. In the left corner of the Dashboard, the modem should be
shown as connected
Wake up all beacons by selecting them in the Dashboard on the panel
It may take up to 7-10 seconds for the beacons to wake up
Notice, that if the modem is not active and is not powered, the beacons will go into
sleep mode automatically after 1 minute
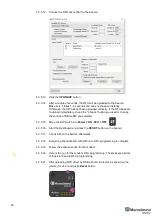
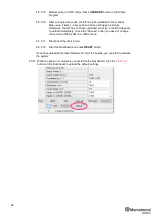
The system may run the frequency search, if it is the very first time you are waking
up the beacons. If this step does not work, disconnect the modem and connect
that beacon again via USB. Press the DEFAULT button in the Dashboard and the
Read All button to make sure that the radio settings are the default ones
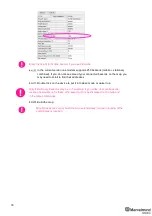
Check that the radio settings on the modem and the radio settings on the beacon
are the same
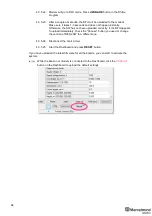
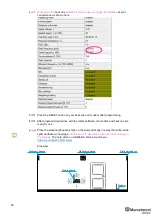
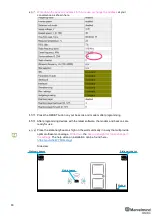
Now you can check RSSI, voltage, ultrasonic filter settings, etc. on the panel on
the right corner of the Dashboard
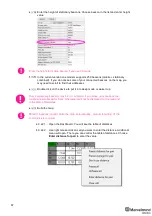
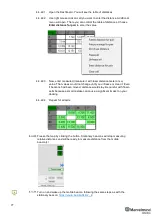
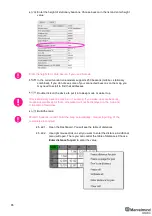
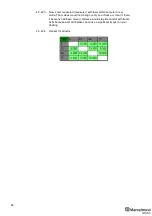
Enter the height of stationary beacons. Choose beacon in the list and enter height
value
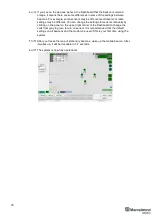
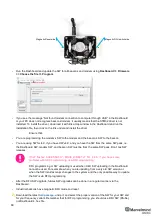
≈
6-10m
≈
4
-6m
Содержание Mini-RX
Страница 1: ...Marvelmind Indoor Navigation System Operating manual v2020_12_14 www marvelmind com ...
Страница 16: ...16 HW v4 9 beacon with Mini TX size comparison Beacon Industrial RX Beacon Industrial Super ...
Страница 30: ...30 Figure 6 Two external microphone connection ...
Страница 34: ...34 Figure 9 One external microphone soldering Figure 10 Two external microphones soldering ...
Страница 36: ...36 Figure 13 Two external microphones final view Figure 14 Two external microphones final view ...
Страница 60: ...60 Help video https www youtube com watch v NHUnCtJIYXc ...
Страница 69: ...69 The system is now fully operational ...
Страница 97: ...97 The system is now fully operational ...
Страница 106: ...106 The system is now fully operational ...
Страница 115: ...115 The system is now fully operational ...
Страница 136: ...136 Advanced settings TBD Enabling will allow direction along with location TBD TBD TBD ...
Страница 171: ...171 Floor 5 is enabled Floor 4 is enabled ...
Страница 175: ...175 Z X ...
Страница 190: ...190 Choose color and press OK Color applied Now background matches floorplan ...
Страница 192: ...192 Choose any color which suits you and press OK Now the hedgehog and its tracking path will be colored ...
Страница 196: ...196 7 18 IMU axis positioning Super Beacon IMU axis positions HW v4 9 IMU axis positions ...
Страница 197: ...197 Mini TX IMU axis positions Mini RX beacon IMU axis positions ...
Страница 201: ...201 Real time player turned on ...
Страница 204: ...204 8 1 Super beacon external interface pinout top view ...
Страница 205: ...205 8 2 Beacon HW v4 9 external interface 4x4 pinout top view ...
Страница 206: ...206 8 3 Modem HW v4 9 external interface pinout top view ...
Страница 225: ...225 How to change modes Choose hedge Go to Ultrasound TDMA mode Left mouse button click to change ...
Страница 240: ...240 Right mouse button on it Set movement path Shift Left mouse click to add point ...
Страница 241: ...241 Shift Left mouse click on point to remove that point Click on Upload path to send it to robot Path loaded ...
Страница 250: ...250 Contacts For additional support please send your questions to info marvelmind com ...

