


Chapter 4 Configuring the Basic System
PNNI System-Wide Configuration
4-48
255-700-025
PacketStar
™
Access Concentrator 60 User Guide
, Issue 1
Release 6.3.0
6
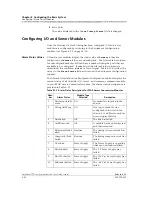
Select the
Create Node Entry
command and press Enter.
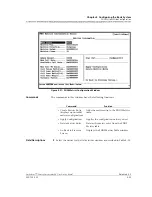
The Node entry is created and the Node Id field is displayed the node
identifier of your AC 60 system.
7
Select the
Bring Node Into Service
command and press Enter.
The
OperStatus
display field indicates that the node is up.
Note:
You must bring the node into service to enable PNNI support on
your AC 60 system. The ATM PNNI interface cannot be brought
into service until a PNNI node is created and in service. If you
need to take the node out of service, you must first delete any
ATM PNNI interfaces you have configured on your AC 60 system.
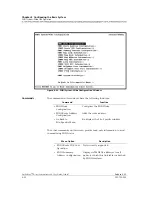
8
Select the
Go Back to Previous Screen
command and press Enter.
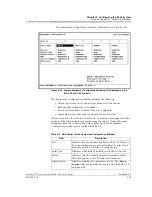
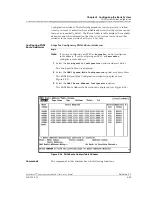
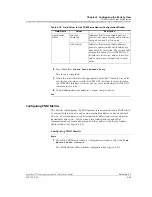
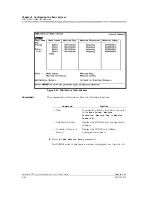
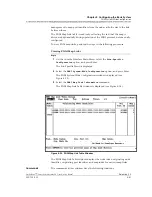
The PNNI Node Table Screen (see Figure 4-26) is displayed, showing
your current node index, node level, and operating status. Use this
screen to check a node’s status whenever you create, delete, or bring a
node into service.
9
Press
Ct r l+G
to go back to the Console Interface Main Menu window.
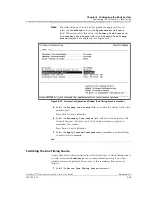
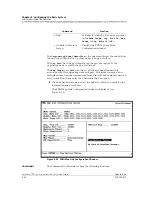
10
Select the
Equipment Configuration
option and press Enter.
The Equipment Configuration window is displayed.
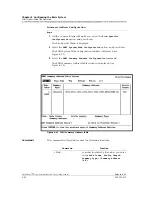
11
Select an I/O module that supports the ATM PNNI 1.0 interface type.
The Port and Channel Configuration window is displayed.
12
In the
Interface Type
field, select
AtmPnni1-0
.
The ATM PNNI 1.0 Interface Configuration window is displayed.
13
Configure the fields for this interface as described in the appropriate
PacketStar™ Module User Guide
.
14
Select the
Apply Configuration command and press Enter.
15
Select the
Bring Interface Into Service command and press
Enter.
16
Type
Ct rl +G
to return to the Console Interface Main Menu window.
End
The PNNI node you just configured has been brought into service. At this
time, you can select a route address using the PNNI System-Wide
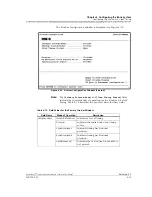
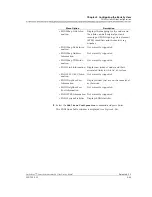
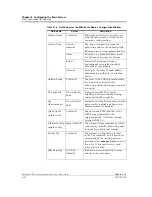
[Admin Status]
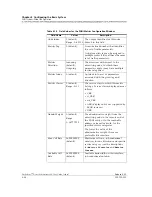
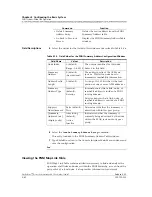
(display only)
Up, Down
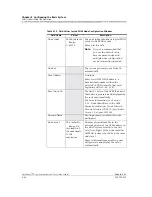
The administrative status for this node.
[Oper Status]
(display only)
Up, Down
The operational status for this node.
Table 4-13. Field Values for the PNNI Node Configuration Window
Field Name
Values
Description
Содержание PacketStar AC 60
Страница 38: ...Chapter 1 Getting Started 1 14 255 700 025 PacketStar Access Concentrator 60 User Guide Issue 1 Release 6 3 0 ...
Страница 128: ...Chapter 3 System Features 3 80 255 700 025 PacketStar Access Concentrator 60 User Guide Issue 1 Release 6 3 0 ...
Страница 404: ......
Страница 406: ......
Страница 408: ......
Страница 409: ......


