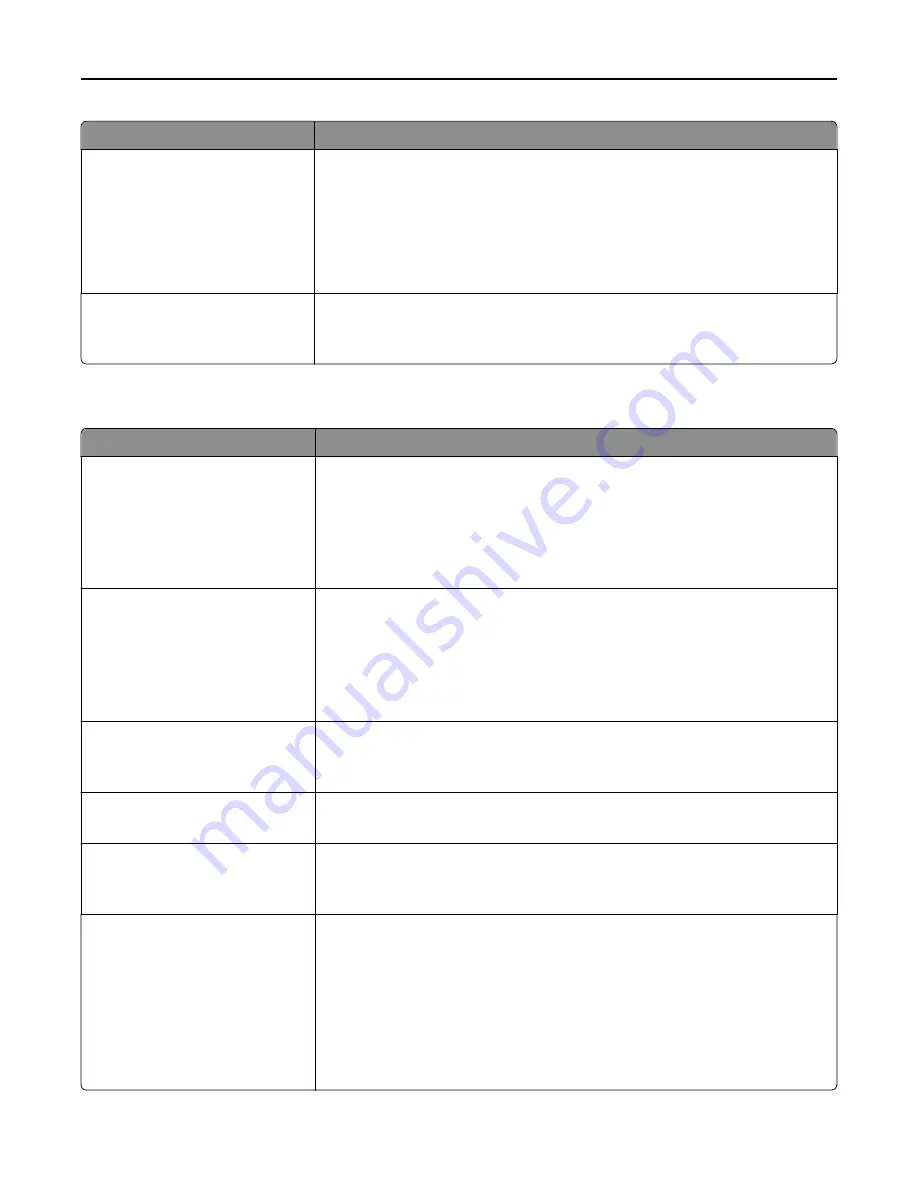
Use
To
Use Multi
‑
Page TIFF
On
Off
Provide a choice between single
‑
page TIFF files and multiple
‑
page TIFF files. For a
multiple-page scan
‑
to
‑
fax job, either one TIFF file is created containing all the pages,
or multiple TIFF files are created with one file for each page of the scan job.
Notes:
•
On is the factory default setting.
•
This menu item applies to all scan functions.
Enable Analog Receive
Off
On
Enable receiving of analog faxes.
Note:
Off is the factory default setting.
E
‑
mail Settings menu
Use
To
E
‑
mail Server Setup
Subject
Message
File Name
Specify e
‑
mail server information.
Notes:
•
You can type up to 255 characters in the Subject field.
•
You can type up to 512 characters in the Message field.
•
You can type up to 53 characters in the File Name field.
E
‑
mail Server Setup
Send me a copy
Never appears
On by default
Off by default
Always On
Send a copy of the e-mail to the sender.
Note:
“Never appears” is the factory default setting.
E
‑
mail Server Setup
Max E
‑
mail size
0–65535 KB
Specify the maximum e-mail size in kilobytes (KB).
Note:
E-mails above the specified size are not sent.
E
‑
mail Server Setup
Size Error Message
Send a message when an e-mail is greater than the configured size limit.
Note:
You can type up to 1024 characters.
E
‑
mail Server Setup
Limit destinations
Specify a domain name, such as a company domain name, and then limit e
‑
destinations only to that domain name.
Note:
You can specify only one domain.
E
‑
mail Server Setup
Web Link Setup
Server
Login
Password
Path
File Name
Web Link
Define the e
‑
mail server path name, for example:
/directory/path
.
Notes:
•
The characters
* : ? < > |
are invalid entries for a path name.
•
You can type up to 128 characters for Server, Login, Password, Path, and Web
Link.
•
You can type up to 53 characters for File Name.
Understanding printer menus
169
Содержание CX410 series
Страница 1: ...CX410 Series User s Guide July 2012 www lexmark com Machine type s 7527 Model s 415 436 ...
Страница 28: ...1 2 1 Memory card connector 2 Option card connector 5 Reattach the cover 1 2 Additional printer setup 28 ...
Страница 215: ...3 Open the top door 4 Remove the right side cover Maintaining the printer 215 ...
Страница 245: ...2 Open the top door Clearing jams 245 ...


