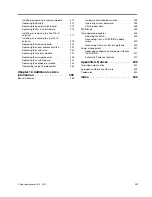
For machine types: 10B4, 10B5, 10B6, 10B7,
10HL, and 10HM . . . . . . . . . . . . . .
76
Locating connectors, controls, and indicators
on the front of your computer . . . . . . .
76
Locating connectors on the rear of your
computer . . . . . . . . . . . . . . .
77
Locating major FRUs and CRUs . . . . . .
78
Looking up FRU information . . . . . . .
80
Locating parts on the system board
. . . .
80
Locating internal drives . . . . . . . . .
82
For machine types: 10AX, 10AY, 10DK, 10DL,
10DM, and 10DN. . . . . . . . . . . . . .
83
Locating connectors, controls, and indicators
on the front of your computer . . . . . . .
83
Locating connectors on the rear of your
computer . . . . . . . . . . . . . . .
84
Locating major FRUs and CRUs . . . . . .
85
Looking up FRU information . . . . . . .
87
Locating parts on the system board
. . . .
87
Chapter 9. Replacing FRUs (machine
types: 10B0, 10B1, 10B2, 10B3, 10HJ,
and 10HK) . . . . . . . . . . . . . . .
89
Handling static-sensitive devices . . . . . . .
89
Installing or replacing hardware . . . . . . . .
89
Installing external options
. . . . . . . .
89
Removing the computer cover. . . . . . .
90
Removing and reinstalling the front bezel . .
90
Installing or replacing a memory module . . .
92
Installing or replacing a PCI Express card . .
94
Replacing the battery . . . . . . . . . .
97
Installing or replacing the optical drive
. . .
98
Replacing the slim card reader
. . . . . .
100
Replacing the heat sink and fan assembly . .
103
Replacing the power supply assembly
. . .
104
Replacing the microprocessor . . . . . . .
106
Replacing the system board
. . . . . . .
108
Installing the solid-state drive . . . . . . .
110
Replacing the primary hard disk drive . . . .
111
Replacing the rear fan assembly . . . . . .
113
Replacing the front audio and USB
assembly . . . . . . . . . . . . . . .
115
Replacing the thermal sensor . . . . . . .
116
Replacing the cover presence switch . . . .
118
Replacing the Wi-Fi units . . . . . . . . .
120
Installing or removing the rear Wi-Fi
antenna
. . . . . . . . . . . . . . .
127
Installing or removing the front Wi-Fi
antenna
. . . . . . . . . . . . . . .
128
Replacing the keyboard . . . . . . . . .
130
Replacing the mouse . . . . . . . . . .
131
Completing the parts replacement . . . . .
131
Chapter 10. Replacing FRUs (machine
types: 10B4, 10B5, 10B6, 10B7, 10HL,
and 10HM) . . . . . . . . . . . . . .
135
Handling static-sensitive devices . . . . . . .
135
Installing or replacing hardware . . . . . . . .
135
Installing external options
. . . . . . . .
135
Removing the computer cover. . . . . . .
136
Removing and reinstalling the front bezel . .
136
Accessing the system board components and
drives . . . . . . . . . . . . . . . .
137
Installing or replacing a PCI Express card . .
139
Installing or replacing a memory module . . .
141
Replacing the battery . . . . . . . . . .
143
Replacing the hard disk drive . . . . . . .
144
Replacing the solid-state drive
. . . . . .
146
Installing or replacing the optical drive
. . .
151
Replacing the slim card reader
. . . . . .
154
Replacing the heat sink and fan assembly . .
157
Replacing the power supply assembly
. . .
159
Replacing the microprocessor . . . . . . .
163
Replacing the system board
. . . . . . .
165
Replacing the front fan assembly
. . . . .
167
Replacing the front audio and USB
assembly . . . . . . . . . . . . . . .
169
Replacing the thermal sensor . . . . . . .
170
Replacing the Wi-Fi units . . . . . . . . .
172
Installing or removing the rear Wi-Fi
antenna
. . . . . . . . . . . . . . .
178
Installing or removing the front Wi-Fi
antenna
. . . . . . . . . . . . . . .
180
Replacing the keyboard . . . . . . . . .
182
Replacing the mouse . . . . . . . . . .
183
Completing the parts replacement . . . . .
183
Chapter 11. Replacing FRUs
(machine types: 10AX, 10AY, 10DK,
10DL, 10DM, and 10DN). . . . . . .
185
Handling static-sensitive devices . . . . . . .
185
Installing or replacing hardware . . . . . . . .
185
Installing external options
. . . . . . . .
185
Installing or removing the ac power adapter . .
186
Installing or removing the vertical stand . . .
187
Installing or removing the VESA mount
bracket . . . . . . . . . . . . . . . .
189
Installing or removing the ac power adapter
bracket . . . . . . . . . . . . . . . .
191
Replacing the optical drive . . . . . . . .
193
Replacing the secondary hard disk drive. . .
198
Installing or removing the I/O box . . . . .
204
Removing the computer cover. . . . . . .
207
Installing or removing the hard disk drive
assembly . . . . . . . . . . . . . . .
209
ii
ThinkCentre M73 Hardware Maintenance Manual
Содержание ThinkCentre M73 10B0
Страница 6: ...iv ThinkCentre M73 Hardware Maintenance Manual ...
Страница 8: ...2 ThinkCentre M73 Hardware Maintenance Manual ...
Страница 15: ...Chapter 2 Safety information 9 ...
Страница 19: ...Chapter 2 Safety information 13 ...
Страница 20: ...1 2 14 ThinkCentre M73 Hardware Maintenance Manual ...
Страница 21: ...1 2 Chapter 2 Safety information 15 ...
Страница 26: ...1 2 20 ThinkCentre M73 Hardware Maintenance Manual ...
Страница 27: ...1 2 Chapter 2 Safety information 21 ...
Страница 30: ...24 ThinkCentre M73 Hardware Maintenance Manual ...
Страница 34: ...28 ThinkCentre M73 Hardware Maintenance Manual ...
Страница 62: ...56 ThinkCentre M73 Hardware Maintenance Manual ...
Страница 74: ...68 ThinkCentre M73 Hardware Maintenance Manual ...
Страница 92: ...86 ThinkCentre M73 Hardware Maintenance Manual ...
Страница 140: ...134 ThinkCentre M73 Hardware Maintenance Manual ...
Страница 244: ...238 ThinkCentre M73 Hardware Maintenance Manual ...
Страница 248: ...242 ThinkCentre M73 Hardware Maintenance Manual ...
Страница 254: ...248 ThinkCentre M73 Hardware Maintenance Manual ...
Страница 255: ......
Страница 256: ......

