a.
Place the tip of the tool in the recess on the top of the retaining clip.
b.
Carefully rotate the retaining clip away from the memory module slot.
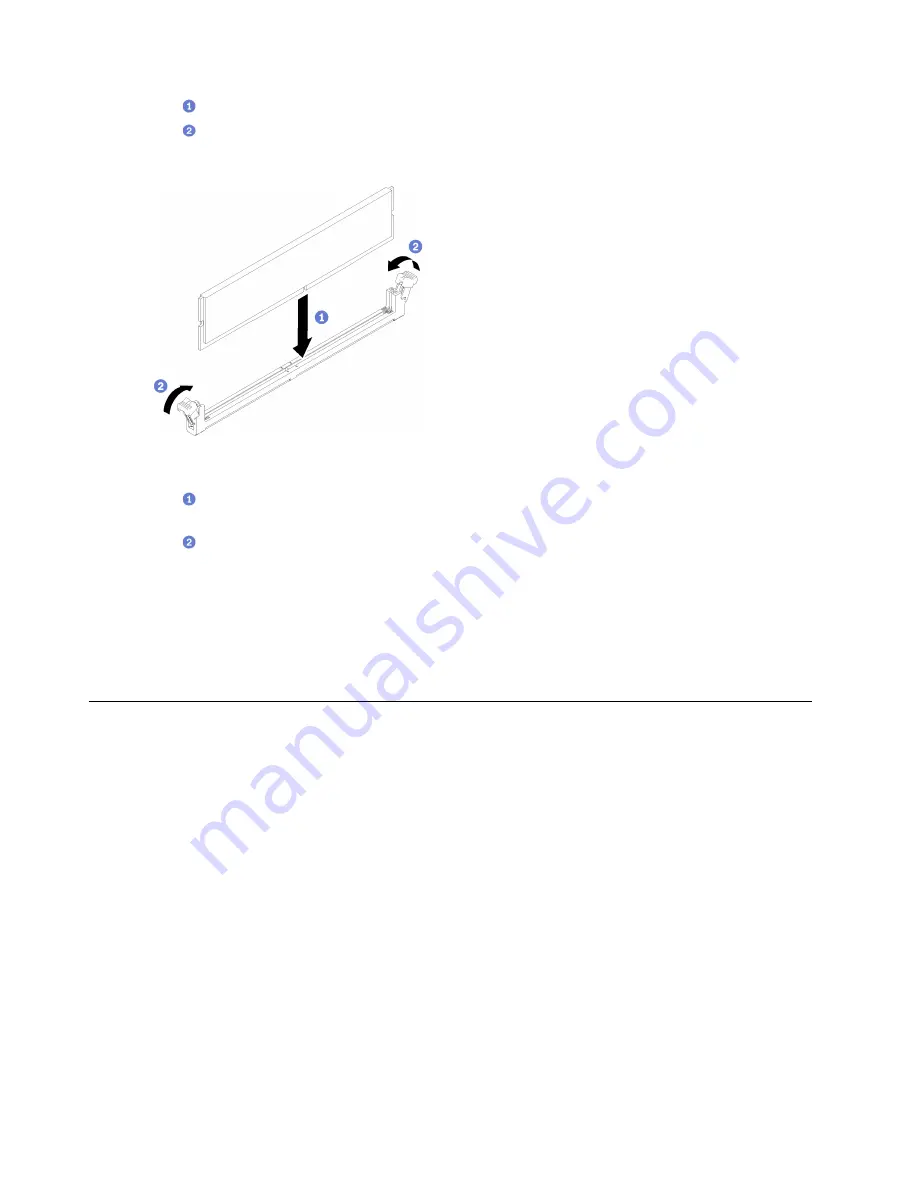
Step 3. Install the memory module.
Figure 82. Memory module installation
a.
Make sure they are in the fully-open position. Align the keys on the memory module with the
connector.
b.
Firmly press both ends of the memory module straight down into the connector until the
retaining clips snap into the locked position.
After you finish
1. Reinstall the air baffle if it is removed. See
“Install the air baffle” on page 64
2. Install the top cover. See
“Install the top cover” on page 134
3. Complete the parts replacement. See
“Complete the parts replacement” on page 140
PCIe adapter replacement
Use the following information to remove and install a PCIe adapter.
Remove a PCIe adapter (Riser)
Use this information to remove a PCIe adapter from the riser.
About this task
Attention:
• Replacing the adapter might impact your RAID configurations. Back up your data before the replacement
to avoid any data loss due to a RAID configuration change.
• Read the following section(s) to ensure that you work safely.
–
–
“Installation Guidelines” on page 51
• Power off the server and peripheral devices and disconnect the power cords and all external cables. See
“Power off the server” on page 11
.
• If the server is installed in a rack, remove the server from the rack.
94
ThinkSystem SR250 V2 Maintenance Manual
Содержание 7D7Q
Страница 1: ...ThinkSystem SR250 V2 Maintenance Manual Machine Types 7D7Q and 7D7R ...
Страница 8: ...vi ThinkSystem SR250 V2 Maintenance Manual ...
Страница 20: ...12 ThinkSystem SR250 V2 Maintenance Manual ...
Страница 35: ...2 5 inch drive model Figure 26 Server components 2 5 inch drive model Chapter 2 Server components 27 ...
Страница 42: ...34 ThinkSystem SR250 V2 Maintenance Manual ...
Страница 176: ...168 ThinkSystem SR250 V2 Maintenance Manual ...
Страница 180: ...172 ThinkSystem SR250 V2 Maintenance Manual ...
Страница 183: ......
Страница 184: ......


