


Chapter 17 Troubleshooting
17-80
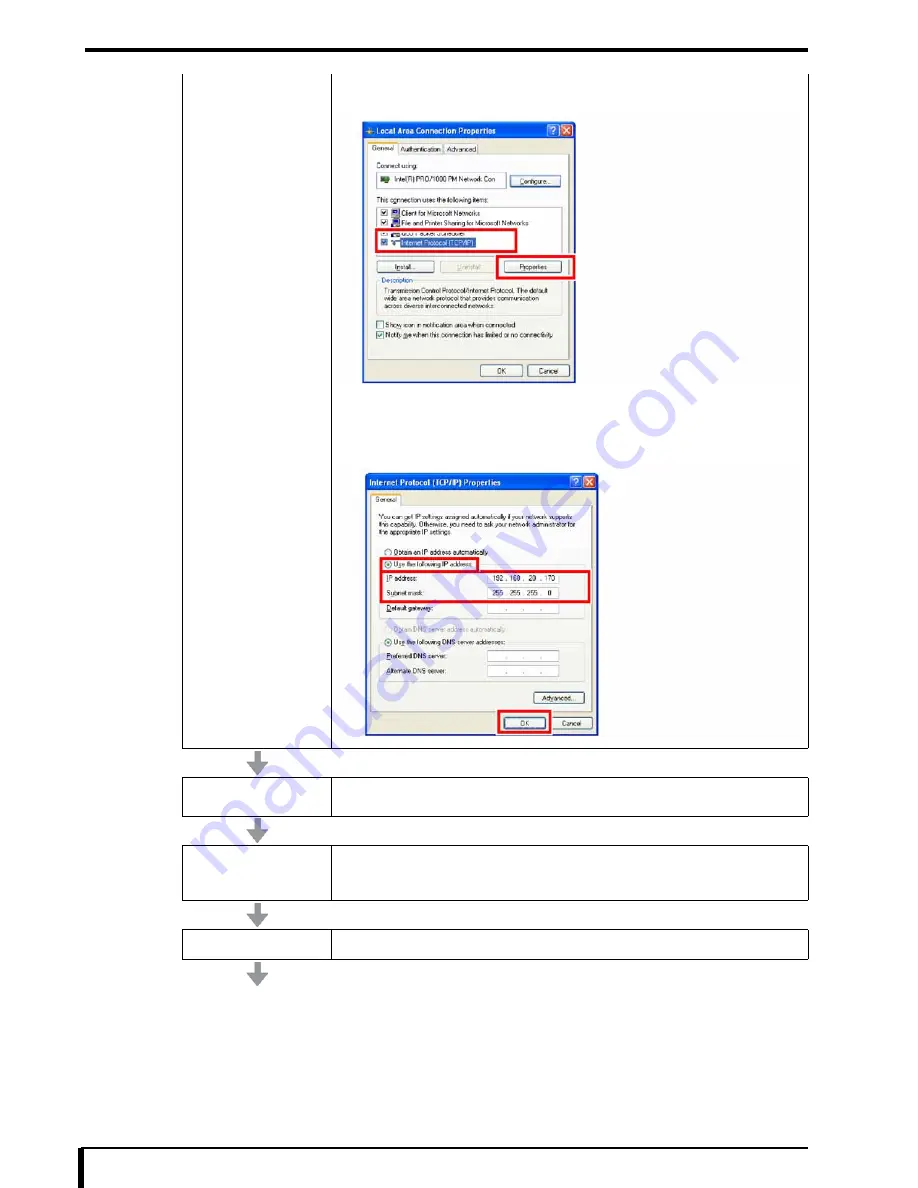
3. Select “Internet Protocol (TCP/IP)” from “This connection uses the following
items:”, and click the [Properties] button.
“Internet Protocol (TCP/IP) Properties” dialog box is displayed.
4. Set the [Use the following IP address] radio button to ON and enter the factory
setting IP address and subnet mask.
5. Click the [OK] button and then the [Close] button.
Setting up Network
Refer to “Setting Up Network” in
“17.3.2 Replacing the Compact Flash (CF) (Page 17-64)”
, and
setup the network.
Set the serial number
1. Check the serial number in the label on DRYPRO 832.
2. Refer to
“15.17 Product Setup (Page 15-37)”
, and set the Serial Number of
DRYPRO 832.
Restore the setup
Refer to
“16.6 Restoring Settings (Page 16-26)”
to restore the setup.
Содержание Drypro 832
Страница 2: ......
Страница 12: ......
Страница 15: ...Chapter 1 Safety Precautions and Warnings 1 3 5 Laser Power Label No Precautions Warning Labels ...
Страница 22: ......
Страница 28: ......
Страница 74: ......
Страница 118: ......
Страница 228: ......
Страница 242: ......
Страница 260: ...Chapter 14 Setting and Adjustment 14 4 6 Click the PRINT button The ST13A PATTERN is printed Example ST13A PATTERN ...
Страница 263: ...Chapter 14 Setting and Adjustment 14 7 12 Click the PRINT button The ST13B PATTERN is printed Example ST13B PATTERN ...
Страница 265: ...Chapter 14 Setting and Adjustment 14 9 16 Click the PRINT button The ST13C PATTERN is printed Example ST13C PATTERN ...
Страница 388: ......
Страница 498: ......
Страница 521: ...18 23 18 5 Block Diagram ...
Страница 527: ...18 29 18 7 Printing Operation Load Timing Chart Standard 1 ch ...
Страница 529: ......


