


Chapter 14 Setting and Adjustment
14-17
14.3 Checking and Fine Tuning the Print Size
If there is variation between the Main Scan OFFSET and Sub Scan OFFSET, you can adjust in the “PRODUCT
SETUP” window of DRYPRO 832 Utility Tool.
14.3.1 Checking Print Size
Print a FRAME pattern, and check the size.
1
Start DRYPRO 832 Utility Tool with reference to
“15.1 DRYPRO 832 Utility Tool Start (Page 15-
2)”
.
The Maintenance Menu window appears.
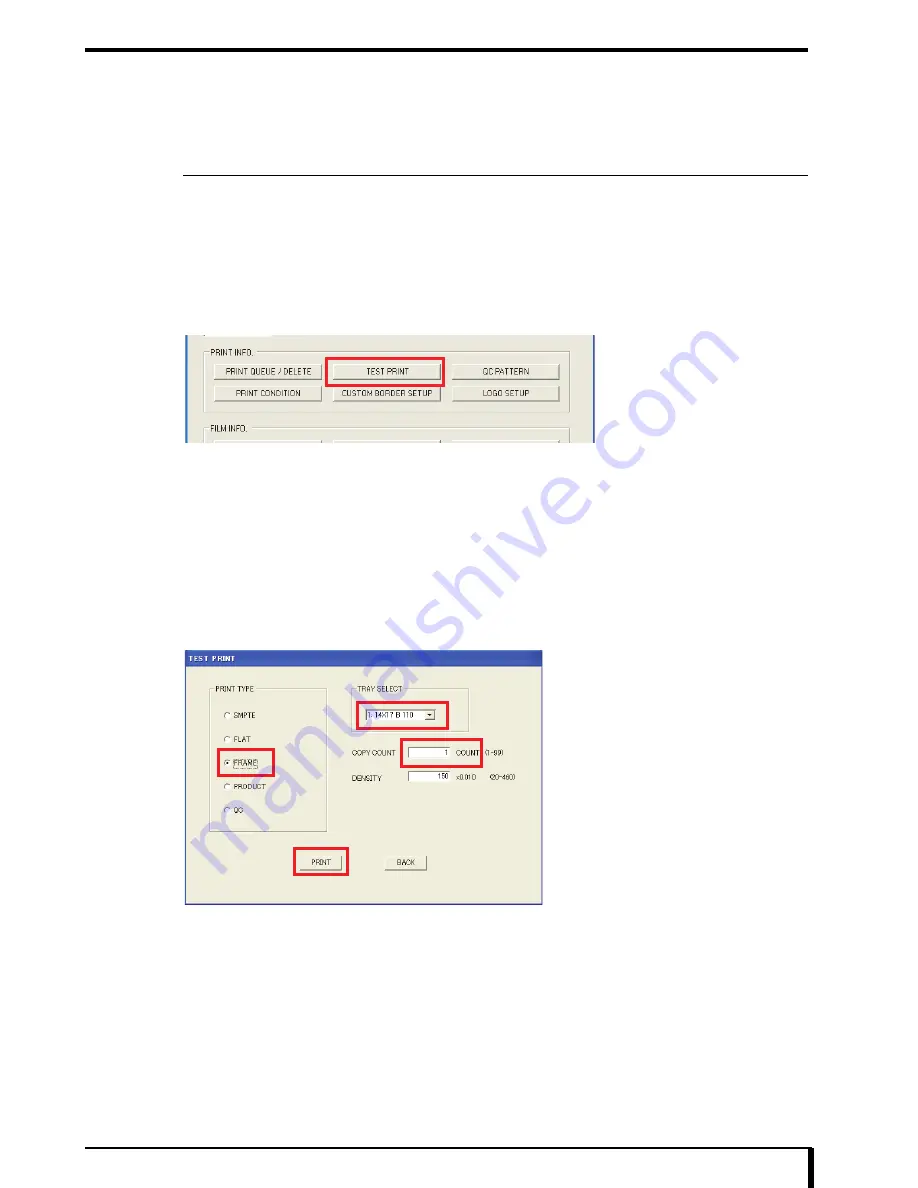
2
Click the [TEST PRINT] button under “PRINT INFO.”.
The “TEST PRINT” window appears.
3
Select “FRAME” from “PRINT TYPE”.
The “FRAME” pallet appears.
4
Select the tray from which you want to print the frame pattern from the “TRAY SELECT”
dropdown list and specify “DENSITY” and “COPY COUNT”.
5
Click the [PRINT] button.
The FRAME pattern is printed from the selected tray.
Содержание Drypro 832
Страница 2: ......
Страница 12: ......
Страница 15: ...Chapter 1 Safety Precautions and Warnings 1 3 5 Laser Power Label No Precautions Warning Labels ...
Страница 22: ......
Страница 28: ......
Страница 74: ......
Страница 118: ......
Страница 228: ......
Страница 242: ......
Страница 260: ...Chapter 14 Setting and Adjustment 14 4 6 Click the PRINT button The ST13A PATTERN is printed Example ST13A PATTERN ...
Страница 263: ...Chapter 14 Setting and Adjustment 14 7 12 Click the PRINT button The ST13B PATTERN is printed Example ST13B PATTERN ...
Страница 265: ...Chapter 14 Setting and Adjustment 14 9 16 Click the PRINT button The ST13C PATTERN is printed Example ST13C PATTERN ...
Страница 388: ......
Страница 498: ......
Страница 521: ...18 23 18 5 Block Diagram ...
Страница 527: ...18 29 18 7 Printing Operation Load Timing Chart Standard 1 ch ...
Страница 529: ......


