


Chapter 15 DRYPRO 832 Utility Tool
15-7
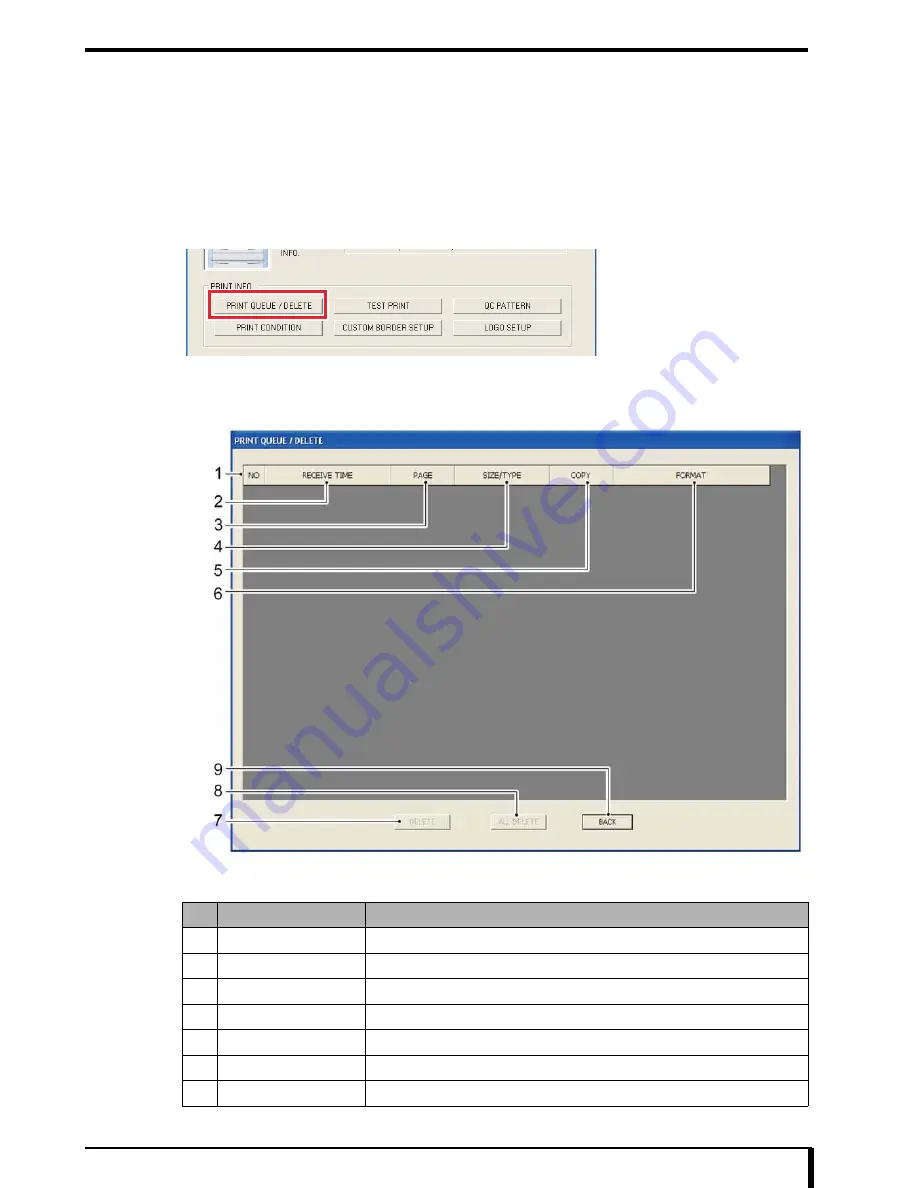
15.2 Print Queue/Delete
The status and information for print jobs in DRYPRO 832 can be confirmed, and print jobs can be deleted.
Set print parameters for each connected diagnostic device.
1
Refer to
“15.1 DRYPRO 832 Utility Tool Start (Page 15-2)”
, and open the maintenance menu
window of the DRYPRO 832 Utility Tool.
2
Click the [PRINT QUEUE/DELETE] button in the “PRINT INFO”.
The “PRINT QUEUE/DELETE” window appears.
“PRINT QUEUE/DELETE” Window
The “PRINT QUEUE/DELETE” window contains the following items:
No.
Setup Items
Description of Setting
1
No.
The print job number is shown.
2
RECEIVE TIME
The date and time that the image was received is shown.
3
PAGE
The page number of the output film attached to each diagnostic device is shown.
4
SIZE/TYPE
The size and type of the film to be output will be displayed.
5
COPY
The number of pages printed or copied will be shown.
6
FORMAT
The number of frames is shown.
7
[DELETE] button
The selected job is deleted.
Содержание Drypro 832
Страница 2: ......
Страница 12: ......
Страница 15: ...Chapter 1 Safety Precautions and Warnings 1 3 5 Laser Power Label No Precautions Warning Labels ...
Страница 22: ......
Страница 28: ......
Страница 74: ......
Страница 118: ......
Страница 228: ......
Страница 242: ......
Страница 260: ...Chapter 14 Setting and Adjustment 14 4 6 Click the PRINT button The ST13A PATTERN is printed Example ST13A PATTERN ...
Страница 263: ...Chapter 14 Setting and Adjustment 14 7 12 Click the PRINT button The ST13B PATTERN is printed Example ST13B PATTERN ...
Страница 265: ...Chapter 14 Setting and Adjustment 14 9 16 Click the PRINT button The ST13C PATTERN is printed Example ST13C PATTERN ...
Страница 388: ......
Страница 498: ......
Страница 521: ...18 23 18 5 Block Diagram ...
Страница 527: ...18 29 18 7 Printing Operation Load Timing Chart Standard 1 ch ...
Страница 529: ......


