GTD-110/150
Chapter 7
Route/Mark navigation
93151542-00
7-5
7.1.2 Setting a route
This function refers to recalling and displaying the registered route on the screen.
7.1.2.1 Designating a route using the cross cursor
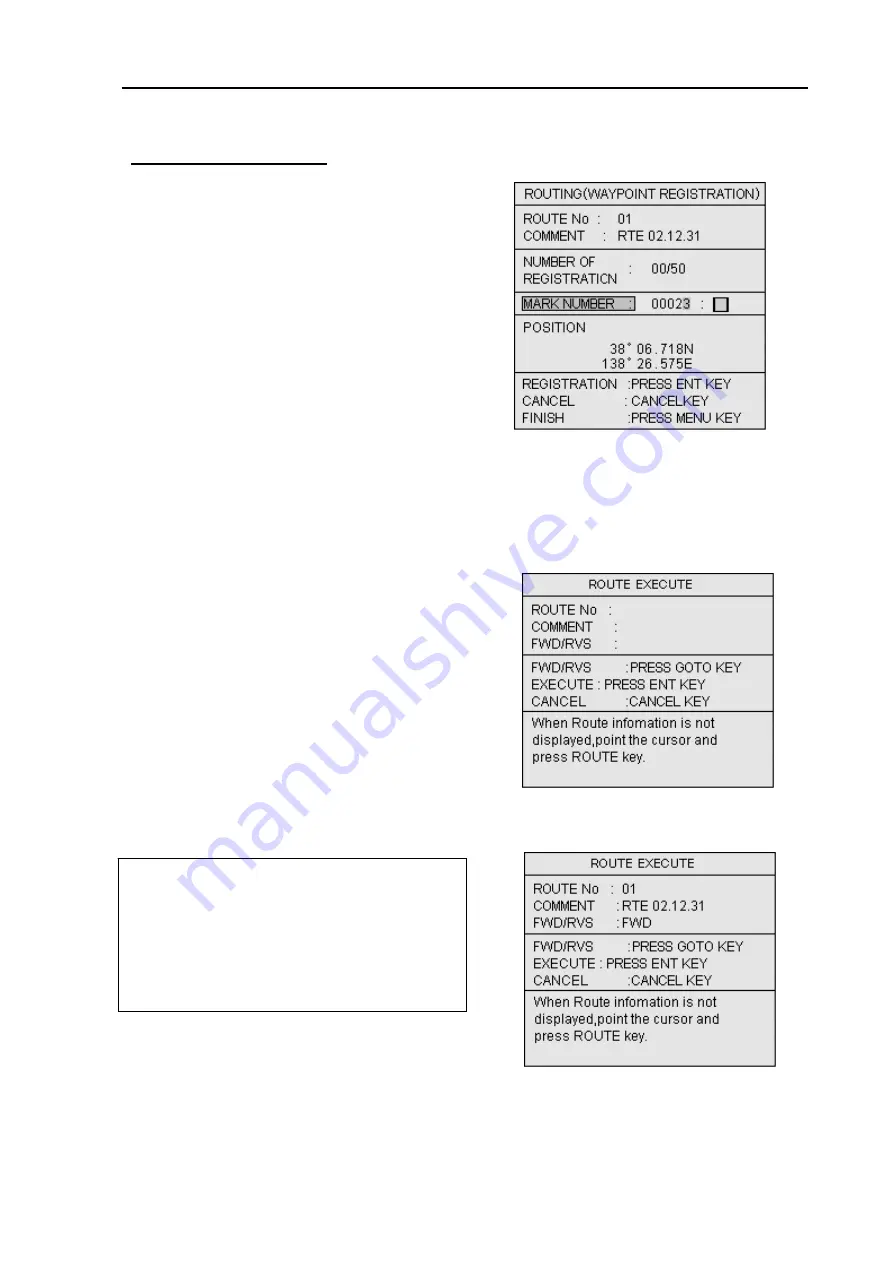
c. By Mark number entry.
(1) Enter the mark number using the assigned
alphanumeric keys. (Figure 7.10)
(2) Press the ENT key to register the waypoint.
(3) Repeat step 1 and step 2 for further waypoint
registrations.
(4) Press the MENU key to fix the route.
(5) To return to normal display, press the MENU
key.
(1) Press the CUR key to display the cross cursor
key.
(2) Press the ROUTE key to display the ROUTE
EXECUTE window. (Figure 7.11)
(3) Press the Joystick to allow the cross cursor to
fall on the route.
(4) Press the ROUTE key to select the route. The
route number and its name, date of creation,
etc) will be shown in the ROUTE EXECUTE
window. (Figure 7.12)
NOTE1:
In case plural routes are overlapped on
the screen, you can select each route by
repeatedly pressing the ROUTE key.
NOTE 2:
To change the route follow-up order,
press the GOTO key. Each press of the key
changes the order, starting from the beginning or
from the end of the route.
(5) Press the ENT key to fix the selection. The
entire selected route is shown with a flag on the
first waypoint.
Figure 7.11 Waypoint registration by Mark No.
Figure 7.12 Waypoint registration by Mark No.
Figure 7.10 Waypoint registration by Mark No.


