background image

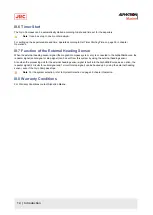
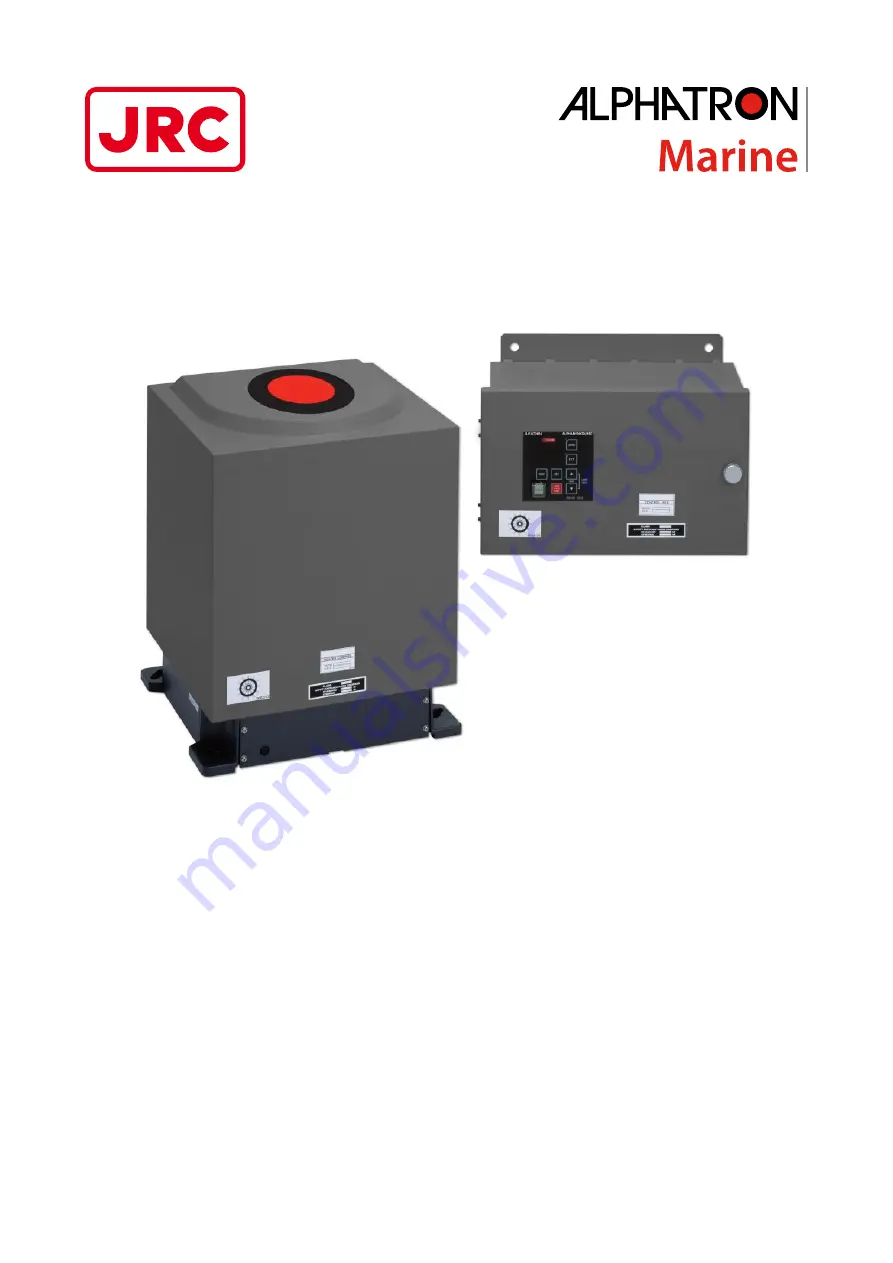
AlphaMidiCourse

Gyro Compass

Installation and Operation Manual

www.jrc.am

Содержание Alpatron AlphaMidiCourse

Страница 1: ...AlphaMidiCourse Gyro Compass Installation and Operation Manual www jrc am ...

Страница 2: ...ls 15 1 1 2 Unpacking of the Gyro Compass 16 1 1 3 Fitting Master Compass Part 1 17 1 1 4 Fitting Master Compass Part 2 17 1 1 5 Remove Parts from Master Compass Mounting Ring 18 1 1 6 Remove Packing Material from Shock Absorbers 18 1 1 7 Unpacking of Sensitive Element Part 1 19 1 1 8 Unpacking of Sensitive Element part 2 19 1 1 9 Mounting of Sensitive Element Part 1 20 1 1 10 Mounting of Sensitiv...

Страница 3: ...ation of Ship Speed 46 2 8 Operation Procedure of Master Compass Power Switch Option 47 2 8 1 Operation Procedure 47 2 8 2 Return Procedure 47 2 9 Alarm 47 2 9 1 Alarm Content 48 2 9 2 Corrective Measures GPS Communication Failure 51 2 9 3 Corrective Measures External Heading Sensor Communication Failure 51 2 9 4 Corrective Measures LOG serial signal Communication Failure 51 2 9 5 Corrective Measu...

Страница 4: ...ure alarm code r 63 4 6 5 15 Gyro Compass does not Function when Power Switch on the Operating Panel turned ON 64 4 6 5 16 Alarm is Activated at the Same Time when Power Switch Turned ON 64 4 6 5 17 Others 64 4 6 5 18 When Failures cannot be fixed On Board 64 4 6 6 Fuse Replacement 65 4 6 6 1 Master Compass Inverter fuse F1 66 5 Appendices 67 5 1 Drawings 67 5 1 1 Outline Control Unit One Gyro Com...

Страница 5: ...24 September 2018 I 2 Points of Attention 1 Thoroughly read this instruction manual before installation and operation of the equipment 2 We recommend to keep this manual nearby the equipment to ensure ready access to it Assign a person in charge for maintaining this manual in an assigned place 3 Users of this manual are assumed to be qualified personnel according to governmental law for ship s off...

Страница 6: ...ed heading signal from the heading detector is sent out as repeater signal and serial signal Rate of Turn Speed of ship s turning Sensitive Element Element to detect north of own ship Speed Error Correction Gyro compass generates error from the North depending on the speed and position of ship s navigation This system automatically calculates and corrects this error using speed and position data S...

Страница 7: ...lly and prepare for the occurrence of trouble or alarm in this product Ensure the emergency steering method is well understood to quickly respond to trouble WARNING Maintenance During maintenance or check of the product touching internal parts may cause electric shock because the ship s power supply is still connected to the system distribution board even if the main power switch of this product i...

Страница 8: ...e to MANUAL or Non Follow Up then determine the True Heading because wrong heading information repeater signal and serial signal may be sent out When an alarm regarding LOG serial alarm code P or U is activated and the Gyro Compass True Heading has not been determined first turn the steering mode to MANUAL or Non Follow Up then determine the True Heading because wrong heading information repeater ...

Страница 9: ...is activated and the Gyro Compass True Heading has not been determined first turn the steering mode to MANUAL or Non Follow Up then determine the True Heading because wrong heading information repeater signal and serial signal may be sent out CAUTION Setting Speed Input The setting of the ship s speed input system and its values for MANUAL is automatically saved When re starting the previous ship ...

Страница 10: ...heading information from this system in particular the automatic steering system etc should be operated immediately according to the individual emergency operating procedure CAUTION Corrective Measures GPS Communication Failure When an alarm related to GPS alarm code c or d is activated and the Gyro Compass True Heading has not been determined first turn the steering mode to MANUAL or Non Follow U...

Страница 11: ...gineer to check it CAUTION Rotor Level Failure alarm code 6 Turn OFF the power switch CAUTION Zero Cross Failure alarm code 8 Determination of the Gyro Compass True Heading when alarm code 8 is activated may cause a large change of the True Heading During automatic navigation take great care because a large course change may have happened CAUTION Master Compass Heading Failure alarm code G When an...

Страница 12: ... once to restore to normal conditions and request advice from Alphatron service engineer When the alarm system is activated during use always check to confirm the cause and reinstate It has the following features 1 Automatic speed error correction 2 Digital signal processing conform International Standards IEC61162 3 Long service life This system has been designed to build an I System One gyro com...

Страница 13: ...serial signal of the Gyro Compass Even when the Gyro Compass is operated by the emergency power supply the connected repeater can be driven Repeater backup function When this system s serial signal is not used for the repeater the following serial signals may be sent 1 Output conformed to IEC61162 1 ed 2 2 Output conformed to IEC61162 2 These signals can be individually set for each circuit Refer ...

Страница 14: ...nnected to the AlphaMidiCourse the repeater signal serial signal or step signal can be sent from this system by using the external heading sensor Also when the processing unit for the external heading sensor signal is built into the AlphaMidiCourse as an option the repeater signal 2 circuits for serial signal and 1 circuit for step signal can be backed up by using the external heading sensor even ...

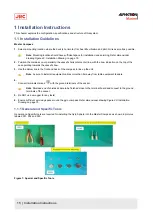
Страница 15: ...ssel s bow 3 Use the datum line in the front and back of the compass to line up the unit Note be sure to install all equipment cables more than 5m away from radio equipment feeders 4 Connect terminals marked with the ground terminals of the vessel Note Shielded end of shielded cable to be finished close to the terminal board and connect to the ground terminals of the vessel 5 Do NOT use a megger f...

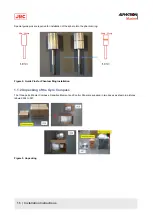
Страница 16: ...ntom ring Figure 2 Guide Pins for Phantom Ring Installation 1 1 2 Unpacking of the Gyro Compass The three parts Master Compass Sensitive Element and Control Panel are supplied in two boxes as shown in pictures labeled 004 to 007 Figure 3 Unpacking 16 Installation Instructions ...

Страница 17: ...part 1 as shown in pictures labeled 008 to 011 Figure 4 Fitting master Compass Part 1 1 1 4 Fitting Master Compass Part 2 Fitting the Master Compass part 2 as shown in pictures labeled 012 and 013 Figure 5 Fitting Master Compass Part 2 17 Installation Instructions ...

Страница 18: ...ounting ring as shown in pictures labeled 014 to 018 Figure 6 Remove parts 1 1 6 Remove Packing Material from Shock Absorbers Remove packing material from shock absorbers as shown in pictures labeled 019 to 021 Figure 7 Remove Packing Material Shock Absorbers 18 Installation Instructions ...

Страница 19: ...ive element part 1 Note Handle with care and keep packaging material for reuse when returning for servicing 1 1 8 Unpacking of Sensitive Element part 2 Unpack Sensitive Element as shown in pictures labeled 026 and 027 Figure 9 Unpacking Sensitive Element part 2 Note Handle Sensitive Element with great care 19 Installation Instructions ...

Страница 20: ...s shown in pictures labeled 028 to 031 Figure 10 Mounting of Sensitive Element part 1 1 1 10 Mounting of Sensitive Element Part 2 Mount the Sensitive Element as shown in pictures labeled 032 to 034 Figure 11 Mounting of Sensitive Element part 2 20 Installation Instructions ...

Страница 21: ...ith Damping Oil as shown in pictures labeled 037 to 039 Figure 12 Filling with Damping Oil 1 1 12 Attach Connector Attach Connector and fix securely to Sensitive Element as shown in pictures below Figure 13 Attach Connector 21 Installation Instructions ...

Страница 22: ...a of all settings value data Indicated contents can be selected by operating the switches 4 Operating switches They are used for all kinds of operations required for this system Power switch It is used to start and stop this system The indicator lamp in the power switch alights when started Table 2 Name and function 1 3 Configuration Figure 14 System Configuration This system consists of the follo...

Страница 23: ... the ship Note Install the Gyro Compass with in 5 accuracy in order to be able to apply a correction by loosening the fastening bolts and fine tune placement by turning the Mater Compass 2 Fasten the compass to the deck with the four bolts provided Note Locate the bolts in the center of the trails to be able to finely adjust the direction of the unit With the aid of the heading offset feature a sm...

Страница 24: ...ommunication function of the control unit c GPS communication break When GPS operation stopped or the serial signal from GPS has stopped d Abnormality of GPS data When a failure is generated in the serial signal from the GPS E System internal communication failure 1 When the External Heading Sensor Signal Processing Unit stopped its operation or the serial signal from the External Heading Sensor P...

Страница 25: ...started up Any changes made while the system is running will therefore not take effect before the system is restarted Dip Switch Setting Master Compass S1 Standard Setting Details Function Read Timing Remarks NO 1 OFF Master Compass type OFF Standard ON HSC Start Up NO 2 OFF Display of Master Compass Type ON In standard case displayed as Std In HSC case displayed as HIGH LED on mcc PWB All Time NO...

Страница 26: ...rd Type ON HSC type Start Up NO 3 OFF Control Box type OFF Type S ON Type D dual gyro Start Up NO 4 OFF No 2 Gyro or not OFF No ON Yes Start Up NO 5 OFF NO 6 OFF External Sensor Connection NO5 OFF NO6 OFF Non NO5 ON NO6 OFF External Sensor Connection Start Up NO 7 OFF Serial Signal Select OFF IEC61162 2 on Tokimec format Start Up NO 8 OFF Alarm Output Setup OFF All alarm output ON only power fail ...

Страница 27: ...n NO 4 OFF Rate of Turn Scale for Analog meter NO3 OFF NO4 ON Max 300 0 min NO3 ON NO4 OFF Do Not Set Start Up Valid at time of external sensor standard selection NO 5 OFF Ban or permission of an RoT Sentence Output OFF disable ON enable Start Up NO 6 ON Alphatron or other OFF no ON AlphaMidiCourse Start Up NO 7 OFF Unit check mode OFF no ON yes for factory inspection only Start Up NO 8 OFF Buzzer...

Страница 28: ...ils Function Read Tuning Remarks NO 5 OFF HDT THS sentence OFF HDT ON THS Start Up NO 6 OFF Do Not Touch For SCC pwb check mode S1 S2 S3 all ON For ICIF pwb check mode S1 S2 all ON S3 except No 8 all ON 28 Installation Instructions ...

Страница 29: ...rved Attentively read the Operator Manual of the automatic steering system carefully preparing for occurrence of trouble or alarm in this system The emergency steering method should be well understood to easily respond to failures or alarms For the automatic steering system carefully read the related Operator Manual in separate volume supplied by the manufacturer and perform appropriate preparatio...

Страница 30: ... SET switch Change data and change the input system Change data Gyro Compass True Heading Ship Speed Latitude Rate of Turn Change input system Ship Speed MANUAL GPS LOG and LOG serial signal Latitude GYRO and GPS ACK ENT switch Determines the changed data and the changed input system Press to stop alarm buzzer when an alarm has been activated switches Change data and change the input system Normal...

Страница 31: ...rating Panel on page 69 Note When the rotor is in stopped situation the dot at right end of the mode indicator is lit Note When the rotor is running it is blinking Note When in the follow up situation it is extinguished Alarm Indicator Displays alarm status It blinks when an alarm is generated 1 Press ACK ENT to stop alarm 2 If cause of alarm has not been resolved it continues blinking System sele...

Страница 32: ...ACK ENT 2 Press the EXT button to select the External Heading Sensor and press ACK ENT 2 2 2 Setting of the Latitude Input 1 Press the SET button 2 Press or to select either GPS or GYro 3 Press ACK ENT to enter selection Note When H Sd MANUAL was selected as the latitude is displayed in the Data Indicator press or to set the latitude and press ACK ENT again The herein after calculated latitude by ...

Страница 33: ...e The meaning of a display of a mode indicator is as follows Figure 20 S S G Steering Sensor Gyro Compass Figure 21 Gyt Gyro Compass true heading Note When a GPS communication failure LOG serial signal communication failure or LOG contact failure is generated the data indicator is blinking If GYRO system is selected at the time operate according to Corrective Measures GPS Communication Failure on ...

Страница 34: ...External Heading 345 6 123 4 Table 9 Data and Mode Indicators True Heading 2 Note When a communication failure with External heading sensor is generated the data indicator is blinking 2 3 3 Master Heading Master Compass Heading is displayed 2 3 4 Latitude Current ship Latitude is displayed See example Present Latitude is 36 degree 50 minutes North Note When a GPS communication failure is generated...

Страница 35: ...erated the data indicator starts blinking 2 3 6 Rate of Turn Current ship s turn rate is displayed Unit of the indicated Rate of Turn is in degrees minutes See example Presently right turn with 30 degrees 0 minutes Note The Data indicator shows bar indication blinking until the master Gyro Compass starts to follow up or when External heading sensor system is selected Note When the ship makes a lef...

Страница 36: ...de 1 2 and 3 were activated in order When 4 alarm codes are displayed at the same time and the dot in fourth place is not present means more than 5 alarms were activated Example When alarms of alarm code 1 2 3 c and d were activated in order In this case not indicated alarm code can be confirmed by pressing switch as shown below To return to the previous indication press 2 4 Start and Stop Sequenc...

Страница 37: ...Repeater synchronization Synchronize each repeater 3 Setting Just before departure or 6 hours or more after starting Item 2 above Reconfirm Heading error correction Fixed error can be corrected in output heading if necessary 4 Alarm If any alarm is activated check the alarm code and press ACK ENT switch 5 System selection Gyro compass to be selected normally 37 Operation ...

Страница 38: ...cally However confirm that the indicated value coincides with the True Heading selected by this system after the repeater switch is turned ON 6 Stop Turn each repeater switch to OFF and turn the Power Switch on the Gyro Compass operation panel to OFF The Gyro Compass stops 2 5 Start and Running CAUTION Start Up Start up this product after turning the automatic steering system to other mode than AU...

Страница 39: ...witch or to set departure date and time 4 Press switch ACK ENT to confirm Note When the current date and time is not displayed the previously set departure date and time is displayed in the data indicator Indication automatically moves back to START heading setting 5 The set departure date and time are displayed for 3 seconds after the start heading setting Then all indications are extinguished ex...

Страница 40: ...arm regarding GPS alarm code c or d is activated and the Gyro Compass True Heading has not been determined first turn the steering mode to MANUAL or Non Follow Up then determine the True Heading because wrong heading information repeater signal and serial signal may be sent out CAUTION Setting Latitude Input When GYRO is selected for the latitude input system latitude is automatically updated by t...

Страница 41: ...en completed the repeater signal and the serial signal are sent Figure 29 Repeater Compass Prior to synchronization of the Master Compass carry out the Repeater Stepper Output Check Test Mode B To stop the master compass See Turning the Gyro Compass OFF on page 52 The phantom ring starts rotating 360 The Sensitive Element rotor should have stopped spinning completely approx 4 minutes for preparati...

Страница 42: ...ong heading information repeater signal and serial signal may be sent out CAUTION Setting Speed Input When an alarm regarding LOG contact alarm code u is activated and the Gyro Compass True Heading has not been determined first turn the steering mode to MANUAL or Non Follow Up then determine the True Heading because wrong heading information repeater signal and serial signal may be sent out CAUTIO...

Страница 43: ...ip s speed is displayed in the indicator 5 Press switch or when MANUAL is selected to set the ship s speed 6 Press ACK ENT switch to confirm 2 5 8 Set Rate of Turn Filter Constant CAUTION Setting Speed Input Press ACK ENT switch to complete the setting Changed setting is not updated unless pressing ACK ENT switch 1 Press DISP switch to display a rate of turn filter constant see example INFO 43 Ope...

Страница 44: ...the altered angle When on automatic steering first turn the steering mode of the automatic steering system to MANUAL to prevent a large course change Confirm the area around the ship is clear and turn to AUTO steering again CAUTION Confirmation True Heading Press ACK ENT switch to complete the setting Changed setting is not updated unless pushing ACK ENT switch Confirm that the Gyro Compass True H...

Страница 45: ...r switch is turned ON 2 Press System Selection Switch GYRO together with ACK ENT switch to select GYRO System In the gyro compass system press System Selection Switch GYRO together with ACK ENT switch on the operating panel to select the Gyro Compass system Press the system selection switch EXT switch together with the ACK ENT switch to select the External heading sensor system Note When a change ...

Страница 46: ... to AUTO steering again Confirm that the latitude value displayed on GPS coincides with the latitude value displayed on the indicator Note When GPS is selected as the latitude input system the latitude obtained by GPS is displayed Note When GYRO is selected as the latitude input system and other than MANUAL is selected as the ship s speed input system the latitude is automatically updated Confirm ...

Страница 47: ...n the steering stand or the control unit to OFF CAUTION DO NOT turn the main power on switch on the operation panel to OFF Note Although the alarm code 3 or A will appear and be kept indicating the output with the external heading sensor selected will be transmitted and kept on 2 8 2 Return Procedure 1 First turn the steering mode of the steering control system to HAND 2 Turn the Compass Power Swi...

Страница 48: ... the control unit of the power supply shows over current or over voltage or the power supply output falls away 3 Inverter failure Is activated when the inverter unit in the master compass shows over current or over voltage 4 Rotor level failure Is activated when rotor sensitive element in the master compass level is abnormal 5 Zero cross failure Is activated when reference angle zero cross angle o...

Страница 49: ...or the latitude input system 10 System internal communication failure 1 Option Is activated when internal communication from the external heading sensor signal processing unit built into this system to the Gyro Compass operation processing unit in this system has stopped Note When External heading sensor is selected as system operate according to Corrective Measures External Heading Sensor Communi...

Страница 50: ...s activated only when GYRO is selected in the system selection and LOG serial signal is selected as the ship s speed input system 16 LOG serial signal data failure Is activated when a failure is activated in the serial signal from LOG Note When this alarm is activated operate according to Corrective Measures LOG serial signal Communication Failure on page 51 Note This alarm is activated only when ...

Страница 51: ...low Up and then determine the True Heading Once True Heading has been determined the system s heading is sent out CAUTION Corrective Measures EXTERNAL HEADING SENSOR Communication Failure Determination of the True Heading may cause large change of sent heading information During automatic navigation great care should be taken because large course changes may have happened When the alarm related to...

Страница 52: ... sent out When a failure related to LOG contact is activated the data indicator is blinking The Gyro Compass True Heading and the heading information sent out which are currently indicated is the corrected value based on the ship s speed immediately before the alarm was activated 1 Select other mode than LOG for the ship s speed input system Note Refer to Set Ship Speed Input System on page 42 2 P...

Страница 53: ...e NMEA 0183 via RS 422 from GPS Speed 200 or 400 pulses nm from log NMEA 0183 via RS 422 Compensation Latitude 70 N to 70 S Speed 0 50 knots Environmental Ambient operating temperature 10 C 50 C Gimbal limits 45 roll and pitch Mean time between failures MTBF 35000 Operating Voltage Input voltage 24VDC Power Start up 140 VA AC 70 VA AC Operating Dimensions Size 340mm h x 340mm w x 438mm d Weight 23...

Страница 54: ...alt grey 2 CONTROL UNIT Alpha MidiCourse 1 7 Wall mount type 4 3 SPARE PARTS TOOL BOX 1 CLEAR SPARE PARTS TOOLS LIST 5 1 GYRO COMPASS 1 Table 11 Contents and Components List Sensor Type of Signal Protocol Sentence GPS IEC61162 1 IEC61162 1 Ed 2 A Refer to Input Signal Sentence SPEED LOG IEC61162 1 IEC61162 1 Ed 2 A Refer to Input Signal Sentence 200 or 400 Pulses n mile SPEED LOG DRY CONTACT 5V 5m...

Страница 55: ...DATA NO 2 VTG xx T xx M xx x N xx K hh CR LF SPEED knots SPEED LOG DATA NO 1 VBW x x x x A x x x x A hh CR LF SPEED knots STATUS GROUND SPEED knots WATER SPEED knots Note Ground speed is high priority Table 14 Input Signal Sentence Circuit Type of Signal Protocol Sentence SELECTED COMPASS DC24V STEP 1 6 SELECTED COMPASS IEC61162 1 Ed IEC61162 2 A B Refer to output signal sentence Table 15 Output S...

Страница 56: ... selected for each circuit Refer to wiring diagram regarding number of circuits A B BAUD RATE 4800 bps 38400 bps DATA BITS 8 bits 8 bits PARITY none none STOP BITS 1 1 TRANSMIT FREQ 1sec 200msec 100msec 20 ms Table 16 Type of Protocol 56 Specifications ...

Страница 57: ...isfactory operation Main purpose of the periodical checks and maintenance is to catch signs of equipment failure at an early stage Repairs on call in port as a result of these checks will prevent unexpected failures to a minimum while sailing For the periodical checks and maintenance of the equipment connected to this system like the automatic steering system magnetic compass system etc refer to t...

Страница 58: ...ble 1 on page 78 Note When table is full file it 2 Copy and use periodical check table including operational check once a half year once a year in the Appendix See Figure 52 Periodic Check Table 2 on page 79 Note When table is full file it 4 3 Warning Label Check Always check and clean warning labels so they are easy to read When warning labels become dirty or detached request new ones from Alphat...

Страница 59: ...riate measures in non hazardous sea area stopping the ship as a rule Two things must be considered when a failure has become apparent in this system or in the connected external equipment 1 An alarm is displayed in this system 2 A failure exists in part or in all functions of this system 4 6 2 Before Troubleshooting Before starting the troubleshooting procedure consider the following 1 Firstly ens...

Страница 60: ...er pressing ACK ENT switch shows that the failure still exists 3 Confirm alarm occurrence number and alarm content from the data indicator refer to Alarm on page 47 and check according to Failure Phenomena and Corrective Measures on page 60 regarding the displayed alarm content 4 6 5 Failure Phenomena and Corrective Measures When a failure has occurred take the following actions Contact Alphatron ...

Страница 61: ...the power switch 2 Turn ON again after approx 20 seconds 3 Take action according to Start on page 38 if no alarm code 3 was activated 4 Check the inverter fuse F1 12A located in the base of the master compass Master Compass on page 70 if an alarm is activated again in alarm code 3 5 Turn OFF the power switch and request repair from Alphatron Marine service engineer or agent 4 6 5 4 Rotor Level Fai...

Страница 62: ...e Service Engineer or their agent after checking steps 2 to 7 4 6 5 7 System Communication Failure 2 alarm code b 1 Turn OFF the power switch 2 Turn ON again after approx 20 seconds 3 Take action according to Start on page 38 if no alarm code b was activated 4 Turn OFF the power switch of this system when this alarm is generated again 5 Disconnect the power cable from the ship s distribution board...

Страница 63: ...ode n 1 Confirm that the external heading sensor operates properly 2 Operate it according to the Operator s Manual for the external heading sensor if it does not operate properly 3 Take appropriate actions according to Corrective Measures External Heading Sensor Communication Failure on page 51 if it was not recovered after executing step 2 4 Contact Alphatron Marine Service Engineer or agent afte...

Страница 64: ...cated in the upper side of the ITERM terminal board of the control unit see Figure 45 Stand alone type Control Unit of One Gyro Compass System on page 72 and Figure 49 Terminal Board on page 76 3 Contact Alphatron Marine Service Engineer or agent immediately after checking steps 1 and 2 4 6 5 16 Alarm is Activated at the Same Time when Power Switch Turned ON 1 Turn OFF the power switch when error ...

Страница 65: ...m this perform action as in Power Supply Failure alarm code 1 on page 60 Fuse No Capacity TB No Signal Description F1 TB1 33 1R24 Power supply for ch 1 serial repeater F2 TB1 38 2R24 Power supply for ch 2 serial repeater F3 TB1 43 3R24 Power supply for ch 3 serial repeater F4 TB1 48 4R24 Power supply for ch 4 serial repeater F5 1A TB1 21 ST15 Power supply for ch 1 step motor repeater F6 10A TB3 1 ...

Страница 66: ...older in the front and is 6 35x31 8mm All other fuses are 5 2x20mm Figure 40 Master Compass Inverter Unit 1 Press and turn the fuse holder edge counterclockwise with a screw driver to open the fuse holder 2 Turn clockwise to close it after fuse has been replaced 66 Maintenance ...

Страница 67: ...Tables 5 1 Drawings Drawing Contents 1 Outline Control Unit One Gyro Compass System 2 Operating Panel 3 Master Compass 4 Stand alone type Control Unit of One Gyro Compass System 5 Connection Diagram 6 Installation Drawing 7 Terminal Board 8 ITERM pwb 67 Appendices ...

Страница 68: ...5 1 1 Outline Control Unit One Gyro Compass System Figure 41 Control Box 68 Appendices ...

Страница 69: ...5 1 2 Operating Panel Figure 42 Operating Panel 69 Appendices ...

Страница 70: ...5 1 3 Master Compass Figure 43 Main Unit 70 Appendices ...

Страница 71: ...Figure 44 Open Gyro Compass 71 Appendices ...

Страница 72: ...5 1 4 Stand Alone Type Control Unit of One Gyro Compass System Figure 45 Stand alone type Control Unit of One Gyro Compass System 72 Appendices ...

Страница 73: ...5 1 5 Connection Diagram Figure 46 Connection Diagram 73 Appendices ...

Страница 74: ...5 1 6 Cable Diagram Figure 47 Cable Diagram 74 Appendices ...

Страница 75: ...5 1 7 Installation Drawing Figure 48 Installation Drawing 75 Appendices ...

Страница 76: ...5 1 8 Terminal Board Figure 49 Terminal Board 76 Appendices ...

Страница 77: ...5 1 9 ITERM pwb Figure 50 ITERM pwb 5 2 Periodic Check Tables Periodic Check Table Contents 1 Periodic Check Table 1 2 Periodic Check Table 2 3 Periodic Check Table 3 77 Appendices ...

Страница 78: ...d true heading on the operating panel b Confirm that the displayed latitude on the operating panel coincides with the current latitude c Measure error with observation if possible d Confirm that ship s power supply voltage is stable and within specifications e Confirm that all indicators and lamps are lit and it buzzes when lamp test operate f Items to be dealt with and items to be informed Period...

Страница 79: ...rews in the terminal board Re tighten if loosened b Confirm connecting and wire wearing conditions at connecting wire mounting points and wire bases c Confirm operating conditions of switches and displayed state of LEDs and indicators d Confirm that warning labels and other indication labels are not dirty or detached Clean if they become dirty e Items to be dealt with and item to be informed Perio...

Страница 80: ...be corrected on board by the solutions described in this manual immediately contact Alphatron Marine or nearest agency in your area to request advice and supply the following information 1 Ship s name and owner 2 Equipment name type and serial no 3 Where is the ship now 4 Symptoms failure Error code name 5 When did it occur Year Month Day Hour 6 Where did it occur Sea area Channel River 7 Does it ...

Страница 81: ...e from the master compass and the cable to the repeater compass The bracket weighs 8 kg and has a diameter of 354 mm Repeater Stand The repeater stand height 1330 mm weight 25 kg can be used when a repeater compass is installed on the deck It has a gimbal ring at the upper part of the stand to support the repeater compass horizontally even when the wipe is rolling and pitching The stand body is ma...

Страница 82: ...ormation in this document is subject to change without notice and does not represent a commitment on the part of Alphatron Marine B V T 31 10 453 4000 Document name AlphaMidiCourse Document nr 1002 service jrc am Version V1 1 www jrc am All rights reserved Alphatron Marine B V Centers of Excellence Houston Rotterdam Singapore Tokyo ...

Отзывы:

Похожие инструкции для Alpatron AlphaMidiCourse