P
P
a
a
g
g
e
e
3
3
4
4
4.2.5 Setting the rolling torque.
It is important that the product seals, both front and rear lip seals are not
installed until the bearing pre-load has been set and the clearances
checked. The seals may give a false rolling torque reading as well as
increasing the risk of damage during assembly.
-
Re-install one of the shaft assemblies into the gearbox (16) and replace
the endplate assembly, ensure that the retaining screws (74) are
tightened to the correct torque, see section 5.2.
-
Using a torque meter, check the rolling torque of each shaft assembly
(separately) referring to section 5.2 for the correct settings. If necessary,
adjust the amount of shim (73) under the rear bearing cup (19). Either by
adding shims (73) to increase the rolling torque or by removing shim (73)
to decrease the torque until the correct setting is achieved.
-
Repeat steps detailed above for the remaining shaft assembly.
-
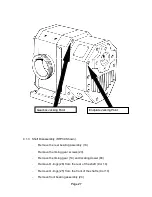
Once the rolling torque has been set for both shaft assemblies. If the
gearbox assembly is still installed to the rotorcase assembly, remove
retaining screw (7). Utilising the jacking points on the gearbox and the
screws (7), disassemble the gearbox assembly from the rotorcase
assembly, see fig 12. The lip seals (17) can be installed into the gearbox
(16) and the ‘slinger’ disc (62) where applicable, requires lubricating with
a compatible lubricant before assembly onto the shaft. The lip seal (11)
can also be installed into the endplate (70).
4.2.6 Rotor Clearances.
-
Install rotors (41) onto shafts (9 and 10) in rotorcase (40), install retainer
O-ring (34) into the bore of the rotor and secure with rotor retainer (35).
Set to correct torque (see section 5.2) using socket tool (58).
Note: The retainer O-ring (34) seals the shaft/rotor spline and should not
be re-used if cut, distorted or damaged in such a way as to impair its
ability to form a seal. If in doubt a new O-ring should always be installed.
-
Using a depth micrometre or similar device measure front clearance
between the rotorcase and rotor front faces. With a feeler gauge set or
similar device measure the side and rear clearances.
-
With rotors (41) installed, check all clearances, front (A), radial (C), rear
(B) and mesh (D), against the Clearance Chart, refer to section 5.1.
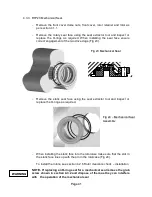
Remove rotors (41) and install product seals, refer to section 4.3,
reassemble rotors (41) tightening to the correct torque.
-
Install O-ring (39) into the rotorcase (40). Install front cover (38) to
rotorcase (40), securing with dome nuts (36), tightening to correct torque,
refer to section 5.2.
W
W
A
A
R
R
N
N
I
I
N
N
G
G
W
W
A
A
R
R
N
N
I
I
N
N
G
G
Содержание Wright Flow Technologies RTP Series
Страница 1: ...P Pa ag ge e 0 0 INSTALLATION OPERATION AND MAINTENANCE MANUAL FOR THE RANGE OF PUMPS...
Страница 47: ...P Pa ag ge e 4 46 6 5 0 Specifications 5 1 Clearance Chart B A C Radial D C Radial...
Страница 51: ...P Pa ag ge e 5 50 0 B B 100 mm or 4 PORT 80 mm or 3 PORT 5 5 RTP30 Foundation Dimensions Stub Shaft Drive...
Страница 54: ...P Pa ag ge e 5 53 3 5 6 Typical Basic Pump Build RTP20 Shown...
Страница 56: ...P Pa ag ge e 5 55 5 5 8 RTPTM Service History Pump Serial No Date Comments...


