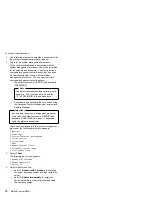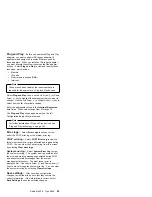
Main menu:
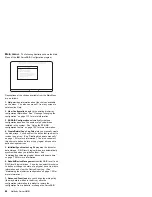
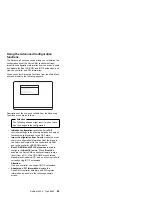
The following illustration shows the Main
Menu of the IBM ServeRAID Configuration program.
Select a choice using the Up Arrow ( ) and Down Arrow ( ) keys and press Enter.
Press Esc to return to previous menu.
Main Menu
1. Help
2. View Configuration
3. EZ-RAID Configuration
4. Create/Delete/Copy Log Drive
5. Initialize/Synchronize Log Dr
6. Rebuild/Device Management
7. Advanced Functions
8. Exit
IBM ServeRAID Adapter Disk Array Configuration Ver. X.XX
Adapter Number: 1
Bus Number: 0 Host ID = Null Config
Descriptions of the choices available from the Main Menu
are as follows:
1. Help provides information about the choices available
on the menu. You also can press F1 from any screen to
obtain online Help.
2. View Configuration displays the existing disk-array
configuration information. See “Viewing or changing the
configuration” on page 113 for more information.
3. EZ-RAID Configuration automatically creates a
configuration based on the number of physical drives
installed in the system. See “Using the EZ-RAID
configuration feature” on page 102 for more information.
4. Create/Delete/Copy Log Drive lets you manually create
the disk arrays. You can select the drives that you want to
include in an array. (See “Creating disk arrays manually”
on page 104 for more information.) You also can select
this choice to define, delete, or copy logical drives and to
define hot-spare drives.
5. Initialize/Synchronize Log Dr prepares the drives for
data storage. RAID level 5 logical drives are automatically
synchronized when you initialize them. See
“Initializing/Synchronizing logical drives at the same time”
on page 108 for more information.
6. Rebuild/Device Management rebuilds RAID level 1 and
RAID level 5 logical drives. You also can select this choice
to define or change the state of a physical drive, view drive
information, and clear the Device Event Log. (See
“Maintaining the disk-array configuration” on page 125 for
more information.)
7. Advanced Functions lets you change the write policy
(the way data is written to the drive), save the
configuration information to a diskette, restore the
configuration from a diskette, or change the ServeRAID
84
Netfinity Server HMM
Содержание 86604RU - Netfinity 5500 - 4RU
Страница 2: ......
Страница 8: ...vi Netfinity Server HMM...
Страница 201: ...a Remove the information panel LED assembly screws then remove the assembly Netfinity 5500 Type 8660 193...
Страница 214: ...1 Hard disk drive 2 Drive tray handle open position 206 Netfinity Server HMM...
Страница 231: ...a Remove the power backplane screws 1 then remove the power backplane Netfinity 5500 Type 8660 223...
Страница 244: ...Screws 236 Netfinity Server HMM...
Страница 247: ...Netfinity 5500 Type 8660 239...
Страница 269: ...a Remove the system board mounting screws then remove the system board Netfinity 5500 Type 8660 261...
Страница 301: ...Parts listing Type 8660 1 2 3 4 5 6 7 8 9 10 11 12 13 14 15 16 17 18 19 20 21 22 23 24 25 Netfinity 5500 Type 8660 293...
Страница 314: ...306 Netfinity Server HMM...
Страница 324: ...316 Netfinity Server HMM...
Страница 325: ...Related service information 317...
Страница 326: ...318 Netfinity Server HMM...
Страница 327: ...Related service information 319...
Страница 340: ...332 Netfinity Server HMM...
Страница 341: ...Related service information 333...
Страница 346: ...338 Netfinity Server HMM...
Страница 402: ...IBM Part Number 00N5902 Printed in U S A S1 L 98 3...

