Configuration overview
You play a key role in how the server allocates resources
to organize and interconnect hardware devices and
software programs. This allocation process is referred to
as
configuration. The steps required to configure the
server depend on the number and types of devices and
programs that you install.
The server supports several types of adapters and SCSI
devices. Because of this flexibility, you can choose from
among many adapters and devices that comply with any of
the following standards:
Peripheral Component Interconnect (PCI)
Industry Standard Architecture (ISA)
Small Computer System Interface (SCSI)
In general, the greater the number and variety of hardware
devices and software programs that you install in the
server, the more you will have to interact with the server
and the devices to correctly configure the system.
The server comes with the following hardware
configuration utility programs:
Configuration/Setup Utility
With the built-in Configuration/Setup Utility program,
you can configure system board functions, such as
serial and parallel port assignments; change interrupt
request (IRQ) settings; and change the startup
sequence for drives that you install. You also can
use this utility program to set passwords for starting
up the server and accessing the Configuration/Setup
Utility program.
ServeRAID
You can use ServeRAID programs to define and
maintain the disk arrays. You can also use these
programs to configure SCSI devices (such as
hot-swap drives) that are attached to the ServeRAID
controller on the system board. See “Understanding
disk array technology” on page 81 for complete
instructions.
Before installing a new device or program, read the
documentation that comes with it. Reading the instructions
helps you to determine the steps required for installation
and configuration. The following actions are typically, but
not always, required to configure the server.
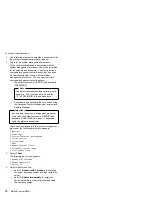
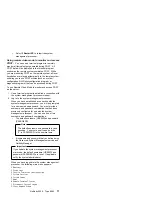
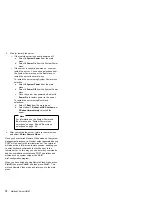
1. Run the Configuration/Setup Utility program and
record the current configuration settings.
2. Set jumpers or switches on the server system board.
See “Changing jumper positions” on page 151 and
“System board jumpers” on page 257.
3. Set jumpers or switches on the device.
See the device installation instructions.
58
Netfinity Server HMM
Содержание 86604RU - Netfinity 5500 - 4RU
Страница 2: ......
Страница 8: ...vi Netfinity Server HMM...
Страница 201: ...a Remove the information panel LED assembly screws then remove the assembly Netfinity 5500 Type 8660 193...
Страница 214: ...1 Hard disk drive 2 Drive tray handle open position 206 Netfinity Server HMM...
Страница 231: ...a Remove the power backplane screws 1 then remove the power backplane Netfinity 5500 Type 8660 223...
Страница 244: ...Screws 236 Netfinity Server HMM...
Страница 247: ...Netfinity 5500 Type 8660 239...
Страница 269: ...a Remove the system board mounting screws then remove the system board Netfinity 5500 Type 8660 261...
Страница 301: ...Parts listing Type 8660 1 2 3 4 5 6 7 8 9 10 11 12 13 14 15 16 17 18 19 20 21 22 23 24 25 Netfinity 5500 Type 8660 293...
Страница 314: ...306 Netfinity Server HMM...
Страница 324: ...316 Netfinity Server HMM...
Страница 325: ...Related service information 317...
Страница 326: ...318 Netfinity Server HMM...
Страница 327: ...Related service information 319...
Страница 340: ...332 Netfinity Server HMM...
Страница 341: ...Related service information 333...
Страница 346: ...338 Netfinity Server HMM...
Страница 402: ...IBM Part Number 00N5902 Printed in U S A S1 L 98 3...

