4-18
Replacing
parts
Hitachi Compute Rack 220S CRU Replacement Guide
4.
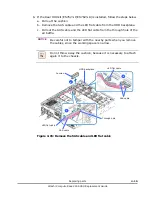
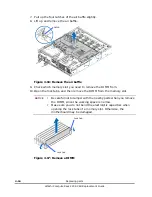
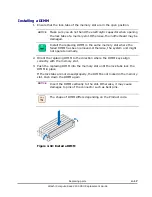
Perform the reverse procedure of removal to install the air baffle.
NOTICE
Make sure that cables do not get hung up on the side of the air
baffle when the air baffle is installed. Otherwise, the cables may
be damaged or disconnected.
Route the cables where that the cables do not touch heatsinks or
fans. Otherwise, the cables may be damaged by heat of
heatsinks or rotation of fans while in operation.
5.
Perform the reverse procedure of removal to connect the SAS cable and the
LED flat cable from the Rear HDD kit (ES7623-Y/ES7623-R) to the HDD
backplane if any.
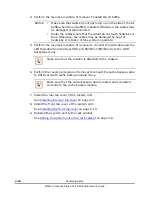
Make sure that the cushion is attached to the chassis.
6.
Perform the reverse procedure of removal to connect the cache backup cable
to RAID card with cache backup module if any.
Make sure that the cache backup cable is routed and connected
correctly to the cache backup module.
7.
Install the rear top cover of the system unit.
See
on page 3-9.
8.
Install the front top cover of the system unit.
See
Installing the front top cover
9.
Reinstall the system unit to the rack cabinet.
See
Sliding the system unit into a rack cabinet
Содержание Compute Rack 220S
Страница 1: ...MK 90CRS003 01 Hitachi Compute Rack 220S CRU Replacement Guide FAS TFIND LINK S Getting Help Contents ...
Страница 32: ...1 12 Introduction Hitachi Compute Rack 220S CRU Replacement Guide ...
Страница 74: ...4 24 Replacing parts Hitachi Compute Rack 220S CRU Replacement Guide ...
Страница 79: ...Hitachi Compute Rack 220S CRU Replacement Guide ...

