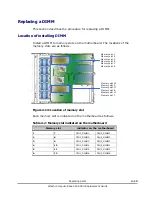

Replacing
parts
4-15
Hitachi Compute Rack 220S CRU Replacement Guide
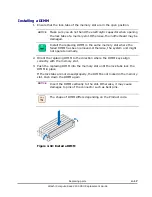
6.
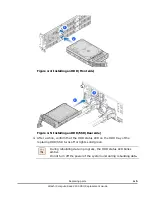
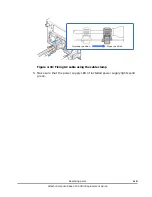
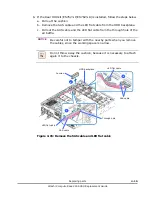
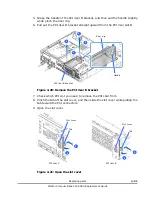
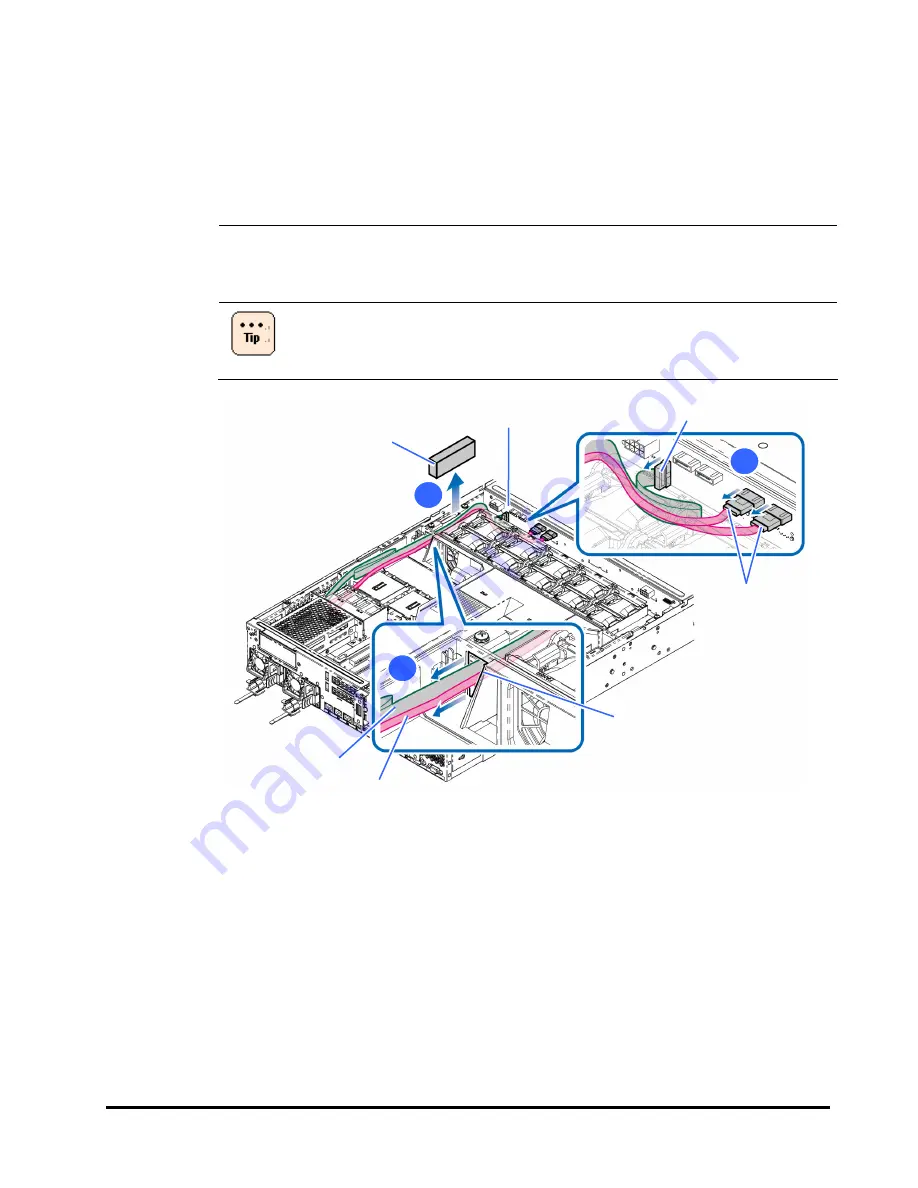
If the Rear HDD kit (ES7623-Y/ES7623-R) is installed, follow the steps below.
a.
Pull out the cushion.
b.
Remove the SAS cable and the LED flat cable from the HDD backplane.
c.
Pull out the SAS cable and the LED flat cable from the through hole of the
air baffle.
NOTICE
Be careful not to tamper with the nearby parts when you remove
the cables, since the working space is narrow.
Do not throw away the cushion, because it is necessary to attach
again it to the chassis.
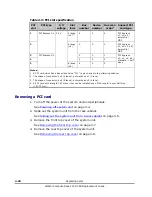
Figure 4-15: Remove the SAS cable and LED flat cable
c
b
a
Cushion
HDD backplane
LED flat cable
SAS cable
Through hole
SAS cable
LED flat cable
Содержание Compute Rack 220S
Страница 1: ...MK 90CRS003 01 Hitachi Compute Rack 220S CRU Replacement Guide FAS TFIND LINK S Getting Help Contents ...
Страница 32: ...1 12 Introduction Hitachi Compute Rack 220S CRU Replacement Guide ...
Страница 74: ...4 24 Replacing parts Hitachi Compute Rack 220S CRU Replacement Guide ...
Страница 79: ...Hitachi Compute Rack 220S CRU Replacement Guide ...


