Access Control Terminal
·
User Manual
79
Duress Card:
The card swiping action will be uploaded.
Super Card:
The card is valid for all the doors of the controller during the configured schedule.
Visitor Card:
The card is assigned for visitors.
2.
Click Add and select the available card.
3.
Click OK to confirm assigning the card(s) to the selected card type.
4.
Click the Apply button to take effect of the new settings.
Note:
You can click Delete to remove the card from the card type and the card can be available for being re-assigned.
Card Reader Authentication
Purpose:
You can only open the door by both swiping card and entering the password during the set time periods.
Notes:
For this authentication mode, the card swiping operation cannot be replaced by entering the card No..
For password settings, please refer to Section 16.2.3 Normal Card.
Steps:
1.
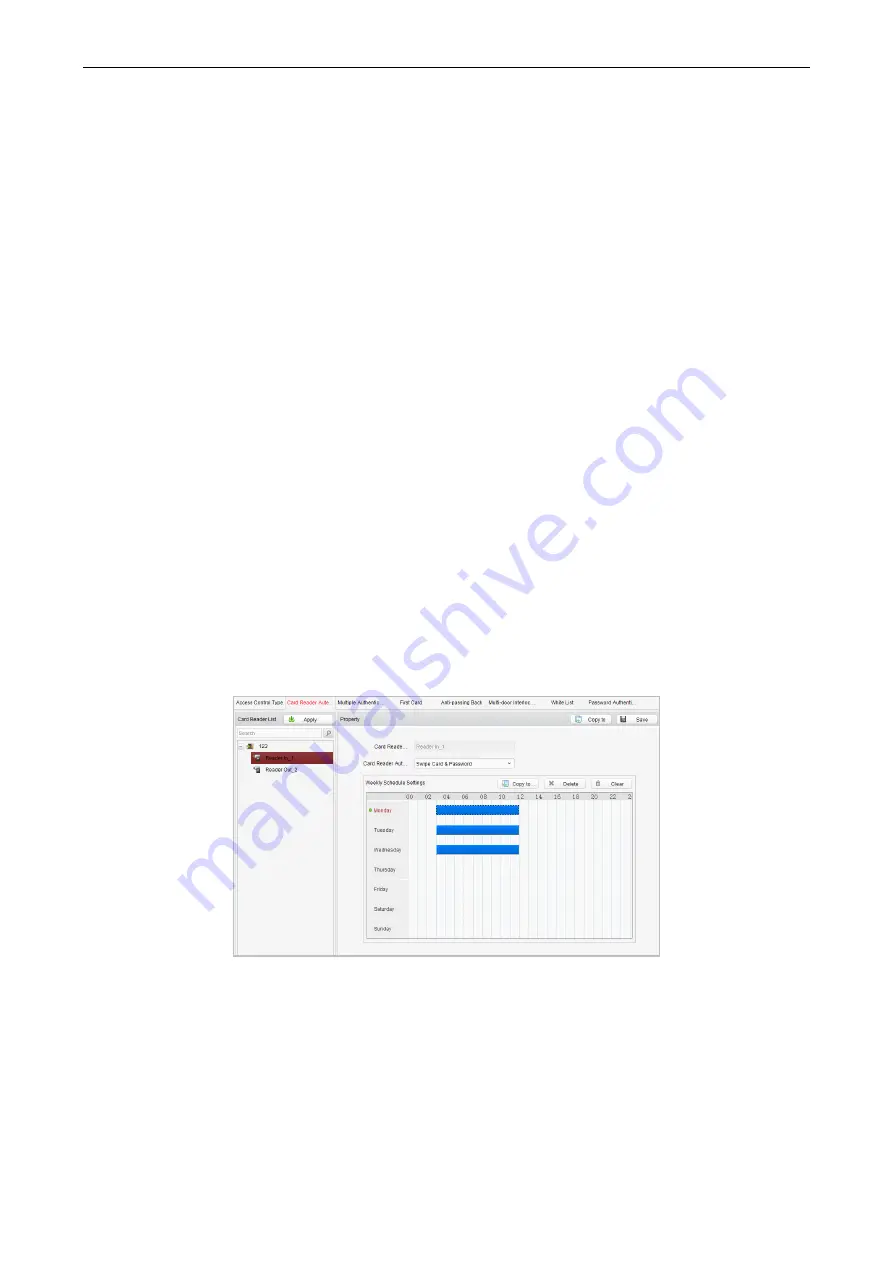
Click Card Reader Authentication tab and select a card reader.
2.
Select a card reader authentication type from the dropdown list.
Fingerprint:
The door can open by only inputting the fingerprint.
Swipe Card:
The door can open by only swiping the card.
Fingerprint/Swipe Card:
The door can open by inputting the fingerprint or swiping the card.
Swipe Card/Password:
The door can open by inputting the password or swiping the card.
Fingerprint Password:
The door can open by both inputting the password and inputting the fingerprint.
Swipe Card Password:
The door can open by both inputting the password and swiping the card.
Fingerprint Swipe Card:
The door can open by both inputting the fingerprint and swiping the card.
Fingerprint Swipe Card Password:
The door can open by inputting the fingerprint, inputting the password, and swiping the
card.
Note:
The fingerprint associated functions are only supported by device with fingerprint recognition module.
3.
Click and drag your mouse on a day to draw a blue bar on the schedule, which means in that period of time, the password
authentication is valid.
4.
Repeat the above step to set other time periods.
Or you can select a configured day and click the Copy to Week button to copy the same settings to the whole week.
You can click the Delete button to delete the selected time period or click the Clear button to delete all the configured time
periods.
5.
(Optional) Click the Copy to button to copy the settings to other card readers.
6.
Click the Save button to save parameters.
7.
Click the Apply button to take effect of the new settings.
Multiple Authentication
You can manage the cards by group and set the authentication for multiple cards for one access controller.
Содержание DS-K1T105 Series
Страница 1: ...Access Control Terminal User Manual V1 1 0 UD01651B...
Страница 99: ...Access Control Terminal User Manual 95...


