99
5.
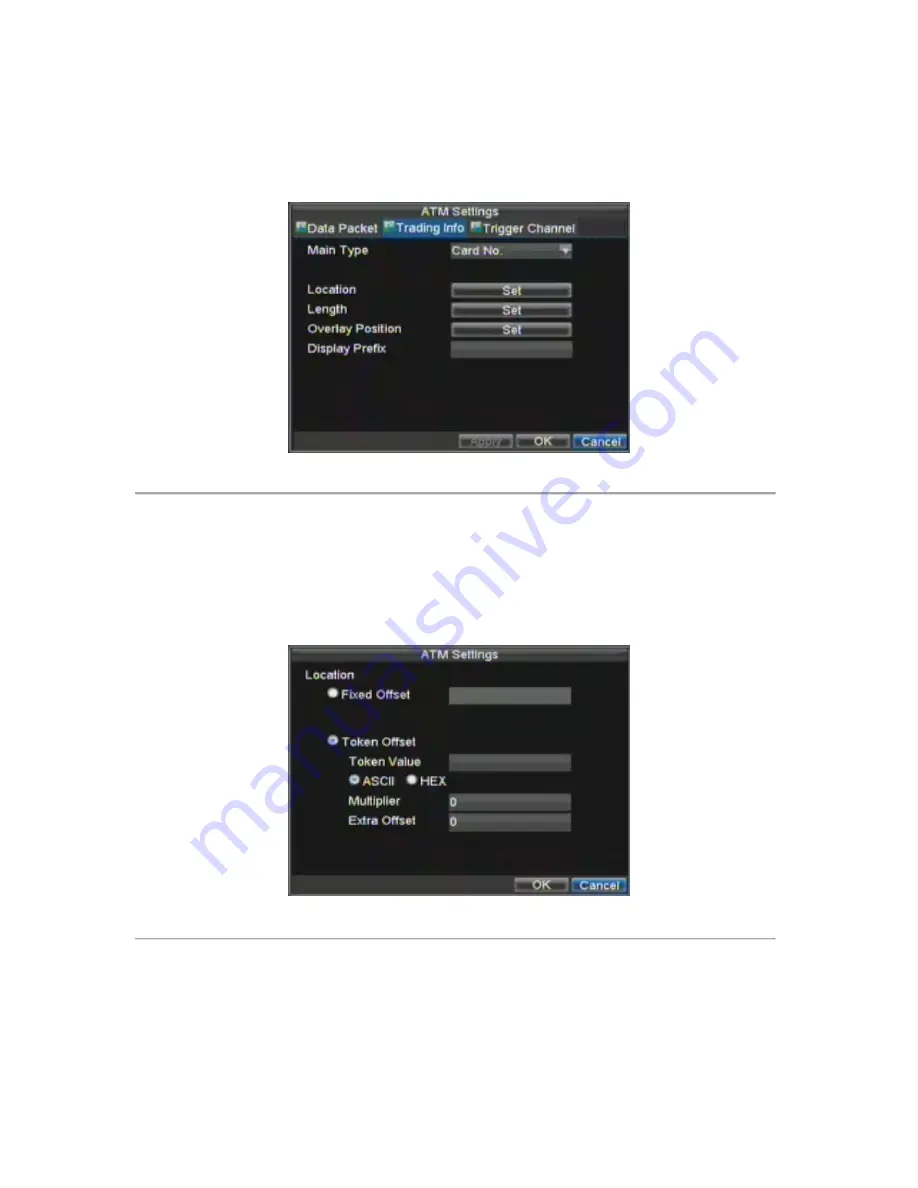
Trading Information Settings, shown as Figure 3: Set the main type, with Card No., Trade Action,
Trade Amount and Serial No. selectable. Set the location, length, overlay position of the selected
main type. If required, input the characters beside
Display Prefix
to add a prefix to the selected main
type. After completion of Trading Info settings, click the
Trigger Channel
item to enter the menu.
Figure 3. Trading Info Menu
Note:
When the main type is set to Trade Action, user may select the corresponding sub-type, with the InCard,
OutCard, Overlay, Query, Withdraw, Deposit, Change Password and Transfer options selectable.
6.
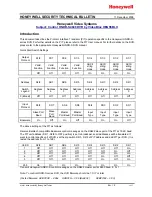
Set the
Location
of the main type: Click the
Set
button beside
Location
to enter the menu, shown as Figure
4. Select the location of the card No. in the message to
Fixed Offset
or
Token
Offset
. In token offset mode,
user may set the identifier (ASCII/HEX) and extra offset to determine the position of the content in the
message, as well as set the multiplier of the identifier.
Figure 4. Location Menu
7.
Set the
Length
of the main type: Click the
Set
button beside
Length
to enter the menu shown as Figure 5.
Set the length of the card No. to
Fixed Length
,
Variable Length
or
Auto Length
. In variable length mode,
user may set the End Character to determine the length of the card No. In auto length mode, user may set the
length value and position to obtain the card No. length from the message.
Содержание DS-8100-ST Series
Страница 1: ...DS 8100 ST Series DVR USER MANUAL ...
Страница 8: ...7 C H A P T E R 1 Introduction ...
Страница 22: ...21 C H A P T E R 2 Getting Started ...
Страница 29: ...28 C H A P T E R 3 Live Preview ...
Страница 34: ...33 C H A P T E R 4 Record Settings ...
Страница 43: ...42 C H A P T E R 5 Playback ...
Страница 50: ...49 Figure 12 Digital Zoom in Playback Mode ...
Страница 51: ...50 C H A P T E R 6 Backup ...
Страница 58: ...57 C H A P T E R 7 Alarm Settings ...
Страница 71: ...70 C H A P T E R 8 Network Settings ...
Страница 79: ...78 C H A P T E R 9 PTZ Control ...
Страница 85: ...84 C H A P T E R 1 0 Camera Management ...
Страница 88: ...87 Figure2 Setting Mask Area 6 Select Exit to save settings and exit the Mask Area Settings interface ...
Страница 89: ...88 C H A P T E R 1 1 HDD Management ...
Страница 98: ...97 C H A P T E R 1 2 ATM Settings ...
Страница 107: ...106 C H A P T E R 1 3 DVR Management ...
Страница 119: ...118 C H A P T E R 1 4 Appendix ...


