68
8.
Click
OK
to finish the settings.
9.
Repeat above steps to configure settings for other channels.
Exception Settings
The exception setting allows the DVR to alert you when irregular events occur. These events include:
•
HDD Full:
All installed HDD are full.
•
HDD Error:
Errors occurred during writing of the HDD, no HDD installed or HDD had failed to
initialize.
•
Network Disconnected:
Disconnected network cable.
•
IP Conflicted:
Conflict in IP address setting.
•
Illegal Login:
Incorrect user ID or password used.
•
Video Output Standard Mismatch:
video output standards do not match with each other.
•
Abnormal Recording:
No recording HDD.
To set exceptions:
1.
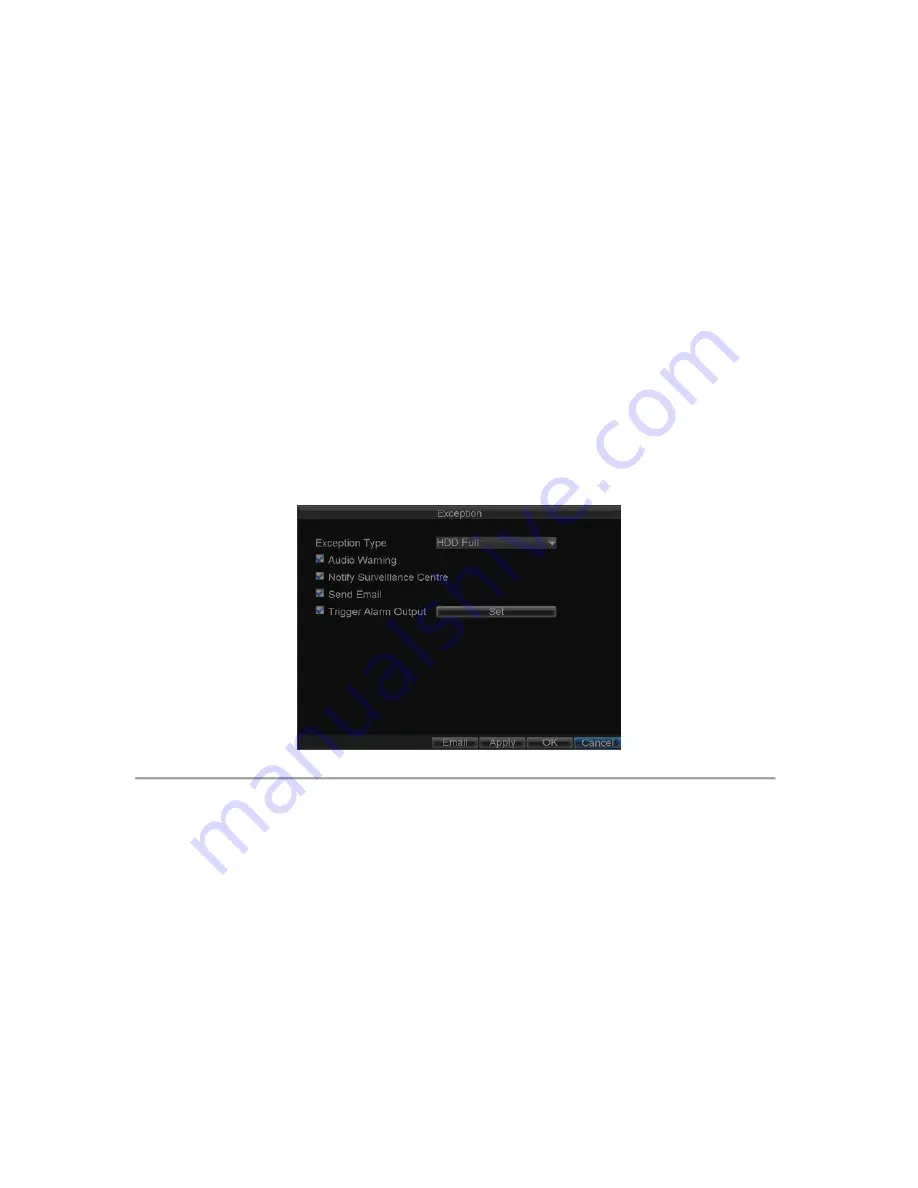
Click Menu > Settings> Exception to enter the Exception menu.
2.
Select the exception to configure under
Exception Type
.
3.
Select triggering options, as shown in Figure22. Trigger options are further explained in the next
section (See
Understanding Exception Trigger Options
).
Figure 22. Exception Menu
4.
Click
OK
to save settings and exit Exception menu.
Understanding Exception Trigger Options
When setting up exception handlers for such features as motion detection and relay alarms, you may select triggering
options to alert you of these exceptions.
The triggering options that you may select include:
• Pop-up Image on Monitor:
When an alarm is triggered, the local monitor (VGA or BNC monitor) will
display an image in Live Preview mode. This alarm can be configured under the Popup Alarm Image
handle method. For alarms that are triggered simultaneously, images will be displayed one at a time every
10 seconds (default dwell time). A different dwell time can be set by going to Menu > Setting > Display >
Dwell Time. Once the alarm stops, cycling of the images will also stop and you’ll be returned to the Live
Preview screen.
• Audio Warning:
Trigger an audible
beep
when exception is detected.
• Notify Surveillance Centre:
Sends a signal to remote alarm host when exception is detected (See
Содержание DS-8100-ST Series
Страница 1: ...DS 8100 ST Series DVR USER MANUAL ...
Страница 8: ...7 C H A P T E R 1 Introduction ...
Страница 22: ...21 C H A P T E R 2 Getting Started ...
Страница 29: ...28 C H A P T E R 3 Live Preview ...
Страница 34: ...33 C H A P T E R 4 Record Settings ...
Страница 43: ...42 C H A P T E R 5 Playback ...
Страница 50: ...49 Figure 12 Digital Zoom in Playback Mode ...
Страница 51: ...50 C H A P T E R 6 Backup ...
Страница 58: ...57 C H A P T E R 7 Alarm Settings ...
Страница 71: ...70 C H A P T E R 8 Network Settings ...
Страница 79: ...78 C H A P T E R 9 PTZ Control ...
Страница 85: ...84 C H A P T E R 1 0 Camera Management ...
Страница 88: ...87 Figure2 Setting Mask Area 6 Select Exit to save settings and exit the Mask Area Settings interface ...
Страница 89: ...88 C H A P T E R 1 1 HDD Management ...
Страница 98: ...97 C H A P T E R 1 2 ATM Settings ...
Страница 107: ...106 C H A P T E R 1 3 DVR Management ...
Страница 119: ...118 C H A P T E R 1 4 Appendix ...


