17
Using the USB Mouse
A regular 3-button (Left/Right/Scroll-wheel) USB mouse can also be used with this DVR. To use a USB mouse:
1.
Plug USB mouse into one of the USB ports on the front panel of the DVR.
2.
The mouse should automatically be detected. If in a rare case that the mouse is not detected, please
refer to the recommended device list from your provider.
The buttons on the mouse corresponds to:
1.
Left Button:
•
Single-Click:
Select a component of a menu, such as a button or an input field. This is similar to
pressing the ENTER button on the remote/front panel controls.
•
Double-Click:
Switch between single screen and multi-screen mode in Preview/ Playback mode.
•
Click and Drag:
Clicking and dragging the Left mouse button can be used to control the pan/tilt of a
PTZ camera as well as to vary the position of digital zoom area and camera OSD. It can also be used
to setup the alarm areas.
2.
Right Button:
•
Single-Click:
Shows pop-up menu.
3.
Scroll-Wheel:
•
Scroll Up:
In Preview mode, scrolling up will switch to the previous screen. In Menu mode, it will
move the selection to the previous item.
•
Scroll Down:
In Preview mode, scrolling down will switch to the next screen. In Menu mode, it will
move the selection to the next item.
Using the Soft Keyboard
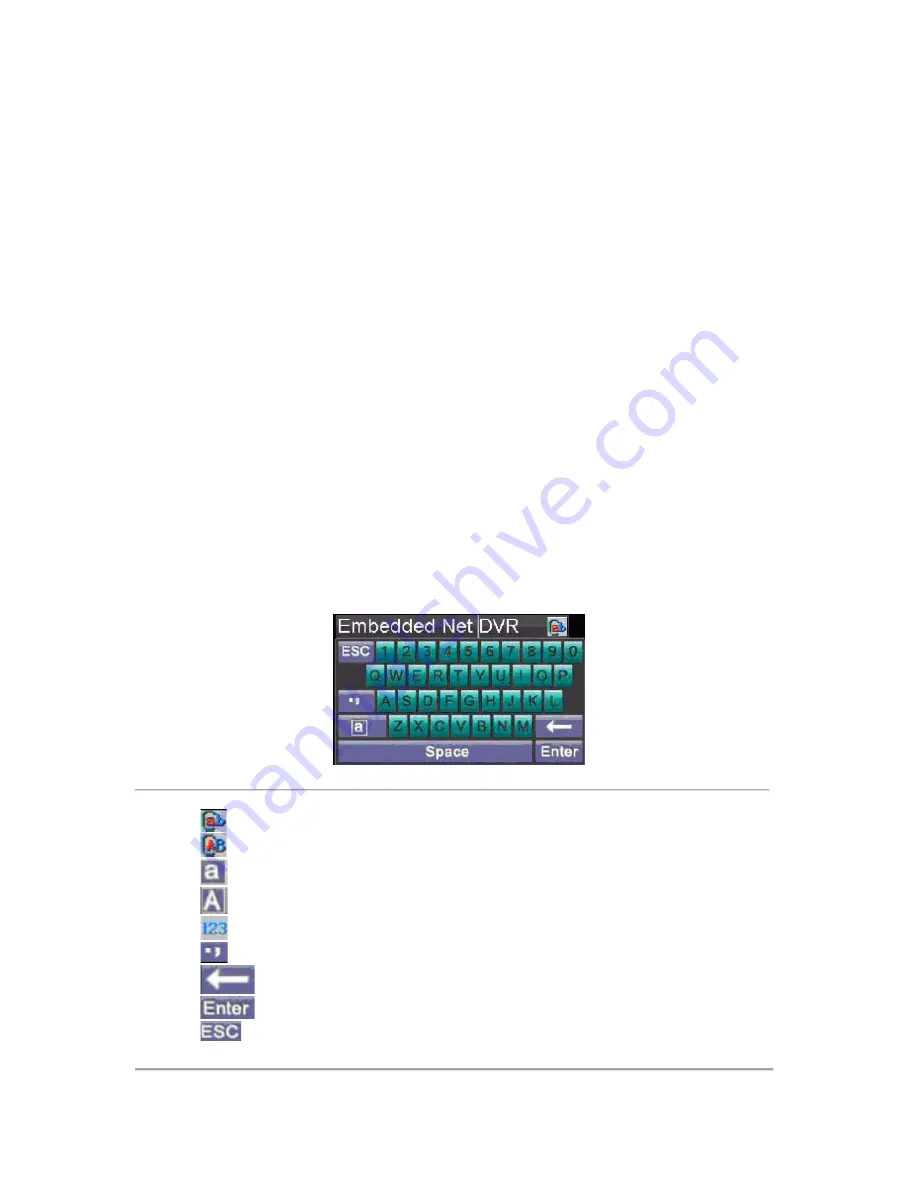
When a mouse is used to perform task on the DVR, clicking on a text input field will bring up the Soft Keypad, shown
in Figure 8.
Figure 8. Soft Keypad
The buttons on the soft keyboard represents:
Lowercase:
Designates lowercase input is being used.
Uppercase:
Designates uppercase input is being used.
Switch to Uppercase:
Switch to uppercase input.
Switch to Lowercase:
Switch to lowercase input.
Number:
Designates number input is being used.
Symbols:
Switch to symbols input.
Backspace:
Delete the character in front of the cursor.
Enter:
Confirm selection.
ESC:
Exit out of Soft Keyboard.
Figure 9. Soft Keyboard Buttons
Содержание DS-8100-ST Series
Страница 1: ...DS 8100 ST Series DVR USER MANUAL ...
Страница 8: ...7 C H A P T E R 1 Introduction ...
Страница 22: ...21 C H A P T E R 2 Getting Started ...
Страница 29: ...28 C H A P T E R 3 Live Preview ...
Страница 34: ...33 C H A P T E R 4 Record Settings ...
Страница 43: ...42 C H A P T E R 5 Playback ...
Страница 50: ...49 Figure 12 Digital Zoom in Playback Mode ...
Страница 51: ...50 C H A P T E R 6 Backup ...
Страница 58: ...57 C H A P T E R 7 Alarm Settings ...
Страница 71: ...70 C H A P T E R 8 Network Settings ...
Страница 79: ...78 C H A P T E R 9 PTZ Control ...
Страница 85: ...84 C H A P T E R 1 0 Camera Management ...
Страница 88: ...87 Figure2 Setting Mask Area 6 Select Exit to save settings and exit the Mask Area Settings interface ...
Страница 89: ...88 C H A P T E R 1 1 HDD Management ...
Страница 98: ...97 C H A P T E R 1 2 ATM Settings ...
Страница 107: ...106 C H A P T E R 1 3 DVR Management ...
Страница 119: ...118 C H A P T E R 1 4 Appendix ...


