24
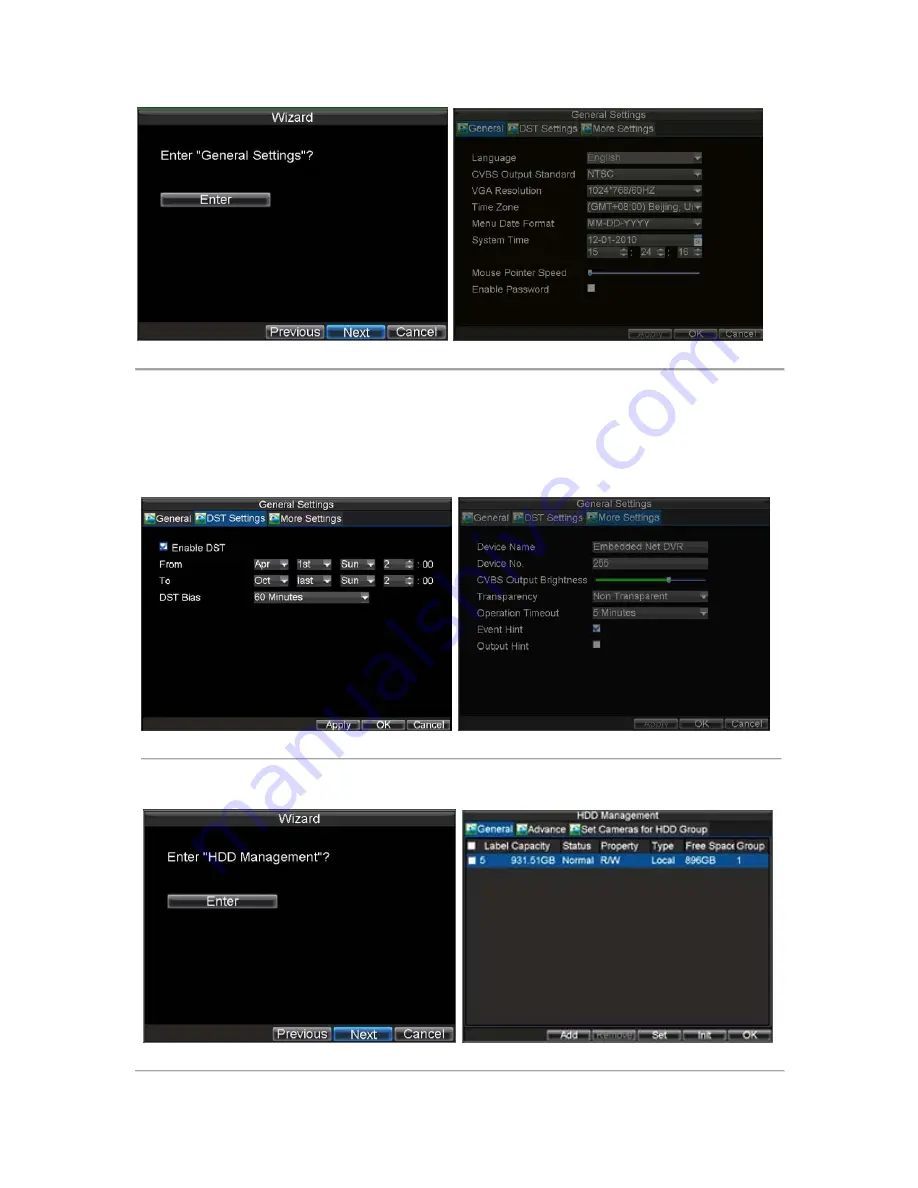
Figure 4. General Settings
6.
Click the Enter button to enter the General Settings interface.
7.
Select the language, output standard, VGA resolution and time zone here. If you do not need to input
password whenever you enter the menu, you can disable password.
8.
Enter the correct date and time under
System Time
. Click the Apply button to save the setting.
9.
Select the
DST Settings
tab to enable DST, and
More Settings
to change device name and number,
shown in Figure5.
Figure 5. General Settings-DST & More Settings
10.
Click OK to return to the
Setup Wizard
window.
11.
Click
Next
button to enter the
HDD Management
dialog box, shown in Figure 6.
Figure 6. HDD Management
Содержание DS-8100-ST Series
Страница 1: ...DS 8100 ST Series DVR USER MANUAL ...
Страница 8: ...7 C H A P T E R 1 Introduction ...
Страница 22: ...21 C H A P T E R 2 Getting Started ...
Страница 29: ...28 C H A P T E R 3 Live Preview ...
Страница 34: ...33 C H A P T E R 4 Record Settings ...
Страница 43: ...42 C H A P T E R 5 Playback ...
Страница 50: ...49 Figure 12 Digital Zoom in Playback Mode ...
Страница 51: ...50 C H A P T E R 6 Backup ...
Страница 58: ...57 C H A P T E R 7 Alarm Settings ...
Страница 71: ...70 C H A P T E R 8 Network Settings ...
Страница 79: ...78 C H A P T E R 9 PTZ Control ...
Страница 85: ...84 C H A P T E R 1 0 Camera Management ...
Страница 88: ...87 Figure2 Setting Mask Area 6 Select Exit to save settings and exit the Mask Area Settings interface ...
Страница 89: ...88 C H A P T E R 1 1 HDD Management ...
Страница 98: ...97 C H A P T E R 1 2 ATM Settings ...
Страница 107: ...106 C H A P T E R 1 3 DVR Management ...
Страница 119: ...118 C H A P T E R 1 4 Appendix ...


