Control Interface Setup and Maintenance
4.
Save the GTI software update file to the
\GRACO\SOFTWARE\ folder on the USB drive.
To automatically create the SOFTWARE folder
on the USB drive, insert the USB into the control
interface and press the soft key next to the
Software Update icon
on Advanced
Screen 4. See
Note
Limit the number of software update
files in the folder on the USB to 14. The
software on the control interface can only
display the first 14 updates found.
5.
After the software is downloaded to the USB
drive, exit the browser and remove the USB drive
from the computer.
Transfer
Transfer
Transfer Software
Software
Software from
from
from USB
USB
USB to
to
to System
System
System
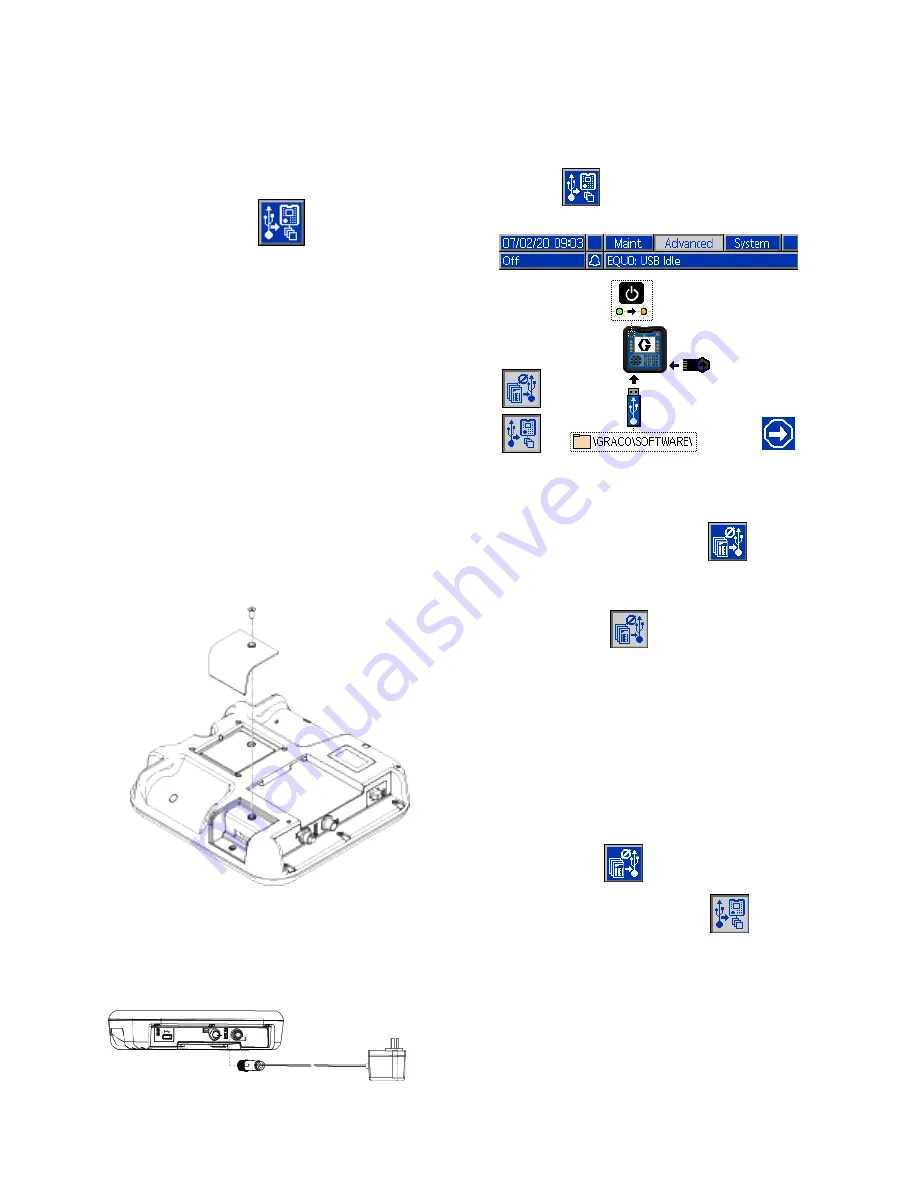
After downloading a system software update to a
USB drive, use this procedure to transfer the update
from the USB drive to the control interface.
Prepare the control interface to receive the software:
1.
Place the control interface face down on a flat
surface and remove the token access cover.
2.
Turn the control interface face up.
3.
Supply electrical power to the control interface
using either system power or Power Supply
Kit 24F672, which is available separately. The
control interface starts and is ready for use when
power is supplied.
Transfer the software to the system:
1.
Navigate to Advanced Screen 4. See
. Press the soft key
next to the
icon. Follow the on-screen
prompts on the Software Update Start screen.
Figure 21 Software Update Start Screen
2.
Consider whether to disable the upload/download
options:
Pressing the soft key next to the
icon
disables the upload/download options for USB
logs, system settings, and custom language files.
Upload/download options are disabled when the
icon appears gray
.
Note
Disabling the upload/download options
allows for a faster software transfer
procedure. However, a factory reset
to default settings is possible during
the software transfer procedure. Graco
recommends that upload/download
options remain enabled if any data logs,
system settings, and custom language
files are critical. Upload/download
options are enabled when the icon
appears blue
.
Press the soft key next to the
icon
to exit the USB update screen.
42
3A8492A
Содержание HydroShield WABH00
Страница 139: ...Notes Notes Notes Notes 3A8492A 139...


