Aisys
9-24
04/08 M1046983
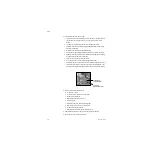
9.11.2
Disassemble the
Display Unit
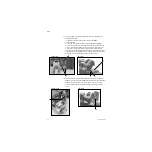
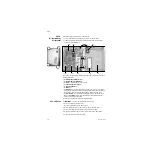
Place the Display Unit face down on an anti-static pad.
1. Loosen (
L
) the four captive screws at each corner of the rear enclosure.
2. Lift the rear enclosure slightly and pivot it away from the lower enclosure at the
bottom side of the Display Unit.
At this point, you can replace the following items (The item numbers refer to the parts
list in Section 10.41):
• the
internal Compact Flash card
(27)
• the
external Compact Flash Kit
(28)
• the
fan
(24) — for the HPDU this is a 12-volt fan
• the
connector panel assembly
(21)
• the
encoder assembly
(12)
• the
battery
(5)
• the
speaker
(20) — (To access the mounting screws for the speaker, you must first
remove the ten screws that hold the mounting plate to the front enclosure so that you
can raise the bottom edge of the assembly slightly — Refer to section 9.11.5.)
• the
rear enclosure
(1) — You can transfer the captive screws to the new enclosure.
However, the
gasket
(2) is held in place with adhesive. When replacing the rear
enclosure, also include a new gasket.
To replace the remaining items requires further disassembly.
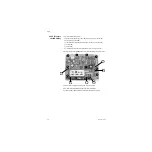
9.11.3 CPU Fan
w
CAUTION
: Do not remove the heatsink from the CPU board.
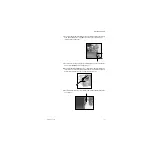
1. Note the orientation of the fan harness.
Disconnect the fan harness from the CPU board.
2. Remove the fan (29) from the CPU heatsink, leaving the heatsink in place.
3. Remove the heatsink (discard) from the replacement fan assembly.
4. Noting the orientation of the fan harness, secure the fan to the CPU heatsink.
5. Connect the fan harness to the CPU board.
20
12
L
L
L
L
(24)
(21)
(2)
(1)
(5)
(27)
(29)
(28)
Содержание Datex-Ohmeda Aisys Carestation
Страница 1: ...Aisys Anesthesia Machine Technical Reference Manual ...
Страница 16: ...Notes xiv 04 08 M1046983 ...
Страница 32: ...Notes 1 16 04 08 M1046983 ...
Страница 35: ...2 Theory of Operation M1046983 04 08 2 3 A M AB 75 098 L H D AB 75 046 J G I F K P O E D B C H N ...
Страница 158: ...Notes 5 20 04 08 M1046983 ...
Страница 288: ...Notes 7 106 04 08 M1046983 ...
Страница 325: ...9 Repair Procedures M1046983 04 08 9 29 The rear inverter A B C ...
Страница 356: ...Notes 9 60 04 08 M1046983 ...
Страница 397: ...10 Illustrated Parts M1046983 04 08 10 41 1 3 4 2 17 15 16 5 6 13 non DES cassette DES cassette 7 8 11 12 10 5 14 18 9 ...
Страница 399: ...10 Illustrated Parts M1046983 04 08 10 43 14 1 2 3 6 5 4 5 8 7 15 16 15 12 17 10 9 11 13 or 18 ...
Страница 401: ...10 Illustrated Parts M1046983 04 08 10 45 14 1 2 3 6 5 4 5 8 7 15 16 18 17 10 9 11 12 13 or ...
Страница 403: ...10 Illustrated Parts M1046983 04 08 10 47 14 15 18 1 2 3 6 5 4 5 8 7 17 10 9 11 15 16 12 13 or 17a 17c 17d 17b 17e ...
Страница 452: ...Notes 10 96 04 08 M1046983 ...
Страница 466: ...11 14 04 08 M1046983 Notes ...
Страница 470: ...Aisys 12 4 04 08 M1046983 12 3 System Schematics 12 3 1 Power Schematic ...
Страница 478: ...Aisys 12 12 04 08 M1046983 12 6 3 Tools Transfer Logs ...
Страница 495: ...12 Service Application M1046983 04 08 12 29 12 10 2 Vaporizer Subsystem Perform Vaporizer Test ...
Страница 497: ......


