


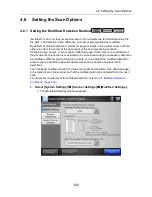

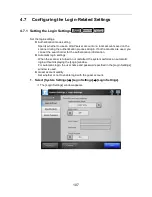


4.5 Configuring the System
94
4.5
Configuring the System
4.5.1 Setting the Scanner Name
Set a scanner name to provide a network alias for the scanner.
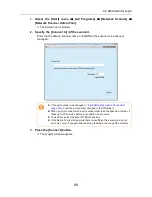
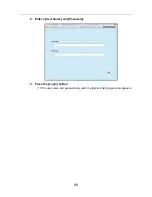
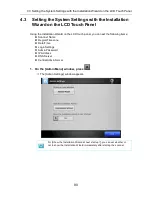
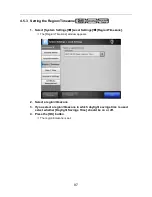
1. Select [System Settings]
J
[Local Settings]
J
[Scanner Name].
D
The [Scanner Name] window appears.
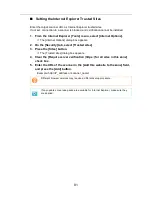
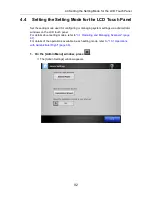
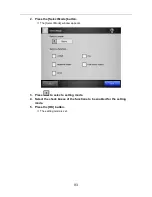
2. Enter a [Scanner Name].
3. In the [Member of] section, specify the scanner as a [Workgroup] or
[Domain] member.
4. Enter a workgroup name or domain name in the input field.
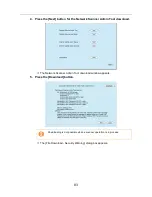
5. Press the [OK] button.
D
The restart confirmation window appears.
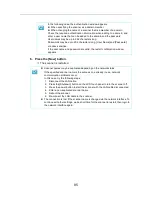
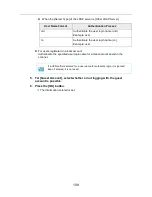
Do not use a name already being used in the network.
Name duplication will cause a network connection error. For details about how to
deal with such errors, refer to
"4.18.1 Administrator Window Messages" (page 225)
.
Содержание ScanSnap N1800
Страница 1: ...ScanSnap N1800 Network Scanner Operator s Guide P3PC 3182 01ENZ0 ...
Страница 17: ...17 ...
Страница 29: ...29 ...
Страница 55: ...55 ...
Страница 65: ...65 ...
Страница 73: ...73 ...
Страница 271: ...271 7 Press the Back button D The Central Admin Console main window appears again ...
Страница 355: ...355 D The Main Menu window is shown again ...
Страница 379: ...379 4 Enter a password and confirm password 5 Press the OK button D The PDF will be created with password protection ...
Страница 415: ...415 ...
Страница 441: ...441 ...
Страница 481: ...481 ...
Страница 488: ...488 Appendix C Root Certification Authority This appendix provides an explanation of root certification authority ...
Страница 492: ...492 Appendix D Scanner Specifications This appendix gives specifications for the scanner ...
Страница 527: ...527 ...
Страница 528: ...528 Appendix G Glossary ...
Страница 533: ...533 ...
Страница 535: ...535 ...