1.2 Connecting a cable
23
4.
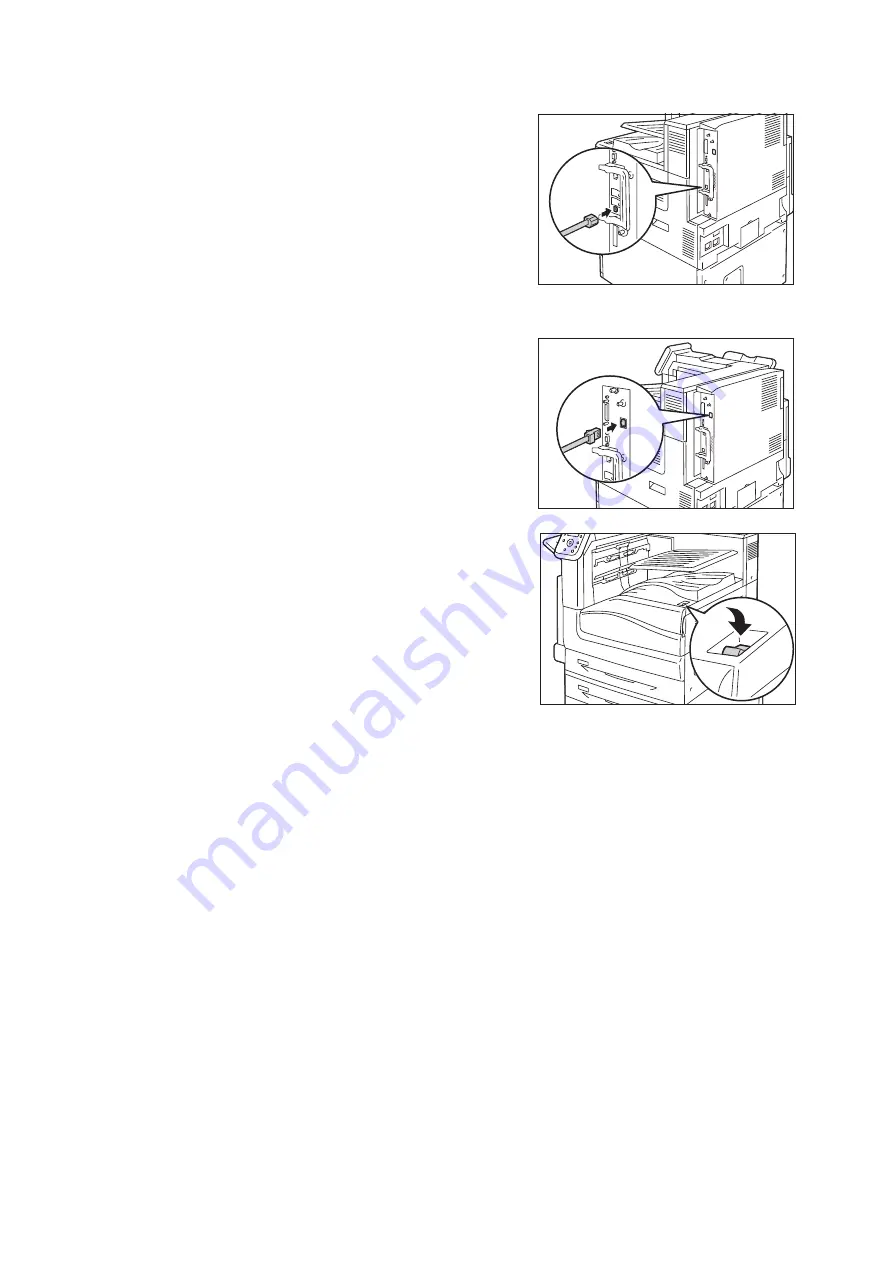
Plug the network cable into the interface
connector on the printer.
Important
• Position of the connector varies according to whether the
optional Gigabit Ethernet Board Kit is installed or not.
Make sure to connect with the appropriate connector for
your environment.
• The connector in the standard configuration cannot be
used when the Gigabit Ethernet Board Kit is installed.
• MAC address is the same as in the standard configuration
when installing the Gigabit Ethernet Board Kit.
• LED1 on the Gigabit Ethernet Board Kit lights up as
follows according to the network environment connected.
10BASE-T environment: Off
100BASE-T environment: Lights in yellow
1000BASE-T environment: Lights in blue
5.
Plug the other end of the network cable into a
network device such as a hub.
6.
Press the < | > side of the printer’s main power
switch to turn on the main power and then
close the front cover.
7.
Press the < | > side of the printer’s power
switch to turn on the power.
Example:Standard configuration
Example:When the Gigabit Ethernet
Board Kit is installed.
Содержание DocuPrint C5155d
Страница 1: ...DocuPrint C5155 d User Guide ...
Страница 67: ...3 3 Printing on Custom Size or Long size Paper 67 2 Click the Device Settings tab 3 Click Custom Paper Size ...
Страница 207: ...6 1 Clearing Paper Jams 207 4 Push the tray in gently until it stops ...
Страница 372: ...372 7 Maintenance 23 When the setting is over press the Settings button to return to the print screen ...
Страница 433: ...DocuPrint C5155 d User Guide Fuji Xerox Co Ltd ME8615E2 1 Edition1 February 2019 Copyright 2019 by Fuji Xerox Co Ltd ...


