Chapter 2 Button & LED
66
Code
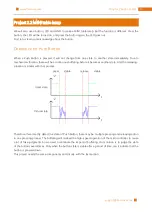
In the project, we still detect the state of Button to control LED. Here we need to define a variable to save the
state of LED. And when the button is pressed once, the state of LED will be changed once. This has achieved
the function of the table lamp.
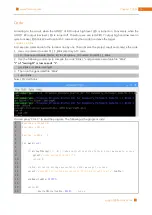
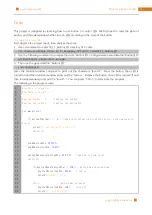
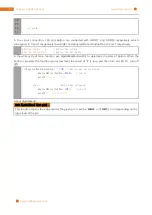
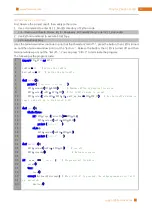
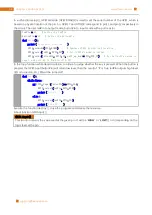
C Code 2.2.1 Tablelamp
First observe the project result, and then analyze the code.
1.
Use cd command to enter 02.2.1_Tablelamp directory of C code.
cd ~/Freenove_Ultimate_Starter_Kit_for_Raspberry_Pi/Code/C_Code/02.1.1_Tablelamp
2.
Use following command to compile “Tablelamp.c” and generate executable file “Tablelamp”.
gcc Tablelamp.c -o Tablelamp -lwiringPi
3.
Tablelamp. Then run the generated file “Tablelamp”.
sudo ./Tablelamp
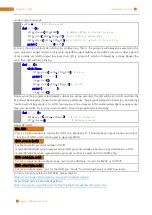
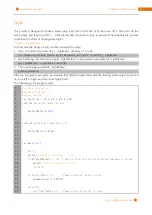
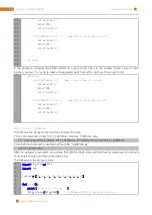
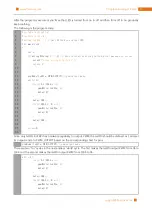
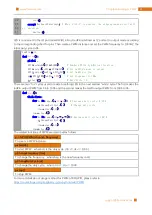
When the program is executed, press the Button once, then LED is turned on. Press the Button another time,
then LED is turned off.
1
2
3
4
5
6
7
8
9
10
11
12
13
14
15
16
17
18
19
20
21
22
23
24
25
26
27
28
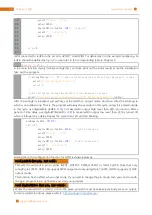
#include <wiringPi.h>
#include <stdio.h>
#define ledPin 0
//define the ledPin
#define buttonPin 1
//define the buttonPin
int
ledState
=
LOW
;
//store the State of led
int
buttonState
=
HIGH
;
//store the State of button
int
lastbuttonState
=
HIGH
;//store the lastState of button
long
lastChangeTime
;
//store the change time of button state
long
captureTime
=
50
;
//set the button state stable time
int
reading
;
int
main
(
void
)
{
if
(
wiringPiSetup
()
==
-
1
){
//when initialize wiring failed,print message to screen
printf
(
"setup wiringPi failed !"
);
return
1
;
}
printf
(
"Program is starting...\n"
);
pinMode
(
ledPin
,
OUTPUT
);
pinMode
(
buttonPin
,
INPUT
);
pullUpDnControl
(
buttonPin
,
PUD_UP
);
//pull up to high level
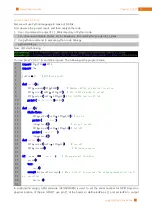
while
(
1
){
reading
=
digitalRead
(
buttonPin
);
//read the current state of button
if
(
reading
!=
lastbuttonState
){
//if the button state has changed ,record the
time point
lastChangeTime
=
millis
();
}
Содержание Ultimate Starter Kit
Страница 1: ...Free your innovation Freenove is an open source electronics platform www freenove com ...
Страница 116: ...Chapter 9 Potentiometer RGBLED 116 www freenove com support freenove com Circuit Schematic diagram ...
Страница 117: ...117 Chapter 9 Potentiometer RGBLED www freenove com support freenove com Hardware connection ...
Страница 136: ...Chapter 12 Joystick 136 www freenove com support freenove com Circuit Schematic diagram Hardware connection ...
Страница 155: ...155 Chapter 14 Relay Motor www freenove com support freenove com Hardware connection OFF 3 3V ...
Страница 173: ...173 Chapter 16 Stepping Motor www freenove com support freenove com Hardware connection ...
Страница 182: ...Chapter 17 74HC595 LEDBar Graph 182 www freenove com support freenove com Circuit Schematic diagram Hardware connection ...
Страница 197: ...197 Chapter 18 74HC595 7 segment display www freenove com support freenove com Circuit Schematic diagram ...
Страница 198: ...Chapter 18 74HC595 7 segment display 198 www freenove com support freenove com Hardware connection ...
Страница 239: ...239 Chapter 22 Matrix Keypad www freenove com support freenove com Circuit Schematic diagram ...
Страница 240: ...Chapter 22 Matrix Keypad 240 www freenove com support freenove com Hardware connection ...
Страница 270: ...Chapter 26 WebIOPi IOT 270 www freenove com support freenove com Circuit Schematic diagram Hardware connection ...

