265
Chapter 25 Attitude Sensor MPU6050
19
20
21
22
23
24
25
26
27
28
29
30
31
32
33
34
35
36
37
38
39
40
printf
(
accelgyro
.
testConnection
()
?
"MPU6050 connection successful\n"
:
"MPU6050
connection failed\n"
);
}
void
loop
( )
{
// read raw accel/gyro measurements from device
accelgyro
.
getMotion6
(&
ax
,
&
ay
,
&
az
,
&
gx
,
&
gy
,
&
gz
) ;
// display accel/gyro x/y/z values
printf
(
"a/g: %6hd %6hd %6hd %6hd %6hd %6hd\n"
,
ax
,
ay
,
az
,
gx
,
gy
,
gz
);
printf
(
"a/g: %.2f g %.2f g %.2f g %.2f d/s %.2f d/s %.2f d/s
\n"
, (
float
)
ax
/
16384
,(
float
)
ay
/
16384
,(
float
)
az
/
16384
,
(
float
)
gx
/
131
,(
float
)
gy
/
131
,(
float
)
gz
/
131
);
}
int
main
( )
{
setup
();
w h ile
(
1
){
loop
( );
}
r e turn
0
;
}
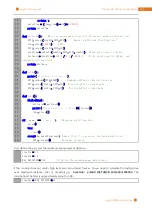
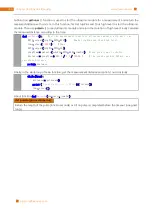
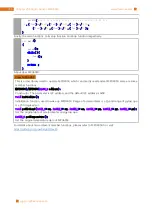
Two library files "
MPU6050
.h" and "
I2Cdev
.h" are used in the code. They will be compiled as others. Class
MPU6050 is used to operate the MPU6050. When used, first instantiate an object.
MPU6050 accelgyro
;
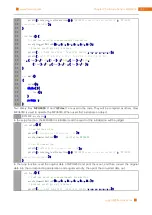
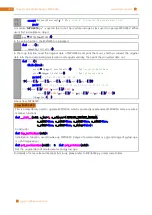
In the setup function, the MPU6050 is initialized and the result of the initialization will be judged.
void
setup
( )
{
// initialize device
printf
(
"Initializing I2C devices...\n"
);
accelgyro
.
initialize
();
//initialize MPU6050
// verify connection
printf
(
"Testing device connections...\n"
);
printf
(
accelgyro
.
testConnection
()
?
"MPU6050 connection successful\n"
:
"MPU6050
connection failed\n"
);
}
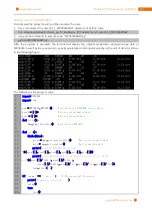
In the loop function, read the original data of MPU6050 and print them out, and then convert the original
data into the corresponding acceleration and angular velocity, then print the converted data out.
void
loop
( )
{
// read raw accel/gyro measurements from device
accelgyro
.
getMotion6
(&
ax
,
&
ay
,
&
az
,
&
gx
,
&
gy
,
&
gz
) ;
// display accel/gyro x/y/z values
printf
(
"a/g: %6hd %6hd %6hd %6hd %6hd %6hd\n"
,
ax
,
ay
,
az
,
gx
,
gy
,
gz
);
Содержание Ultimate Starter Kit
Страница 1: ...Free your innovation Freenove is an open source electronics platform www freenove com ...
Страница 116: ...Chapter 9 Potentiometer RGBLED 116 www freenove com support freenove com Circuit Schematic diagram ...
Страница 117: ...117 Chapter 9 Potentiometer RGBLED www freenove com support freenove com Hardware connection ...
Страница 136: ...Chapter 12 Joystick 136 www freenove com support freenove com Circuit Schematic diagram Hardware connection ...
Страница 155: ...155 Chapter 14 Relay Motor www freenove com support freenove com Hardware connection OFF 3 3V ...
Страница 173: ...173 Chapter 16 Stepping Motor www freenove com support freenove com Hardware connection ...
Страница 182: ...Chapter 17 74HC595 LEDBar Graph 182 www freenove com support freenove com Circuit Schematic diagram Hardware connection ...
Страница 197: ...197 Chapter 18 74HC595 7 segment display www freenove com support freenove com Circuit Schematic diagram ...
Страница 198: ...Chapter 18 74HC595 7 segment display 198 www freenove com support freenove com Hardware connection ...
Страница 239: ...239 Chapter 22 Matrix Keypad www freenove com support freenove com Circuit Schematic diagram ...
Страница 240: ...Chapter 22 Matrix Keypad 240 www freenove com support freenove com Hardware connection ...
Страница 270: ...Chapter 26 WebIOPi IOT 270 www freenove com support freenove com Circuit Schematic diagram Hardware connection ...

