193
Chapter 18 74HC595 & 7-segment display.
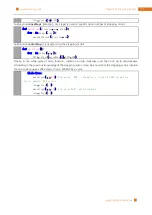
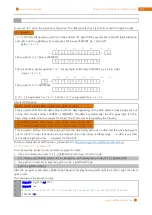
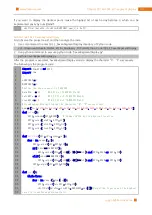
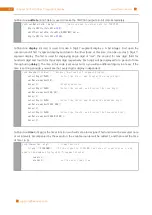
If you want to display the decimal point, make the highest bit of each array become 0, which can be
implemented easily by num[i]&0x7f.
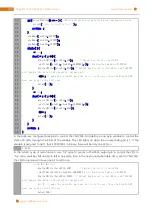
_shiftOut
(
dataPin
,
clockPin
,
MSBFIRST
,
num
[
i
]
&
0x7f
);
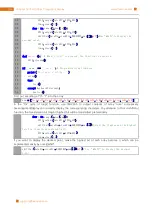
Python Code 18.1.1 SevenSegmentDisplay
First observe the project result, and then analyze the code.
1.
Use cd command to enter 18.1.1_SevenSegmentDisplay directory of Python code.
cd ~/Freenove_Ultimate_Starter_Kit_for_Raspberry_Pi/Code/Python_Code/18.1.1_SevenSegmentDisplay
2.
Use python command to execute python code “SevenSegmentDisplay.py”.
python SevenSegmentDisplay.py
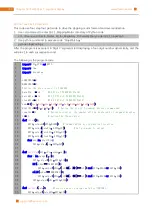
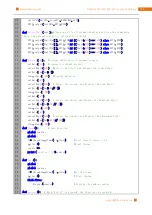
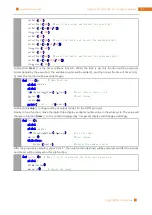
After the program is executed, SevenSegmentDisplay starts to display the character “0”- “F” successively.
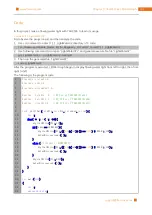
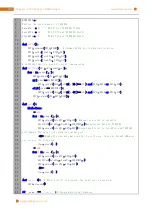
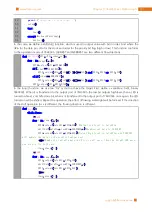
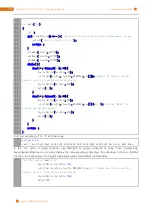
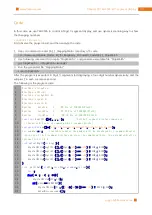
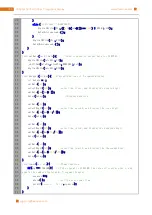
The following is the program code:
1
2
3
4
5
6
7
8
9
10
11
12
13
14
15
16
17
18
19
20
21
22
23
24
25
26
27
28
29
30
31
32
i m port
RPi
.
GPIO
a s
GPIO
i m port
time
LSBFIRST
=
1
MSBFIRST
=
2
#define the pins connect to 74HC595
dataPin
=
11
#DS Pin of 74HC595(Pin14)
latchPin
=
13
#ST_CP Pin of 74HC595(Pin12)
clockPin
=
15
#CH_CP Pin of 74HC595(Pin11)
#SevenSegmentDisplay display the character "0"- "F"successively
num
=
[
0xc0
,
0xf9
,
0xa4
,
0xb0
,
0x99
,
0x92
,
0x82
,
0xf8
,
0x80
,
0x90
,
0x88
,
0x83
,
0xc6
,
0xa1
,
0x86
,
0x8e
]
d e f
setup
( ):
GPIO
.
setmode
(
GPIO
.
BOARD
)
# Number GPIOs by its physical location
GPIO
.
setup
(
dataPin
,
GPIO
.
OUT
)
GPIO
.
setup
(
latchPin
,
GPIO
.
OUT
)
GPIO
.
setup
(
clockPin
,
GPIO
.
OUT
)
d e f
shiftOut
(
dPin
,
cPin
,
order
,
val
):
f o r
i
i n
range
(
0
,
8
):
GPIO
.
output
(
cPin
,
GPIO
.
LOW
);
i f
(
order
= =
LSBFIRST
):
GPIO
.
output
(
dPin
,(
0x01
&(
val
>>
i
)==
0x01
)
a n d
GPIO
.
HIGH
o r
GPIO
.
LOW
)
e l if
(
order
= =
MSBFIRST
):
GPIO
.
output
(
dPin
,(
0x80
&(
val
<<
i
)==
0x80
)
a n d
GPIO
.
HIGH
o r
GPIO
.
LOW
)
GPIO
.
output
(
cPin
,
GPIO
.
HIGH
);
d e f
loop
( ):
w h ile
T r ue
:
f o r
i
i n
range
(
0
,
len
(
num
)):
GPIO
.
output
(
latchPin
,
GPIO
.
LOW
)
shiftOut
(
dataPin
,
clockPin
,
MSBFIRST
,
num
[
i
])
#Output the figures and the highest
level is transfered preferentially.
Содержание Ultimate Starter Kit
Страница 1: ...Free your innovation Freenove is an open source electronics platform www freenove com ...
Страница 116: ...Chapter 9 Potentiometer RGBLED 116 www freenove com support freenove com Circuit Schematic diagram ...
Страница 117: ...117 Chapter 9 Potentiometer RGBLED www freenove com support freenove com Hardware connection ...
Страница 136: ...Chapter 12 Joystick 136 www freenove com support freenove com Circuit Schematic diagram Hardware connection ...
Страница 155: ...155 Chapter 14 Relay Motor www freenove com support freenove com Hardware connection OFF 3 3V ...
Страница 173: ...173 Chapter 16 Stepping Motor www freenove com support freenove com Hardware connection ...
Страница 182: ...Chapter 17 74HC595 LEDBar Graph 182 www freenove com support freenove com Circuit Schematic diagram Hardware connection ...
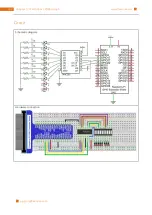
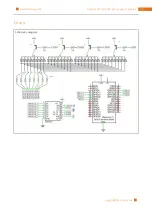
Страница 197: ...197 Chapter 18 74HC595 7 segment display www freenove com support freenove com Circuit Schematic diagram ...
Страница 198: ...Chapter 18 74HC595 7 segment display 198 www freenove com support freenove com Hardware connection ...
Страница 239: ...239 Chapter 22 Matrix Keypad www freenove com support freenove com Circuit Schematic diagram ...
Страница 240: ...Chapter 22 Matrix Keypad 240 www freenove com support freenove com Hardware connection ...
Страница 270: ...Chapter 26 WebIOPi IOT 270 www freenove com support freenove com Circuit Schematic diagram Hardware connection ...

