13
ES
Tabla 5 Asado con termoventilación
ó
Tipode
guiso
Temperatura[
0
C]
Tiempode
asado[hh:min]
Pastaflora
100
1:00–
1:10
Torta
demolde
160
1:05–
1:10
Bizcochocon
levadura
160
1:00–
1:10
Basepara
latorta
160
0:25–
0:35
Torta
delevadura
175
175
175
0:40–
0:45
Pastelcon
migajas
0:20–
0:30
Pastelcon
frutas
0:40–
0:55
Bizcocho
160
0:30–
0:40
5
PROGRAMADOR ELECTRÓNICO
PROGRAMADOR ELECTRÓNICO
Este temporizador digital permite el control y mando del trabajo de horno. El temporizador demuestra
el tiempo actual con la precisió
n de 1 minuto. Despué
s de cada programa realizado el temporizador
emite una senal acú
stica y desconecta automá
ticamente el horno.
El programador realiza:
1. funciones de tiempo:
-
Regulació
n de tiempo actual,
-
Programació
n del tiempo de cocinado,
-
Programació
n de finalizació
n del cocinado,
-
Regulació
n de minutero (avisador),
2. funciones de seguridad:
-
Desconexió
n automá
tica,
-
Bloqueo de seguridad para los ninos.
5.1 NOTAS GENERALES
Dibujo 11
1 - botó
n selector de funciones del temporizador
2 - botó
n "+" de ajuste del tiempo
3 - botó
n "-"de ajuste del tiempo
4 - símbolo indicador de desconexi
ón autom
ática
5 - símbolo indicador de la duraci
ón del cocinado
6 - símbolo indicador de la hora de finalizaci
ón del cocinado
7 - símbolo indicador del minutero (avisador)
8 - símbolo indicador de ajuste de hora de tiempo actual
9 - la pantalla
10 - símbolo indicador de bloqueo de seguridad para ninos
11
- funció
n inaccesible
Para ajustar la hora hay que pulsar el botó
n de la funció
n
y durante unos secundas hay que
ajustar el tiempo deseado usando el botó
n
. Con el botó
n
se puede corregir el tiempo
ajustado.
10
GB
How to use the electric grill
-
preheat the oven by setting the maximum temperature (250
0
C),
-
put the dish in the oven,
-
insert on the highest runner,
-
insert the drip tray on the bottom runner,
-
set the function change-over switch knob to position
,
-
set the required temperature,
-
After half of the grilling time, turn the grilled portions over
.
When the grilling is over - turn the oven off.
GRILLING WITH ROASTING-SPIT
Roasting-spit is used to rotary grilling such dishes as poultry
, sausages, shashliks, etc.
How to handle the oven:
-
remove all unnecessary outfit from the oven and slide in the roasting-spit frame;
-
slide one fork onto the spit and stick meat onto it while paying attention it is symmetri-cal along
the stick; then slide in the second fork and secure it in its position by tightening the set screw;
-
insert the pointed end of spit into the roast-spit drive connection, push it home and rest the
other end of spit on the frame;
-
screw out the handle,
-
turn on the oven, adjust the temperature and, possibly, set the time of grilling.
OVEN
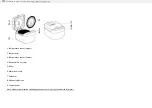
Fig. 11
1 - grill heater;
2 - roasting-spit drive;
3 - forks;
4 - spit;
5 - baking tray;
6 - roasting-spit frame;
7 - handle.
GRILLING WITH FORCED HEA T CIRCULA
TION ON
•
This function is intended for broiling large meat portions (pork loin, chicken,
etc.). In this case there is no need to preheat the oven.
•
The food, in respect to their size, should be placed on the third or fourth level
of the oven.
•
This function allows for improving the taste of foods; so called "crisp crust" is
also developed.
Operating procedure:
- place the meat in the oven,
- set the function change-over switch knob to position
,
- set the required temperature and possibly time of grilling.


