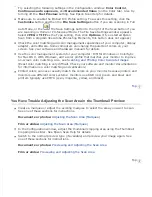
Try selecting the following settings in the Configuration window:
Color Control
,
Continuous auto exposure
, and
Recommended Value
(on the Color tab). Also try
turning off the
Fast Preview
setting. See Epson Scan Help for details.
Make sure to enable the Embed ICC Profile setting. To access this setting, click the
Customize
button and then the
File Save Settings
button if you are scanning in Full
Auto Mode, or the
File Save Settings button to the right of the Scan button if you
are scanning in Home or Professional Mode. The File Save Settings window appears.
Select
JPEG
or
TIFF
as the Type setting, then click
Options
. (If you started Epson
Scan from a program like Adobe Photoshop Elements, this button does not appear.)
Check the color matching and color management capabilities of your computer, display
adapter, and software. Some computers can change the palette of colors on your
screen. See your software and hardware manuals for details.
Use the color management system for your computer: ICM for Windows or ColorSync
for Mac OS X. With Windows, add a color profile that matches your monitor to improve
on-screen color matching. Also, see
Scanning and Printing Color Accurate Images
.
(Exact color matching is very difficult. Check your software and monitor documentation
for information on color matching and calibration.)
Printed colors can never exactly match the colors on your monitor because printers and
monitors use different color systems: monitors use RGB (red, green, and blue) and
printers typically use CMYK (cyan, magenta, yellow, and black).
You Have Trouble Adjusting the Scan Area in the Thumbnail Preview
Create a marquee or adjust the existing marquee to select the area you want to scan.
See one of these sections for instructions.
Adjusting the Scan Area (Marquee)
Film or slides:
Adjusting the Scan Area (Marquee)
In the Configuration window, adjust the thumbnail cropping area using the Thumbnail
Cropping Area slider. See Epson Scan Help for details.
Switch to the normal preview type (if available) and preview your image again. See
one of these sections for instructions.
Documents or photos:
Previewing and Adjusting the Scan Area
Содержание V500
Страница 26: ...a document mat b transparency unit transportation lock c document table d carriage a DC inlet b OPTION port ...
Страница 27: ...c scanner transportation lock d USB interface connector e cover cable ...
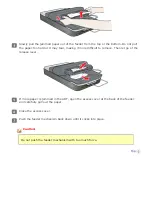
Страница 34: ...Open the scanner cover Pull the scanner cover straight up and off the scanner ...
Страница 47: ...Top ...
Страница 64: ......
Страница 69: ...Thumbnail preview ...
Страница 78: ...Professional Mode ...
Страница 98: ...Professional Mode ...
Страница 99: ...Before you scan your film or slides you need to select these basic settings ...
Страница 103: ...Epson Scan prescans your images and displays them in one of the following Preview windows Normal preview ...
Страница 120: ...Professional Mode Scroll down to the Adjustments area and click the Color Restoration checkbox ...
Страница 121: ......
Страница 131: ...Professional Mode ...
Страница 135: ...Professional Mode ...
Страница 136: ...Note ...
Страница 142: ......
Страница 149: ...Click the Settings button You see the Scan to PDF Settings window ...
Страница 157: ...Click the File Save Settings button The File Save Settings window appears ...
Страница 179: ...Click Apply then click OK Note You must restart your computer before using the newly assigned scanner buttons Top ...
Страница 183: ...Pull the scanner cover straight up and off the scanner ...


