Section 6: Using the Epilog Dashboard
49
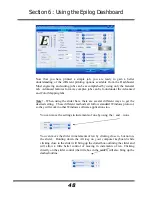
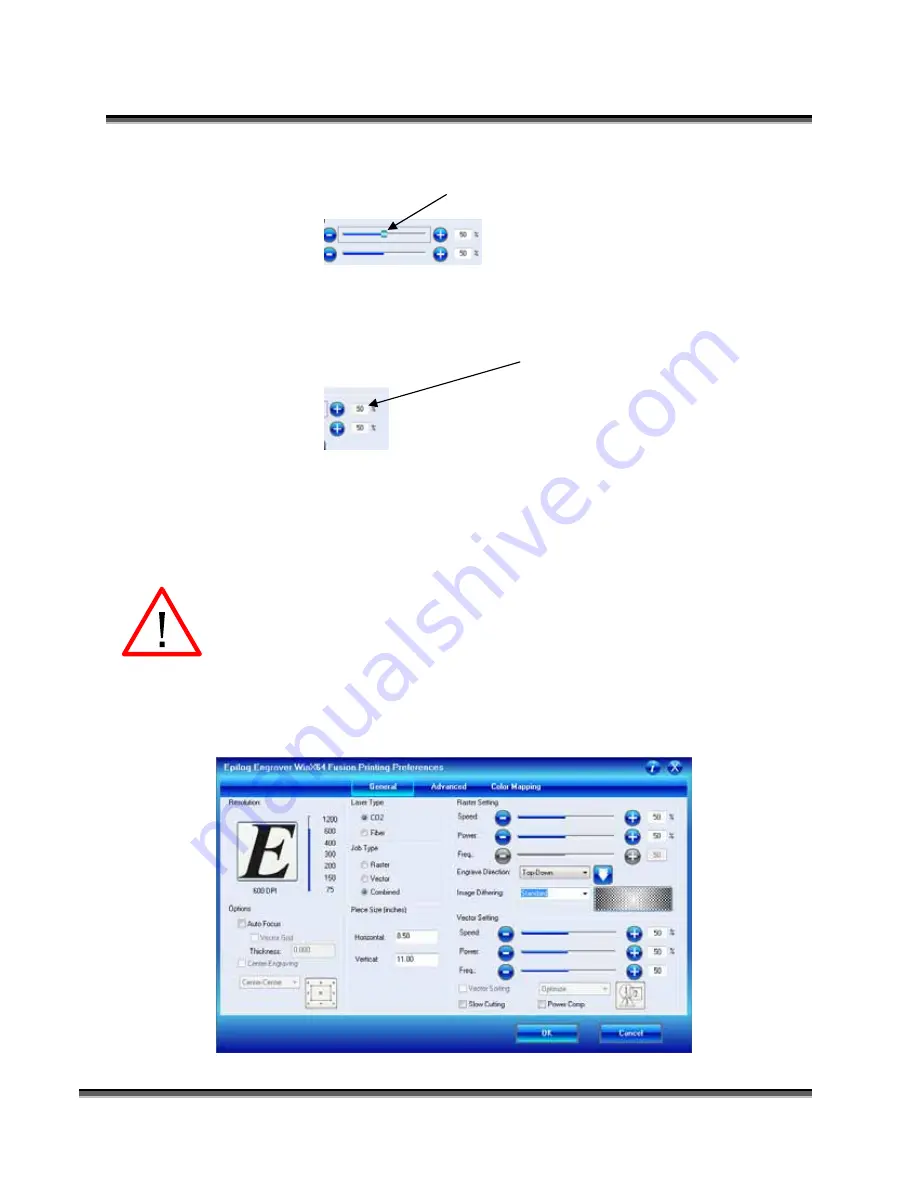
You can move the little slider box by clicking down, holding and then moving
to the desired number before releasing your mouse.
You can type the setting into the number box.
The following sections provide detailed explanations of the different features in
the Print Driver. Most engraving and cutting jobs can be accomplished by using
only the General tab of the Print Driver. Advanced features for more complex
jobs can be found under the Advanced tab.
NOTE: The Fusion driver is used for both CO2 laser and the Fiber laser sources.
There are a few functions in the driver that only apply to one laser type or the
other. Most functions apply to both, but if a function does not apply to the laser
type installed in your machine that function will be “grayed out”. For instance, in
the image below we have selected Laser Type as CO2. Notice that the Freq
function under Raster Setting is Grayed out. This setting is only used with the
Fiber laser so it is not necessary to try and set it with the CO2 laser.
Содержание Fusion 13000
Страница 2: ...ii THIS PAGE WAS INTENTIONALLY LEFT BLANK ...
Страница 4: ...Contents at a Glance iv THIS PAGE WAS INTENTIONALLY LEFT BLANK ...
Страница 8: ...Table of Contents viii INDEX 195 THIS PAGE WAS INTENTIONALLY LEFT BLANK ...
Страница 10: ...Fire Warning x SEE PREVIOUS PAGE ...
Страница 14: ...Introduction xiv THIS PAGE WAS INTENTIONALLY LEFT BLANK ...
Страница 15: ...1 Manual Epilog Laser Setup ...
Страница 16: ...2 THIS PAGE WAS INTENTIONALLY LEFT BLANK ...
Страница 26: ...Section 1 Safety 10 ...
Страница 27: ...Section 1 Safety 11 ...
Страница 28: ...Section 1 Safety 12 THIS PAGE WAS INTENTIONALLY LEFT BLANK ...
Страница 41: ...Section 3 Getting Started 11 THIS PAGE WAS INTENTIONALLY LEFT BLANK ...
Страница 44: ...Section 4 Installing the ECC 14 ...
Страница 51: ...Section 4 Installing the ECC 21 THIS PAGE WAS INTENTIONALLY LEFT BLANK ...
Страница 57: ...Section 5 Installing the Epilog Dashboard Print Driver 27 8 Click on Change Settings 9 Click on the Driver tab ...
Страница 58: ...Section 5 Installing the Epilog Dashboard Print Driver 28 10 Click on Update Driver ...
Страница 68: ...Section 5 Installing the Epilog Dashboard Print Driver 38 Click on Add Local Printer ...
Страница 76: ...Section 5 Installing the Epilog Dashboard Print Driver 46 THIS PAGE WAS INTENTIONALLY LEFT BLANK ...
Страница 108: ...Section 6 Using the Epilog Dashboard 78 THIS PAGE WAS INTENTIONALLY LEFT BLANK ...
Страница 109: ...79 Manual Basic Operations ...
Страница 110: ...80 THIS PAGE WAS INTENTIONALLY LEFT BLANK ...
Страница 130: ...Section 8 Using the Front Control Panel 100 THIS PAGE WAS INTENTIONALLY LEFT BLANK ...
Страница 136: ...Section 9 Using the ECC Epilog Control Center 106 THIS PAGE WAS INTENTIONALLY LEFT BLANK ...
Страница 148: ...Section 10 Standard Optional Machine Features 118 ...
Страница 152: ...Section 11 Engraving Machine Cleaning 122 Crash Bar and locating pins ...
Страница 160: ...Section 11 Engraving Machine Cleaning 130 ...
Страница 184: ...Section 13 Material Engraving Techniques 154 THIS PAGE WAS INTENTIONALLY LEFT BLANK ...
Страница 191: ...161 Manual Technical Support Troubleshooting and Specifications ...
Страница 192: ...162 THIS PAGE WAS INTENTIONALLY LEFT BLANK ...
Страница 194: ...Section 15 In Case of Difficulty 164 THIS PAGE WAS INTENTIONALLY LEFT BLANK ...
Страница 200: ...Section 16 Specifications 170 THIS PAGE WAS INTENTIONALLY LEFT BLANK ...
Страница 208: ...APPENDIX A 178 THIS PAGE WAS INTENTIONALLY LEFT BLANK ...
Страница 214: ...Appendix C Additional Dashboard Instructions 184 Click on Network and Sharing Center Click on Change adapter settings ...
Страница 218: ...Appendix C Additional Dashboard Instructions 188 ...


