Section 9: Using the ECC (Epilog Control Center)
104
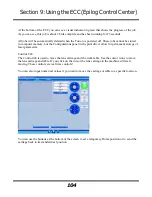
At the bottom of the ECC you can see a visual indicator in green that shows the progress of the job.
As you can see, this job is about 2/3rds complete and has been running for 23 seconds.
All jobs will be automatically deleted when the Fusion is powered off. These jobs cannot be stored
in computer memory, but the Configurations panel in the print driver allow for permanent storage of
laser parameters.
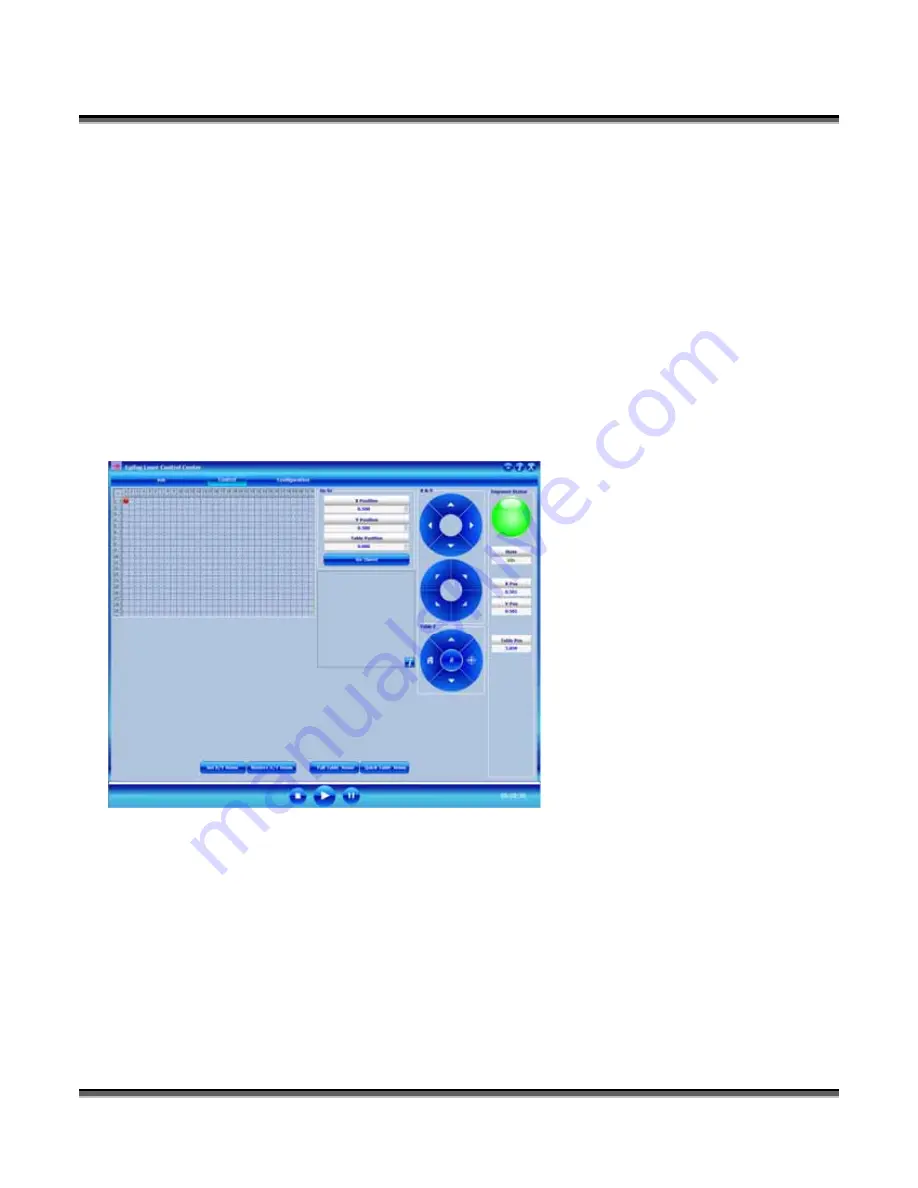
Control Tab
The Control tab is used to move the lens carriage and the work table. Use the cursor icons to move
the lens carriage and table. If you click on the cursor the lens carriage in the machine will start
moving. These controls are real time controls!
You can also input numerical values if you want to move the carriage or table to a specific location.
You can use the buttons at the bottom of the screen to set a temporary Home position or to send the
carriage back to its standard rest position.
Содержание Fusion 13000
Страница 2: ...ii THIS PAGE WAS INTENTIONALLY LEFT BLANK ...
Страница 4: ...Contents at a Glance iv THIS PAGE WAS INTENTIONALLY LEFT BLANK ...
Страница 8: ...Table of Contents viii INDEX 195 THIS PAGE WAS INTENTIONALLY LEFT BLANK ...
Страница 10: ...Fire Warning x SEE PREVIOUS PAGE ...
Страница 14: ...Introduction xiv THIS PAGE WAS INTENTIONALLY LEFT BLANK ...
Страница 15: ...1 Manual Epilog Laser Setup ...
Страница 16: ...2 THIS PAGE WAS INTENTIONALLY LEFT BLANK ...
Страница 26: ...Section 1 Safety 10 ...
Страница 27: ...Section 1 Safety 11 ...
Страница 28: ...Section 1 Safety 12 THIS PAGE WAS INTENTIONALLY LEFT BLANK ...
Страница 41: ...Section 3 Getting Started 11 THIS PAGE WAS INTENTIONALLY LEFT BLANK ...
Страница 44: ...Section 4 Installing the ECC 14 ...
Страница 51: ...Section 4 Installing the ECC 21 THIS PAGE WAS INTENTIONALLY LEFT BLANK ...
Страница 57: ...Section 5 Installing the Epilog Dashboard Print Driver 27 8 Click on Change Settings 9 Click on the Driver tab ...
Страница 58: ...Section 5 Installing the Epilog Dashboard Print Driver 28 10 Click on Update Driver ...
Страница 68: ...Section 5 Installing the Epilog Dashboard Print Driver 38 Click on Add Local Printer ...
Страница 76: ...Section 5 Installing the Epilog Dashboard Print Driver 46 THIS PAGE WAS INTENTIONALLY LEFT BLANK ...
Страница 108: ...Section 6 Using the Epilog Dashboard 78 THIS PAGE WAS INTENTIONALLY LEFT BLANK ...
Страница 109: ...79 Manual Basic Operations ...
Страница 110: ...80 THIS PAGE WAS INTENTIONALLY LEFT BLANK ...
Страница 130: ...Section 8 Using the Front Control Panel 100 THIS PAGE WAS INTENTIONALLY LEFT BLANK ...
Страница 136: ...Section 9 Using the ECC Epilog Control Center 106 THIS PAGE WAS INTENTIONALLY LEFT BLANK ...
Страница 148: ...Section 10 Standard Optional Machine Features 118 ...
Страница 152: ...Section 11 Engraving Machine Cleaning 122 Crash Bar and locating pins ...
Страница 160: ...Section 11 Engraving Machine Cleaning 130 ...
Страница 184: ...Section 13 Material Engraving Techniques 154 THIS PAGE WAS INTENTIONALLY LEFT BLANK ...
Страница 191: ...161 Manual Technical Support Troubleshooting and Specifications ...
Страница 192: ...162 THIS PAGE WAS INTENTIONALLY LEFT BLANK ...
Страница 194: ...Section 15 In Case of Difficulty 164 THIS PAGE WAS INTENTIONALLY LEFT BLANK ...
Страница 200: ...Section 16 Specifications 170 THIS PAGE WAS INTENTIONALLY LEFT BLANK ...
Страница 208: ...APPENDIX A 178 THIS PAGE WAS INTENTIONALLY LEFT BLANK ...
Страница 214: ...Appendix C Additional Dashboard Instructions 184 Click on Network and Sharing Center Click on Change adapter settings ...
Страница 218: ...Appendix C Additional Dashboard Instructions 188 ...

