Section 8: Using the Front Control Panel
92
Joystick:
Changes made while using the Joystick will be shown on the two-line LCD display.
The Joystick is an extremely versatile tool that can be used in many different ways. There are three
primary functions to the Joystick:
1)
Tilting – most actions will be performed by tilting the Joystick from side-to-side. To tilt the
Joystick, use the side of your thumb or forefinger to apply pressure to the sides of the
Joystick. Alternatively, many users will place their thumb in the top indent of the Joystick for
easy 360 degree maneuverability.
2)
Center Clicking – Some actions will require a straight down center click to initiate. This is
accomplished by simply pressing straight down on the center of the Joystick.
3)
Flick - A single, quick “Flick” will produce a single movement or very small adjustment.
The Joystick is progressive and touch sensitive and provides a continuously variable range of
adjustments. It is sensitive to the degree of tilt that is being applied. The more you tilt the Joystick,
the bigger your impact on the function you are using.
To see how the Joystick works, let’s practice:
Use the cursor keys on the keypad to highlight the Focus function. Focus mode allows us to move
the table up or down. Now, simply tilt the Joystick as fas as you can in the Up or Down direction.
The table should start moving qucikly. To slow the table movement, simply reduce the amount of tilt
you apply to the Joystick. Varying the amount of tilt changes how fast the table moves.
Now, let’s “flick” the joystick. By flicking the Joystick, the table will move about .001” or .002”.
You will probably not be able to see the table move such a small amount, but if you watch the
display panel you will see that the numeric display shows it has moved.
Once you get a feel for it, you will be able to move the table at an absolute crawl or as fast as it will
go just by adjusting the amount of tilt.
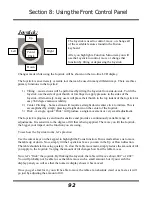
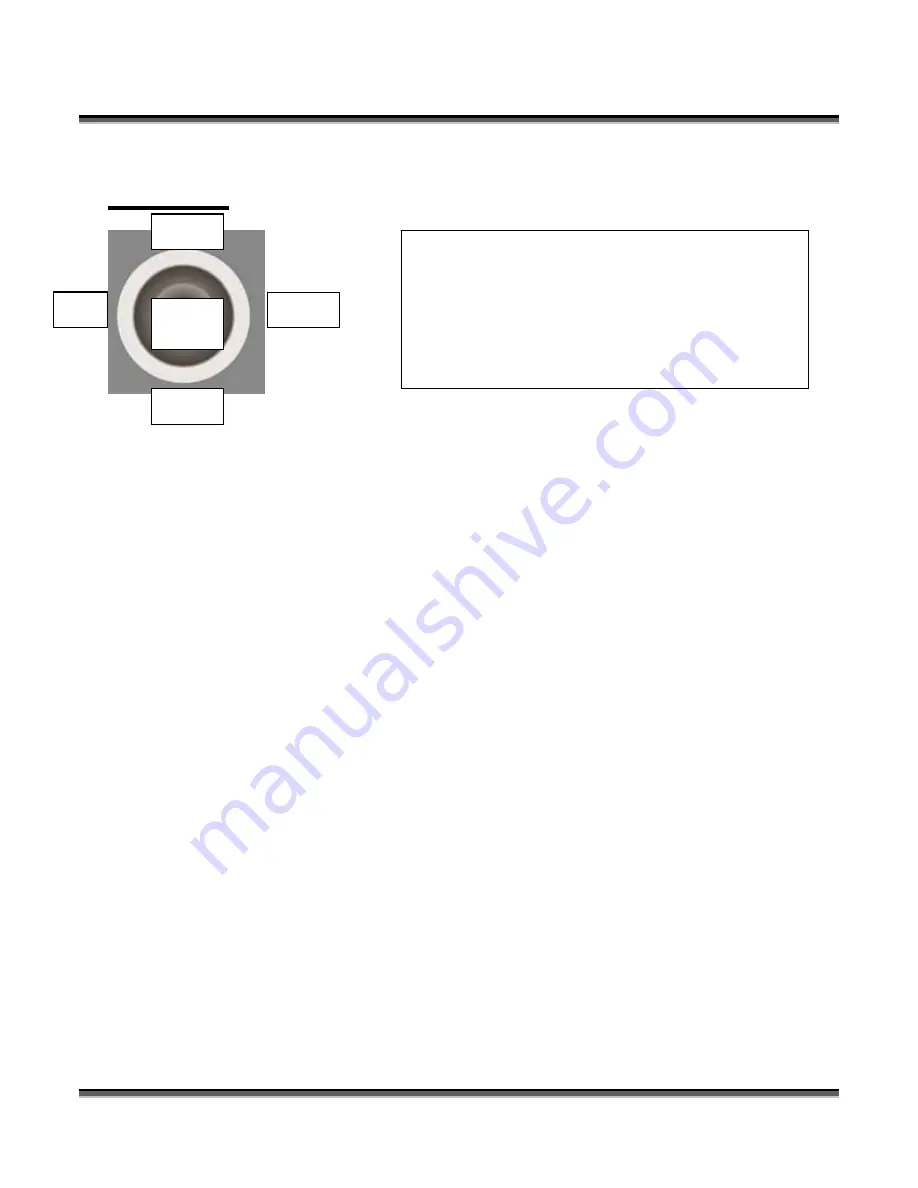
The Joystick is used to control, move, or change all
of the available features found in the Fusion
keyboard.
After you highlight a Function Menu item you will
use the Joystick to control, move or change that
function by tilting or depressing the Joystick.
Left
Right
Down
Up
Center
Click
Содержание Fusion 13000
Страница 2: ...ii THIS PAGE WAS INTENTIONALLY LEFT BLANK ...
Страница 4: ...Contents at a Glance iv THIS PAGE WAS INTENTIONALLY LEFT BLANK ...
Страница 8: ...Table of Contents viii INDEX 195 THIS PAGE WAS INTENTIONALLY LEFT BLANK ...
Страница 10: ...Fire Warning x SEE PREVIOUS PAGE ...
Страница 14: ...Introduction xiv THIS PAGE WAS INTENTIONALLY LEFT BLANK ...
Страница 15: ...1 Manual Epilog Laser Setup ...
Страница 16: ...2 THIS PAGE WAS INTENTIONALLY LEFT BLANK ...
Страница 26: ...Section 1 Safety 10 ...
Страница 27: ...Section 1 Safety 11 ...
Страница 28: ...Section 1 Safety 12 THIS PAGE WAS INTENTIONALLY LEFT BLANK ...
Страница 41: ...Section 3 Getting Started 11 THIS PAGE WAS INTENTIONALLY LEFT BLANK ...
Страница 44: ...Section 4 Installing the ECC 14 ...
Страница 51: ...Section 4 Installing the ECC 21 THIS PAGE WAS INTENTIONALLY LEFT BLANK ...
Страница 57: ...Section 5 Installing the Epilog Dashboard Print Driver 27 8 Click on Change Settings 9 Click on the Driver tab ...
Страница 58: ...Section 5 Installing the Epilog Dashboard Print Driver 28 10 Click on Update Driver ...
Страница 68: ...Section 5 Installing the Epilog Dashboard Print Driver 38 Click on Add Local Printer ...
Страница 76: ...Section 5 Installing the Epilog Dashboard Print Driver 46 THIS PAGE WAS INTENTIONALLY LEFT BLANK ...
Страница 108: ...Section 6 Using the Epilog Dashboard 78 THIS PAGE WAS INTENTIONALLY LEFT BLANK ...
Страница 109: ...79 Manual Basic Operations ...
Страница 110: ...80 THIS PAGE WAS INTENTIONALLY LEFT BLANK ...
Страница 130: ...Section 8 Using the Front Control Panel 100 THIS PAGE WAS INTENTIONALLY LEFT BLANK ...
Страница 136: ...Section 9 Using the ECC Epilog Control Center 106 THIS PAGE WAS INTENTIONALLY LEFT BLANK ...
Страница 148: ...Section 10 Standard Optional Machine Features 118 ...
Страница 152: ...Section 11 Engraving Machine Cleaning 122 Crash Bar and locating pins ...
Страница 160: ...Section 11 Engraving Machine Cleaning 130 ...
Страница 184: ...Section 13 Material Engraving Techniques 154 THIS PAGE WAS INTENTIONALLY LEFT BLANK ...
Страница 191: ...161 Manual Technical Support Troubleshooting and Specifications ...
Страница 192: ...162 THIS PAGE WAS INTENTIONALLY LEFT BLANK ...
Страница 194: ...Section 15 In Case of Difficulty 164 THIS PAGE WAS INTENTIONALLY LEFT BLANK ...
Страница 200: ...Section 16 Specifications 170 THIS PAGE WAS INTENTIONALLY LEFT BLANK ...
Страница 208: ...APPENDIX A 178 THIS PAGE WAS INTENTIONALLY LEFT BLANK ...
Страница 214: ...Appendix C Additional Dashboard Instructions 184 Click on Network and Sharing Center Click on Change adapter settings ...
Страница 218: ...Appendix C Additional Dashboard Instructions 188 ...


