


42
5.3 Fusible couplé en série
Voir pour cela les illustrations à la page 43.
. Dévissez les 3 vis de Torx à gauche et droite au boîtier et au fond (5).
2. Tirez le panneau arrière du boîtier (8) du corps de projecteur portatif.
3. Coupez les fiches de couplage (7) (Pressez le crochet de verrouillage et tirez la fiche
de couplage).
4. Déliez aussi le contact de batterie (4) pôle positif.
5. Tirez le fusible couplé en série (6) du guidage. Installez et contactez le fusible
ET002095 couplé en série nouveau en ordre inverse.
6. Fermez et serrez à vis le corps
Attention: Faites attention à un bon étanchement (IP protection)!
Estce que l‘étoupage est encore correct?
Illustrations
Содержание SHL 100-EX
Страница 10: ... Vor Inbetriebnahme Pluspol 14 stecken ...
Страница 15: ...14 Abbildungen ...
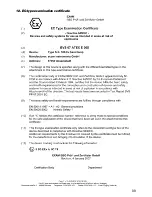
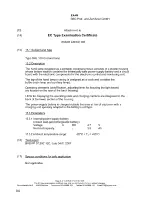
Страница 17: ...16 12 EG Baumusterprüfbescheinigung ...
Страница 18: ...17 ...
Страница 27: ...26 Plug the positive pole 14 preoperational ...
Страница 32: ...31 Illustrations ...
Страница 34: ...33 12 EC type examination certificate ...
Страница 35: ...34 ...
Страница 44: ...43 Fichez le pôle positif 14 avant la mise en fonctionnement ...
Страница 49: ...48 Illustrations ...
Страница 51: ...50 12 Attestation d examen CE de type ...
Страница 52: ...51 ...
Страница 61: ...60 Sluit voor gebruik de positieve pool aan 14 ...
Страница 66: ...65 Afbeeldingen ...
Страница 68: ...67 12 EG verklaring van typeonderzoek ...
Страница 69: ...68 ...
Страница 78: ...77 Prima della messa in funzione inserire il polo positivo 14 ...
Страница 83: ...82 Illustrazioni ...
Страница 85: ...84 12 Attestato di certificazione ...
Страница 86: ...85 ...
Страница 95: ...94 Conecte el polo positivo 14 antes del uso ...
Страница 100: ...99 Ilustraciones ...
Страница 102: ...101 14 Certificado de ensayo de tipo de construcción CE ...
Страница 103: ...102 ...
Страница 112: ...111 Ligue o pólo positivo 14 antes da colocação em funcionamento ...
Страница 117: ...116 Desenhos ...
Страница 119: ...118 15 N do Certificado do modelo CE ...
Страница 120: ...119 ...
Страница 129: ...128 Innan du startar skall pluspolen anslutas ...
Страница 134: ...133 Bilder ...
Страница 136: ...135 14 EG konstruktionskontrollintyg ...
Страница 137: ...136 ...