


86 |
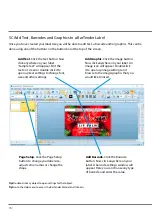
5. Review the label setup summary. If it is correct, click “Finish”. Your blank label will be displayed.
After you click “Finish”, you can always go back and change any of these “Label Properties” settings, by going
to the Menu Bar and select “Document Properties” or double click on the blank label.
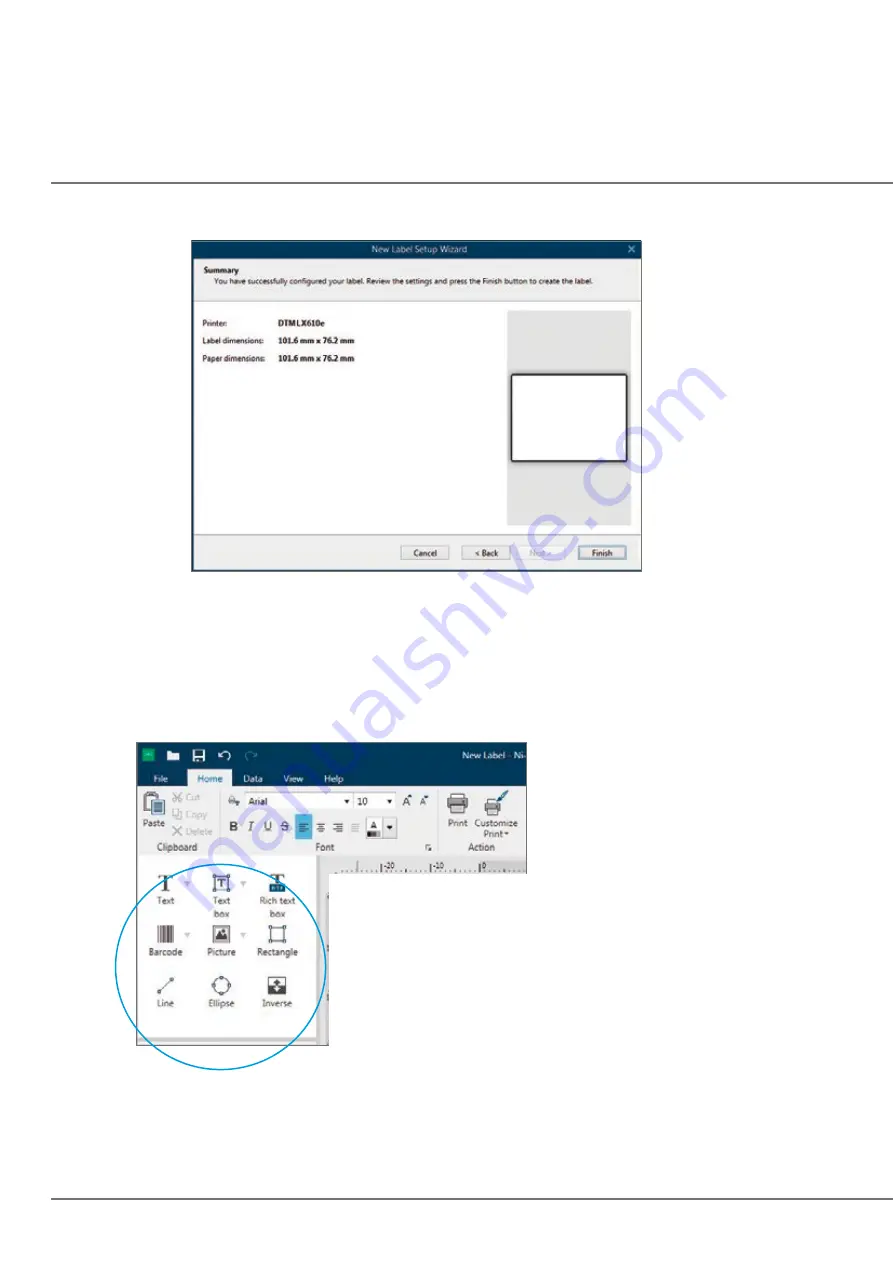
Once you have created your label size you can start to design your label using tools from the tool box/
button bar. You will need to add text, rectangles, lines and/or graphics. This can be done using one of the
buttons on the button bar at the top left screen.
Click the Text buttons to add text to your labels. Edit the text
on screen or double click to open up text settings to change
font, size and other settings.
Click the Picture button to add graphic. Click anywhere
on the label. A pop-up window will open to browse to the
image/graphic and select it with “Open”.
Click the Rectangle, Line and Ellipse button to add geometri-
cal shapes.
Click the Barcode button to add a bar code. Double click the
bar code to choose the bar code type.
Tip 1: Double-click any object to open settings for that object.
Tip 2: Go to the Help tab to access the NiceLabel Manual and Tutorials
Содержание LX610e
Страница 51: ... 51 The software is now activated on this computer Important Note Activation requires internet access ...
Страница 71: ... 71 5 Center the image horizontally and vertically to the Page ...
Страница 85: ... 85 3 Choose Orientation Click Next 4 Set the dimensions of your label and unit of measure Click Next ...
Страница 88: ...88 1 Choose Start a new BarTender document ...
Страница 89: ... 89 2 Select Blank Template Click Next 3 Select Color Label 610e Click Next ...
Страница 109: ... 109 4 Prepare items needed for procedure 5 Soak the paper towels in water for 5 seconds ...