D-Show Profile Guide
144
Assigning Hardware Inserts to
Channels
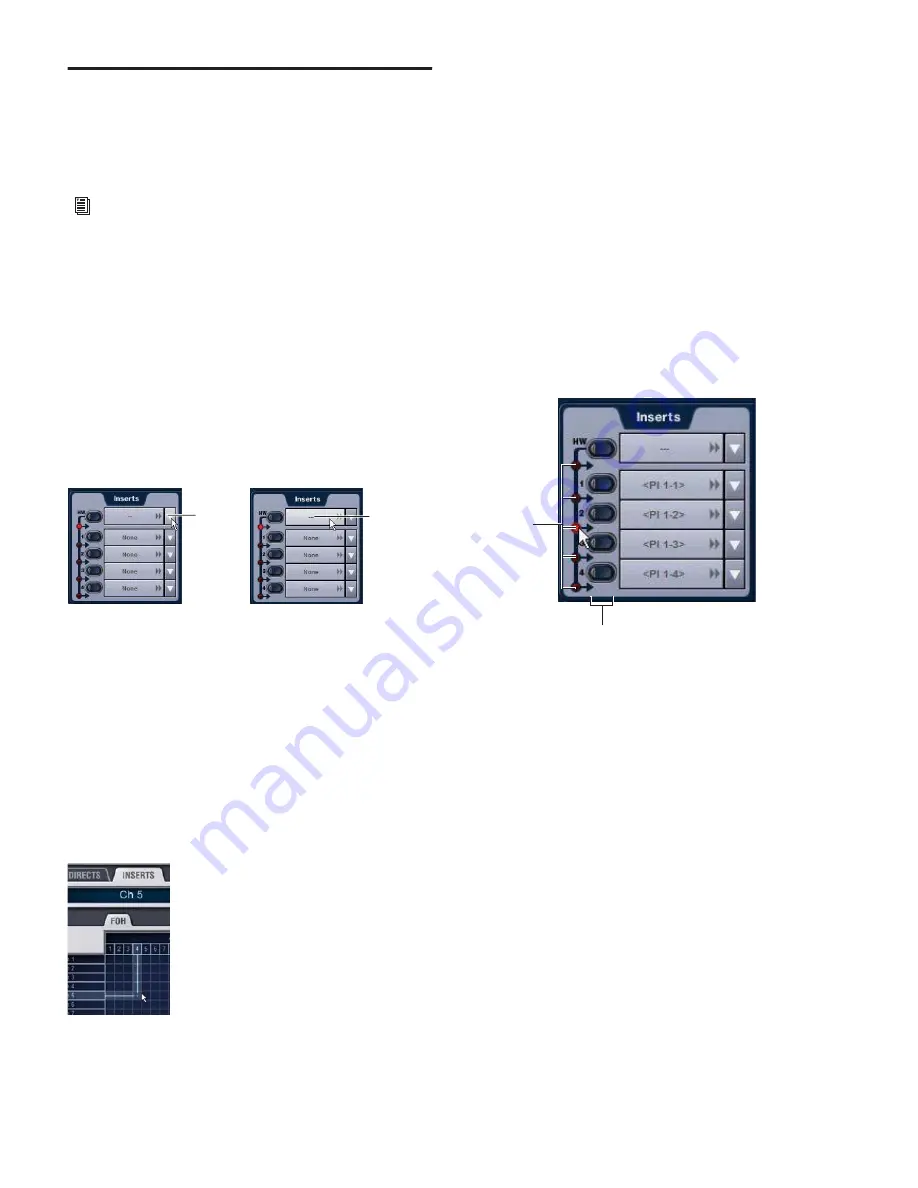
You can assign hardware inserts directly from the Inputs page
or Outputs page. You can also make hardware insert assign-
ments from the Patchbay.
To assign a hardware insert to a channel or bus:
1
Go to the Inputs or the Outputs page and target the channel
where you want to assign the hardware insert by pressing the
channel Select switch.
2
In the Inserts section, do one of the following:
• Click the Hardware Insert pop-up menu and choose an
insert destination directly from the menu. The name of
the hardware insert destination appears in the on-screen
Hardware Insert button.
– or –
• Click the Hardware Insert button to go to the Inserts page
of the Patchbay, and assign the insert from the Patchbay.
To assign a hardware insert from the Patchbay:
1
Go to the Patchbay and click the Inserts tab. The Hardware
Tab for the FOH Rack is shown.
2
Click the Channels, FX Returns, and Outputs tabs to show
the desired channel types in the grid. If you jumped to the
patchbay from the Inputs or Outputs page, the appropriate
Channel Type tabs are automatically enabled.
3
Click in the channel grid to assign the insert input/output
number (listed across the top) to the channel where you want
to assign the insert (listed on the left).
The Patchbay Inserts page shows the name of the channel and
its destination at the current cursor location. The Insert loca-
tion is also displayed in the Inserts section in the Inputs or
Outputs page.
Setting the Hardware Insert Location
You can choose the location of the hardware insert in the sig-
nal path, relative to the four plug-in inserts, for each channel.
A hardware insert does not need to be currently assigned to do
this.
To set the hardware insert location:
1
Go to the Outputs page and select the channel where you
want to set the hardware insert location.
2
In the Inserts section of the Outputs page, click the hard-
ware insert indicator so that it lights red.
Activating and Bypassing Hardware Inserts
The controls for activating and bypassing hardware inserts are
available on-screen in the Inserts sections of the Inputs and
Outputs pages.
To activate or bypass a hardware insert:
1
Target the channel where you want to activate or bypass the
insert by pressing the channel Select switch.
2
Click the In/Out button for the HW insert. The button lights
when the insert is activated (in circuit).
See Chapter 12, “Patchbay.”
Assigning a hardware insert in the Outputs page
Assigning a hardware insert in the Patchbay Inserts page
Click to
go to the
Patchbay
Click to
assign
Setting a hardware insert location in the Inputs page
Click to set
HW Insert
location
In/Out
Содержание D-Show Profile
Страница 10: ...D Show Profile Guide x ...
Страница 11: ...Part I Overview and Installation ...
Страница 12: ......
Страница 16: ...D Show Profile Guide 6 ...
Страница 32: ...D Show Profile Guide 22 ...
Страница 33: ...Part II System Description ...
Страница 34: ......
Страница 50: ...D Show Profile Guide 40 ...
Страница 58: ...D Show Profile Guide 48 ...
Страница 67: ...Part III Signal Routing ...
Страница 68: ......
Страница 94: ...D Show Profile Guide 84 ...
Страница 102: ...D Show Profile Guide 92 ...
Страница 110: ...D Show Profile Guide 100 ...
Страница 134: ...D Show Profile Guide 124 ...
Страница 135: ...Part IV Processing ...
Страница 136: ......
Страница 144: ...D Show Profile Guide 134 ...
Страница 171: ...Part V Shows ...
Страница 172: ......
Страница 180: ...D Show Profile Guide 170 ...
Страница 204: ...D Show Profile Guide 194 ...
Страница 227: ...Part VI Specifications ...
Страница 228: ......
Страница 236: ...D Show Profile Guide 226 D Show Output Signal Flow Diagram Version 1 3 07 07 05 ...
Страница 245: ...Part VII Reference ...
Страница 246: ......
Страница 258: ...D Show Profile Guide 248 ...
Страница 269: ......


