

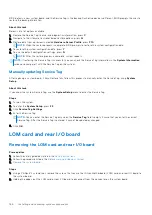
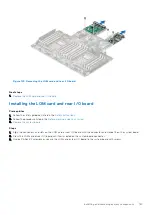
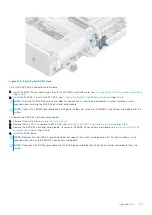
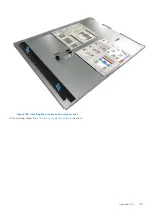
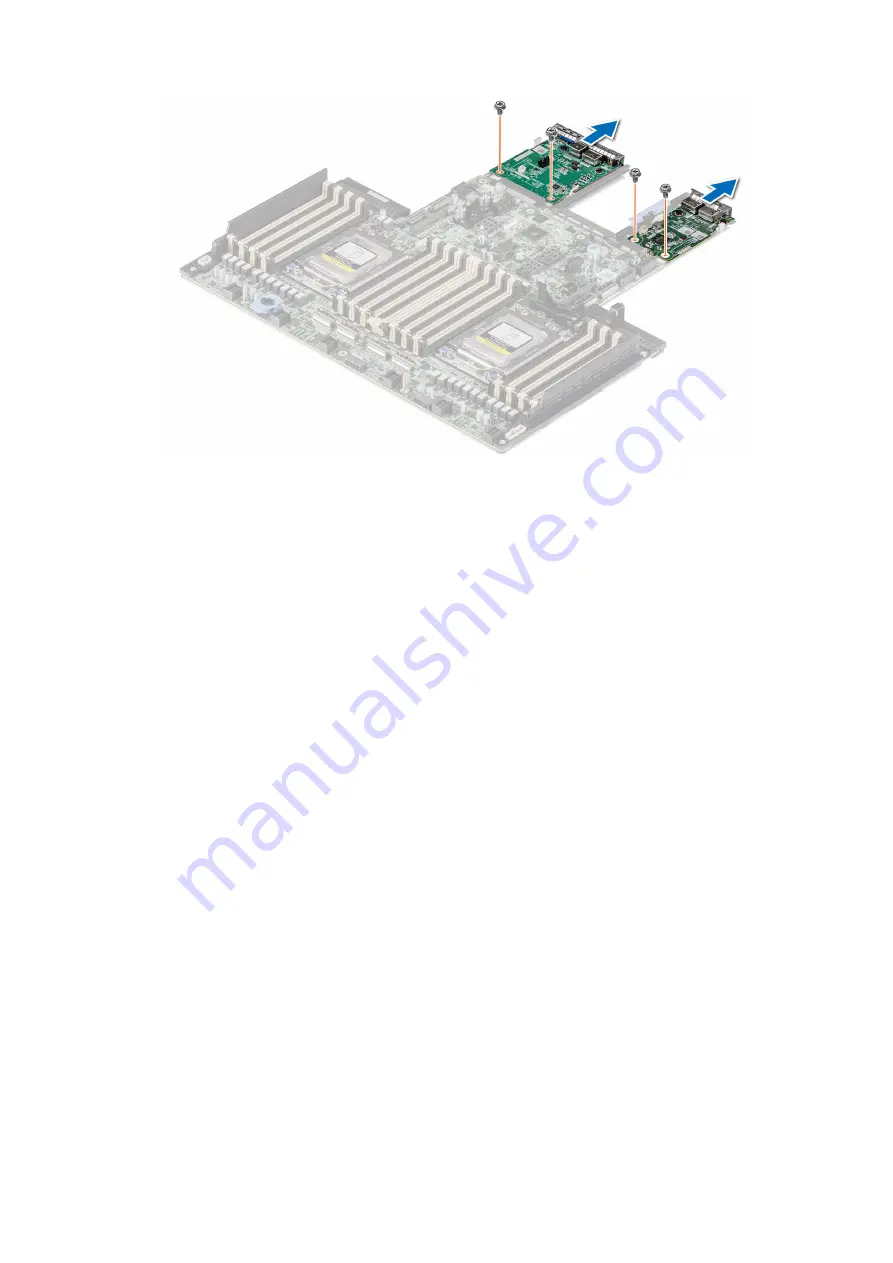
Figure 145. Removing the LOM card and rear I/O board
Next steps
1.
Replace the LOM card and rear I/O board
Installing the LOM card and rear I/O board
Prerequisites
1. Follow the safety guidelines listed in the
.
2. Follow the procedure listed in the
Before working inside your system
3.
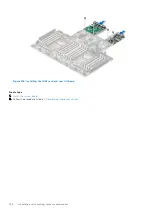
Steps
1. Align the connectors and slots on the LOM card or rear I/O board with the connector and standoffs on the system board.
2. Press the LOM card or rear I/O board until firmly seated on the system board connector.
3. Using a Phillips #2 screwdriver, secure the LOM card or rear I/O board to the system board with screws.
Installing and removing system components
167
Содержание E68S
Страница 19: ...Figure 14 Service information System overview 19 ...
Страница 28: ...Cable routing Figure 18 12x 3 5 inch Figure 19 8 x 3 5 inch 28 Installing and removing system components ...
Страница 30: ...Figure 22 24 x 2 5 inch with NVMe Figure 23 16 x 2 5 inch 30 Installing and removing system components ...
Страница 31: ...Figure 24 8 x 2 5 inch with NVMe Figure 25 8 x 2 5 inch with NVMe Installing and removing system components 31 ...


