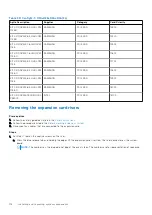

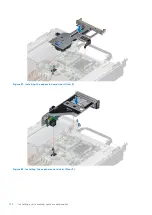
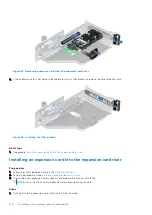
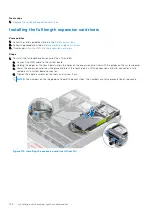
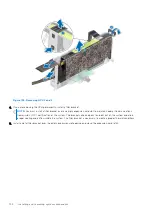
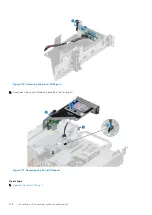
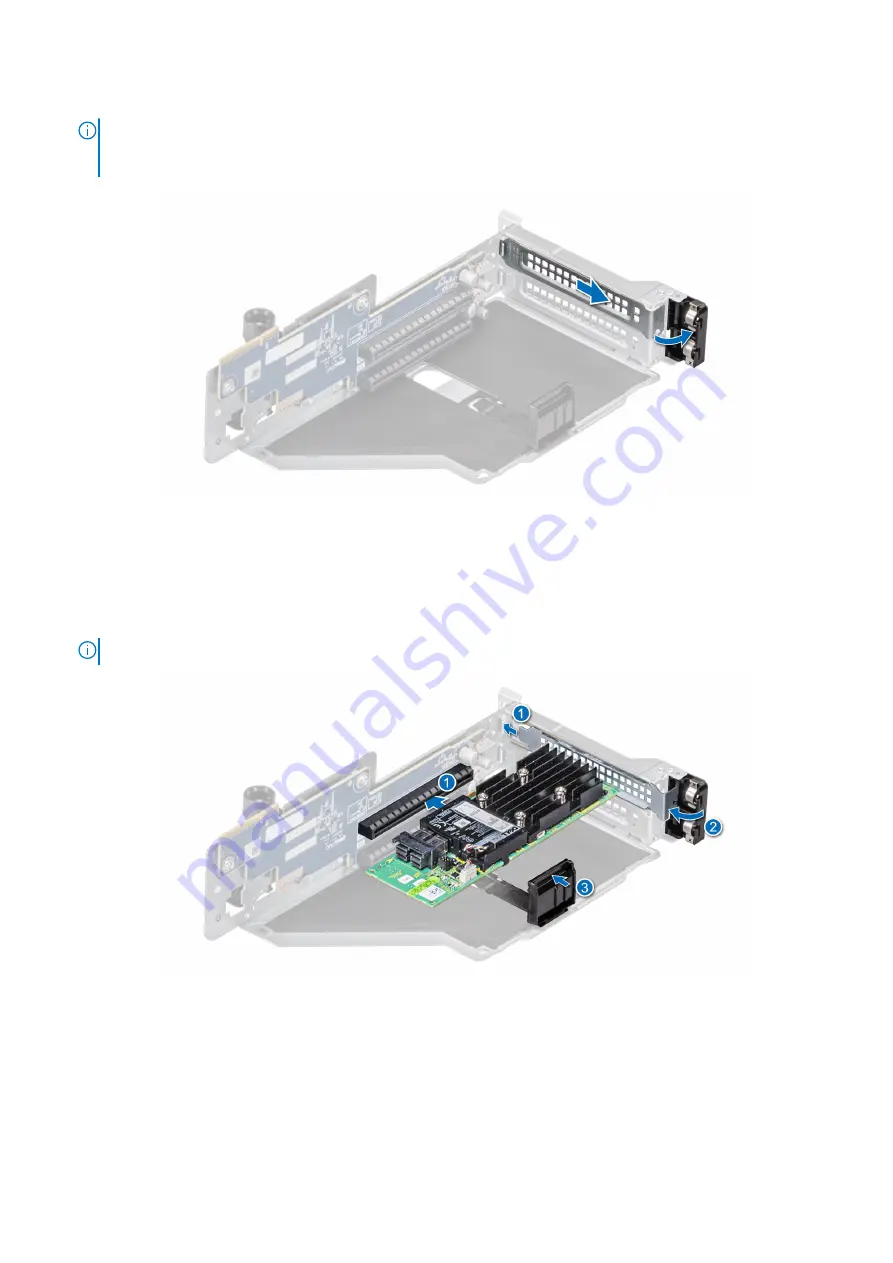
2. If installed, remove the filler bracket.
NOTE:
Store the filler bracket for future use. Filler brackets must be installed in empty expansion card slots to maintain
Federal Communications Commission (FCC) certification of the system. The brackets also keep dust and dirt out of the
system and aid in proper cooling and airflow inside the system.
Figure 96. Removing the filler bracket
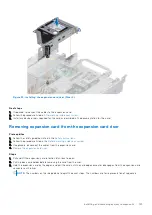
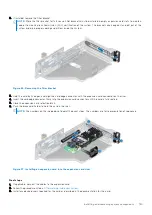
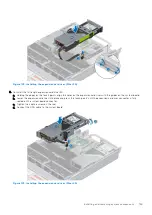
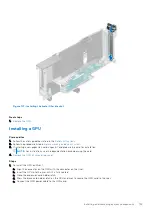
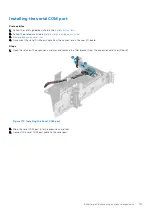
3. Hold the card by its edges, and align the card edge connector with the expansion card connector on the riser.
4. Insert the card edge connector firmly into the expansion card connector until the card is fully seated.
5. Close the expansion card retention latch.
6. Push the black card holder to hold the card in the riser.
NOTE:
The numbers on the image do not depict the exact steps. The numbers are for representation of sequence.
Figure 97. Installing an expansion card into the expansion card riser
Next steps
1. If applicable, connect the cables to the expansion card.
2. Follow the procedure listed in
After working inside your system
.
3. Install any device drivers required for the card as described in the documentation for the card.
Installing and removing system components
125
Содержание E68S
Страница 19: ...Figure 14 Service information System overview 19 ...
Страница 28: ...Cable routing Figure 18 12x 3 5 inch Figure 19 8 x 3 5 inch 28 Installing and removing system components ...
Страница 30: ...Figure 22 24 x 2 5 inch with NVMe Figure 23 16 x 2 5 inch 30 Installing and removing system components ...
Страница 31: ...Figure 24 8 x 2 5 inch with NVMe Figure 25 8 x 2 5 inch with NVMe Installing and removing system components 31 ...


