


21
Copy
The DVR gives you an option to copy all display selections from one camera to another, or to all cameras.
To copy Camera Settings follow these steps:
1. Select the COPY option and choose a camera
number or ALL cameras.
2. The settings from the currently viewed camera
will now be copied to the camera(s) selected
from the drop down list.
3. Select APPLY to save settings.
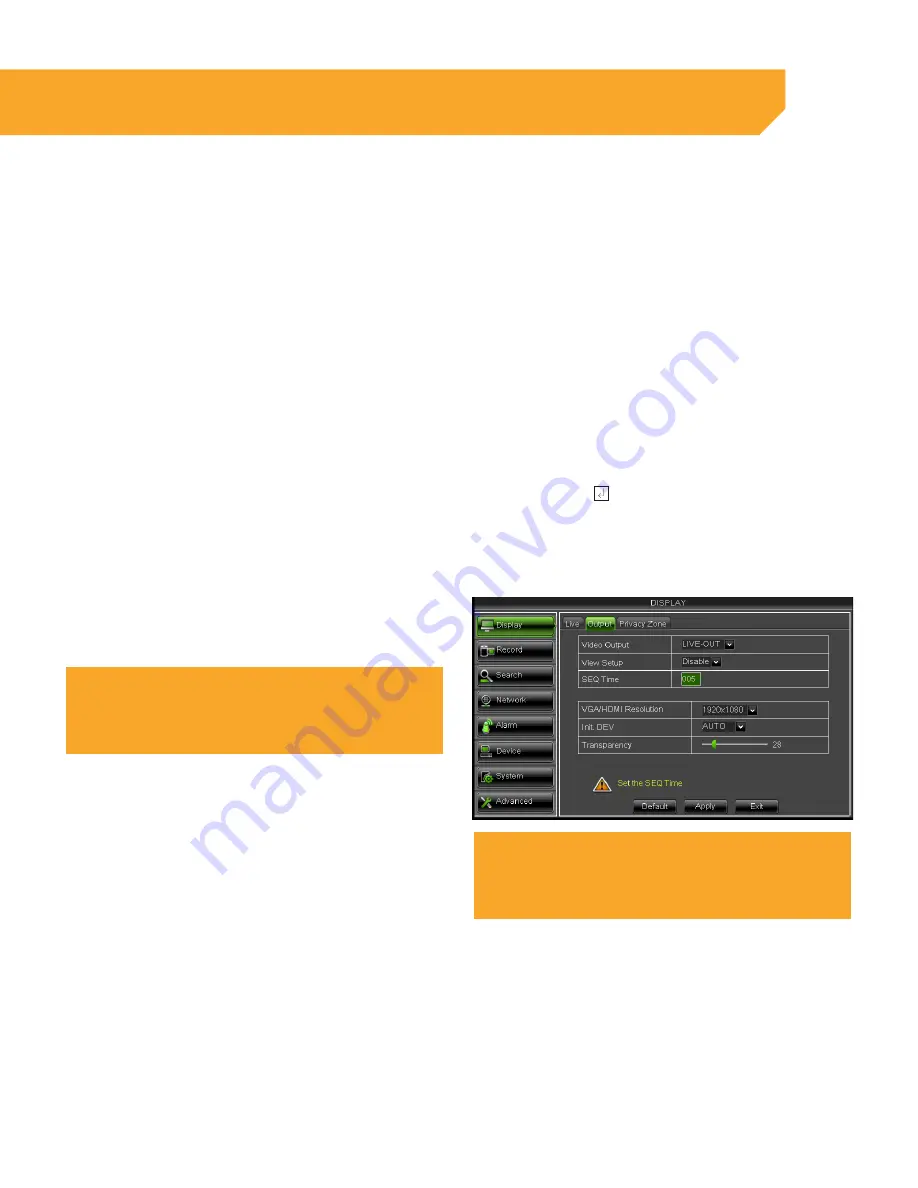
Output Tab
Rotate Time
You can set the DVR to automatically switch channels every few seconds while in Live View.
1. Select the text box beside Rotate Time, input the
amount of time in seconds that you would like
each camera view to play full screen on your DVR.
2. Select ENTER key.
3. Select APPLY to save your changes.
VGA/HDMI Resolution
1. Select the scroll bar next to VGA/HDMI
RESOLUTION and a list will appear.
2. Highlight the resolution you would like.
NOTE:
The higher the resolution, the more space you will use on
your HDD.
3. Select APPLY to save your changes.
Initial Device (Init. DEV.)
1. Select the drop down bar next to INIT. DEV and
a list will appear.
2. Highlight the device type you are using: VOUT,
HDMI, or AUTO.
3. Select APPLY to save your changes.
Note:
GUI to LCD (VGA) If you connect the DVR to a television and
the DVR is set to LCD (VGA) the mouse and remote will not
function.
Blind Switch
If you are unable to access the Menu or use the mouse, the DVR display settings may be stuck on an
incorrect display format. To resolve this please follow these steps:
1. Reboot your DVR (Unplug for at least 10 seconds
and plug back in).
2. Wait for the HDD light on the front of the DVR to
start flashing.
3. Aim the remote directly at your DVR and press 0.
4. You will hear a loud beep from the DVR and will
regain control of the mouse.
MAIN MENU
BASIC SETUP


