background image


1 2 3 4 


6 7 8 

1 – backwards at 1/16

th

 of the speed 

2 – backwards at 1/8

th

 of the speed 

3 – backwards at quarter of the speed
4 – backwards at half the speed  

5 – forwards at half the speed 
6 – forwards at quarter of the speed 
7 – forwards at 1/8

th

 of the speed 

8 – forwards at 1/16

th

 of the speed 

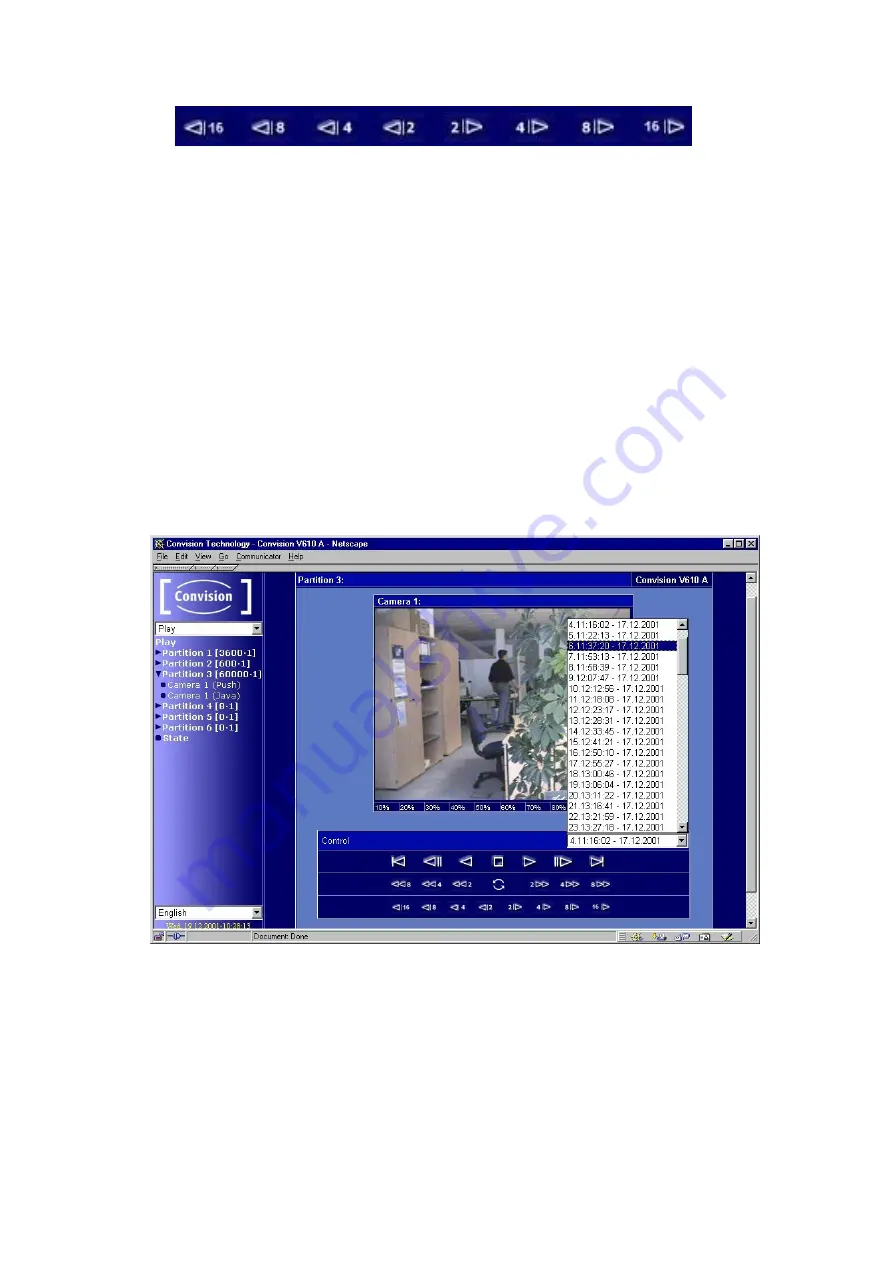
Use the percentage specifications below the image for fast access to the desired 
image in the image sequence. 100 % refers to the last of the images recorded on this 
partition, irrespective of the partition size. 

)


Note:


The playback speed depends on the recording speed! 

Playing Back Event Partitions 

The control panel also contains a list of all the recorded events. These are numbered 
and identified by the date and time of the recording. Click an event to play back this 
event. 


Figure 14: List of Events 

Manual 


 - 29 - 

Содержание V600 A

Страница 1: ... Convision V600 A Series are trademarks of Convision Systems GmbH Microsoft and MS Internet Explorer are trademarks or registered trademarks of Microsoft Corporation Netscape and Netscape Navigator are registered trademarks of Netscape Communications Corporation Any other trade names and product names are the trademarks or registered trademarks of the respective owners Convision Systems GmbH canno...

Страница 2: ...need any special software to operate the Convision V6xx A since all the components are generally included in the standard software package supplied with the computer Please read this manual before connecting your Convision V6xx A You can download the latest update of the Convision V6xx A manual and the Convision V6xx A firmware free of charge from the Convision Website www convision de Operate the...

Страница 3: ...o the ISDN 12 5 4 Connecting the Unit via Modem 13 5 5 Connecting the Cameras 13 5 6 The Key Operated Switch 15 5 7 Input and Output Connections 15 5 7 1 Example Input Connections 15 5 7 2 Example Open Collector Output Connection 16 5 7 3 Example Alarm Output Connection 17 6 Initial Configuration of the Convision V6xx A 18 6 1 MSN Configuration via ISDN 18 6 2 IP Configuration in a Local Area Netw...

Страница 4: ...the Camera Properties 55 9 3 Events Actions When an Alarm Is Triggered 56 9 3 1 Inputs 57 9 3 2 Key Switch 58 9 3 3 Time Control Time Dependent Actions 59 9 3 4 Time Period 60 9 3 5 Live Video Loss 61 9 3 6 Camera used 62 9 3 7 HD Level Convision V610 A only 62 9 3 8 Activity Detection 62 9 4 Actions 64 9 4 1 Hard Disk Configuring the Hard Disk 64 9 4 2 Configuring the Frame Buffers 64 9 4 3 Outpu...

Страница 5: ...80 10 2 Live optimized and Live compatible 80 10 3 FTP 80 10 4 Password Encryption 80 10 5 Channel Bundling 81 10 6 SMTP or Mail Server 81 10 7 Control via CGI Parameters 81 10 8 TCP IP and IP Addresses 82 11 Technical Data 84 Appendix A Declaration of Conformity 86 Appendix B List of Figures 87 Appendix C List of Keywords 89 Manual 5 ...

Страница 6: ...of your Convision V6xx A 1 2 Safety Instructions The Convision V6xx A is a high quality electronic product Please follow the safety instructions below to prevent damage Never place the Convision V6xx A near a heating source e g furnace or heaters or expose it to direct sunlight Do not cover the Convision V6xx A Only clean Convision V6xx A using a moist cloth only without abrasive cleaning agents a...

Страница 7: ...ces of this series are available that are equipped with all the basic functions of the Convision V600 A and offer various additional features All the variants have an identical basic configuration 2 2 Convision V610 A This variant of the Convision V600 A is equipped with a 2 5 hard disk for long time recording Versions Convision V610 A with a HDD of at least 20 GB Convision V610 A XXL with a HDD o...

Страница 8: ... refer to Chapter 6 1 3 2 Requirements for Operation in a Local Area Network LAN For installing the Convision V6xx A in a LAN you need a computer with an Ethernet interface The Convision V6xx A requires a 10 Mbit twisted pair TP connection For detailed information on cabling please refer to Chapter 5 2 3 3 Software Requirements To be able to configure the Convision V6xx A you need an Internet brow...

Страница 9: ...LED is lit when the Convision V6xx A proactively established a connection Active LED is lit when the alarm function of the Convision V6xx A has been switched to alert HD LED HD hard disk is lit when data is written to or read from the hard disk option Power LED lights up as soon as the Convision V6xx A is connected to the power supply and switched on Reset button when this button is activated the ...

Страница 10: ...to this interface Ethernet 10 Base T connection for operating the Convision V6xx A in a LAN ISDN This connector is used for operating the Convision V6xx A via an ISDN multi device access Audio This is the connector for the microphone and loudspeaker of an audio transmission device e g a door intercom system Power switch used to switch the device on and off Power 12 V DC This is the connector for t...

Страница 11: ... cable to the 12 V DC Power connector female of your Convision V6xx A Connect the power pack provided with the unit to the power supply socket using the power cable Activate the Power switch on the rear of the unit The Power LED will light up 5 2 Connecting the Unit to the LAN In a LAN you have to establish a connection between the Convision V6xx A and your computer via a hub or switch using a twi...

Страница 12: ...via a network terminator NT 1 Plug one end of the ISDN cable provided labeled ISDN into the ISDN port on the rear of the device refer to Figure 2 Rear view of the Convision V6xx A 2 Plug the other end of the cable into the RJ 45 connector female of the ISDN network terminator Figure 4 Connection via ISDN To be able to communicate with your Convision V6xx A via ISDN your computer must be equipped w...

Страница 13: ...this purpose contact the manufacturer of the telecommunications equipment 5 4 Connecting the Unit via Modem To operate the Convision V6xx A via an analog modem connect the modem to the 2nd serial interface COM 2 of your Convision V6xx A using a serial cable Connect the modem to the telephone socket using the telephone cable and to the power supply via the power pack For information on configuring ...

Страница 14: ...meras to a Convision V6xx A all the cameras following the first one are controlled via series cable connectors of the individual cameras 8pin mini DIN connectors The cameras are then individually controlled via internal port addresses In some controllable cameras you have to set an internal control address For this purpose please use the addresses starting with 1 For controlling a camera not suppo...

Страница 15: ... the red Active LED will be lit Switch unlocked Alarm function activated Switch locked Alarm function deactivated 5 7 Input and Output Connections Connect only devices that have been designed for 12V to your Convision V6xx A Never use 230 Volts on your Convision V6xx 5 7 1 Example Input Connections Alarm devices for various purposes can be connected to the six inputs Please observe that only 12 V ...

Страница 16: ... Collector Output Connection A relay via which higher power is then supplied for example can be connected to the open collector output OC The breaking capacity of the OC output is 12V 100 mA Figure 8 Example of an OC output connection 16 Convision V600 A Series ...

Страница 17: ...ction An indicator lamp for example or any other 12 V signal device e g siren can be connected directly to this output The maximum load for this switching output is 12 V 500 mA Figure 9 Example of an alarm output connection Manual 17 ...

Страница 18: ...ree different ways to set up the Convision V6xx A depending on your connection 1 MSN configuration via ISDN 2 IP configuration in a local area network 3 IP configuration via a direct link between the PC and the Convision V6xx A using a cross connect cable 6 1 MSN Configuration via ISDN To set up the Convision V6xx A via ISDN you have to install a dial up networking on your computer For information...

Страница 19: ...PSetup program For this purpose the computer must be in the same network segment defined by the network mask as the Convision V6xx A In Windows the program is launched using IPSETUP EXE As this is a Java program it can also be started by opening java IPSetup 5 After a few moments max 1 min the program will display the Convision V6xx A If the program is not automatically started double click the en...

Страница 20: ...ct your Convision V6xx A However in this case you can delete the configuration by resetting the unit Once the Convision V6xx A has been reset it will be in the initial state i e neither the IP address nor the MSN have been saved yet To delete the configuration of the Convision V6xx follow the instructions below 1 Briefly press the Reset button on the front of the Convision V6xx A 2 Then immediatel...

Страница 21: ...3 you can change the default settings and load additional languages Useful Notes on Navigation In the left hand bar of the browser window you can see a field with the entry Cameras Click the arrow to the right of this field to display a list of various menu items If you click on one of the menu items another list with submenu items will be displayed A small square to the left of a list item means ...

Страница 22: ...ual cameras or View of two cameras views of 2 cameras simultaneously View of four cameras views of 4 cameras simultaneously or View of six cameras views of 6 cameras simultaneously On the right hand side the current image is displayed as 384x288 fullsize The camera name is displayed inside the frame provided you assigned a name under Configuration Cameras Name This icon is displayed if one of the ...

Страница 23: ...ng the image stream When using Live compatible you can also flip the image horizontally and vertically and show the camera name and FPS frames per second rate Snapshot In the upper left hand corner of the image in the streaming section you will find the Snapshot icon Clicking on this during the streaming will result in a JPEG single image being taken With the right mouse button you can save this i...

Страница 24: ...controllable camera is shown in Figure 12 Note The camera control is always displayed as a live stream with a fullsize image recorded from a single camera In some controllable cameras you have to set an internal control address For this purpose please use the addresses starting with 1 Figure 12 View of a fully controllable camera 1 Snapshot Clicking on this during the streaming will result in a JP...

Страница 25: ...ype of camera connected some of the following controls will be displayed instead of the user interface shown in Figure 12 View of a fully controllable camera By clicking on the triangles the camera swivels in the direction of the arrow The angle depends on the zoom factor By clicking on the double arrow the camera will be moved 10 times further in one movement than with the single arrow Adjusting ...

Страница 26: ... and the Tour icon will change to red 6 End the Tour by clicking on stop The red indicator and the Tour icon will change to black Note If the configuration protection function is activated administrator rights are required for the storage process 8 1 2 Sequencer The sequencer allows you to program the cameras to be viewed sequentially for a specified time without having to manually shift between t...

Страница 27: ...eras recording on this partition In our example the total number of images on partition 2 is 42 x 5 210 Event partition The numbers in square brackets behind the partition specify the number of recorded images the number of events which have already occurred In our example the number of images per event on partition 2 is 840 14 60 If a partition does not have any images the icon shown on the left ...

Страница 28: ... the controls 1 2 3 4 5 6 7 1 to the beginning 2 single step backwards 3 backwards at normal speed 4 stop 5 forwards at normal speed 6 single step forwards 7 to the end 1 2 3 4 5 6 7 1 backwards at 8 x the speed 2 backwards at 4 x the speed 3 backwards at double speed 4 continuous playback at normal speed 5 forwards at double speed 6 forwards at 4 x the speed 7 forwards at 8 x the speed 28 Convisi...

Страница 29: ...rcentage specifications below the image for fast access to the desired image in the image sequence 100 refers to the last of the images recorded on this partition irrespective of the partition size Note The playback speed depends on the recording speed Playing Back Event Partitions The control panel also contains a list of all the recorded events These are numbered and identified by the date and t...

Страница 30: ...titions type On the other partitions types and you can neither start recordings nor stop recordings in progress For information on time controlled and event controlled recordings please refer to Chapter 9 3 Figure 15 Menu for manual recording 8 4 Frame Buffer Display Frame Buffers are storage spaces in the main memory of the Convision V6xx A In these buffers you can store as many as 32 pre and pos...

Страница 31: ...r 1 Select a camera frame buffer 2 The pre event images are displayed at the top the first image is displayed enlarged in the center of the window and the post event images are displayed at the bottom 3 Clicking on an image will enlarge it Note The frame buffers are automatically restarted as soon as your images are sent by email or VdS 2465 message The next pre event images will then be displayed...

Страница 32: ...nu Note Whilst viewing the camera images it is also possible to switch the outputs on or off by clicking on them in the left hand side of the window see Chapter 8 1 On Switch is closed device is activated Off Switch is opened device is deactivated Trigger Enter a time in the Seconds field and click Trigger The switch will close for this time and then open again Figure 17 Configuring the outputs If...

Страница 33: ...rams that perform various functions in the Convision V6xx A thus enhancing the firmware For modules that you can upload to the device if desired please visit www convision de Depending on the functions of the individual modules module specific HTML pages will be displayed Some of the modules may also be an extension of existing HTML pages Each module is supplied together with a PDF document contai...

Страница 34: ...igure 18 Configuring the IP addresses During the initial configuration using IPSetup refer to Chapter 6 2 or 6 3 you have already assigned an IP address and a network mask This data is now displayed on this page You can change this if desired After a change you will be prompted to reboot the device For this purpose click the Reboot button Note If your Convision V6xx A is connected via ISDN only i ...

Страница 35: ...u have to enter the IP address of a DNS Domain Name Service server a DNS server converts an alphanumeric address to an IP address In this case you should select the DNS server of the provider set in the Convision V6xx A For information on this topic please revert to your provider Syslog Server If you are operating a syslog server in your network the Convision V6xx A can send messages error message...

Страница 36: ...n analog modem It is not possible to operate the two connections at the same time The user can only establish a connection to the Convision V6xx A if both the user and the Convision V6xx A are using either analog connections or ISDN connections Data transmission from an analog modem to ISDN is possible only over Convision Call Note Please check whether you need to enter additional zeroes for your ...

Страница 37: ... the Phone number MSN field enter the multiple subscriber number MSN for dialing the Convision V6xx A Note Normally when using a telephone system you have to enter only the extension as the telephone number 2 Enter the login name in the Identification for PPP point to point protocol field 3 Enter the password in the Password for PPP field Note The data you enter in these fields must also be entere...

Страница 38: ...ion V6xx A cannot be accessed via the default router By entering multiple providers it is possible to establish alternative connections automatically if the first attempt at establishing a connection fails Apart from that you can select different connections for different tasks 1 Select one of the eight connection buttons on the Connections button bar 2 Assign a name 3 Enter the phone number of th...

Страница 39: ...ovider refer to Chapter 10 8 The Domain Name Service The following data needs to be entered only if you want to use this connection for sending e mail or SMS 11 Enter the SMTP server mail server of the LAN or your provider 12 Enter the address of the sending Convision V6xx A This address must be registered with the provider 13 Select the authentication method as required by the provider 14 Enter t...

Страница 40: ...of the ISDN For this reason you have to connect the Convision V6xx A to the ISDN The image data are transmitted either via Ethernet or via the other B channel In this case channel bundling is no longer possible Connect a door intercom system to the audio connector female on the rear of the device refer to Figure 2 Rear view of the Convision V6xx A 1 For this purpose remove approx 10 13 mm of the i...

Страница 41: ...tion must be enabled If you want to control an alarm circuit you have to connect an alarm signaling device to one of the inputs When this alarm is triggered 1 the Convision V6xx A sends an e mail or VdS alarm notification to a receiving station 2 e g an alarm center The receiving station then manually or automatically establishes a voice connection to the door intercom system via the Convision V6x...

Страница 42: ...erver and the associated telephone number has already been entered If the installation site of your Convision V6xx A is not in Germany you have to enter the country code 0049 3 To be able to use this service you need to register with the Convision Call server For more information on Convision Call please visit http www convision de convision _de convisioncall call html To register you need the ser...

Страница 43: ...ision Call in the Convision V6xx A 7 Immediately within the set timeout refer to Chapter 9 1 2 Connecting to Different Providers select the Connect option in the first browser window The server will now call your Convision V6xx A The Convision notices that it is being called but does not answer the call Instead it updates if applicable the number of the Convision Call server and establishes a dial...

Страница 44: ... Notification in Compliance with VdS 2465 Apart from TCP IP the Convision V6xx A can alternatively use a special alarm protocol VdS 2465 to send alarm messages These messages are sent via an ISDN connection to an alarm center At the alarm center a special software receives and decodes these messages so that measures can be taken immediately This menu is used to define the parameters for connecting...

Страница 45: ... menu texts to the Convision V6xx A Modules with other languages are available on the Convision Website www convision de Download the desired language module to your computer 1 To upload the language module to the Convision V6xx A enter the file name extension lgf together with the complete path to the directory in which it is stored 2 Alternatively you can click the Browse button to search for th...

Страница 46: ...clicking the delete menu item a list of all the applets you have already uploaded will be displayed If you want to delete one of these applets select it and then click the Delete button For an HTML display of your applet select the Applets menu refer to Chapter 8 6 9 1 5 Modules Modules are software programs that can perform various functions in the Convision V6xx A thus enhancing the firmware For...

Страница 47: ...or example you can easily restore the original configuration using this file After you transferred the configuration file to other devices you must assign a new IP address MSN The device associated with the IP address set in the configuration file must not be reachable within the LAN when the file is transferred to another device As soon as you have transferred the file change the IP address if th...

Страница 48: ...r downloading 2 Alternatively you can click the Browse button to search for the file Once you have located it double click to add it to the input line 3 Then click the Upload file button Do not switch off the Convision V6xx A during the update procedure Do not access the Convision V6xx A in any other way during the procedure Figure 27 Update dialog box Note Following an update controllable cameras...

Страница 49: ...ll be displayed as soon as the Configuration menu is selected A user with the login name admin will always be granted access to all the areas of the device The login name for the administrator is admin and cannot be changed Protecting the Recording Sector against Unauthorized Access If you also wish to protect the recording sector i e the access to the frame buffer or the hard disk enter a passwor...

Страница 50: ... battery Your Convision V6xx A can automatically change from summer to winter time The time conversion is done in MESZ Middle European Summer Time and is already configured for the next few years If you do not require this simply delete the preconfigured time 9 1 10 Activating the FTP Server Use this menu to activate the Convision V6xx A as an FTP server When this option is activated the camera im...

Страница 51: ...n the hard disk enter the following address in the browser ftp IP address HD partition1 camera1 good 123456 jpg The path is composed of IP address of the Convision V6xx A specification HD for the hard disk area specification of the partition partition1 partition8 specification of a camera camera1 camera6 image quality good medium low desired image The names of the images are composed of a 6 digit ...

Страница 52: ...let that you have to upload to the Convision V6xx A refer to Chapter 8 6 and 9 1 4 5 Save the data 6 You will be prompted to reboot the device For this purpose click the Reboot button You cannot connect two models of one device type e g cameras to the two COM ports Figure 30 Assignments of the serial ports Serial URL Port Once the serial URL port has been activated it is possible to control device...

Страница 53: ...s and warnings Click on the Event log menu item to list all these events Click on Delete events if you want to delete the list Additional all events are recorded on the hard disk refer to Chapter 9 5 6 Figure 31 Event log You can change or filter the display by clicking on one of the buttons above the list Change the order of the entries All the entries visible and refresh the display Filter only ...

Страница 54: ... in the hard disk cache of the browser not in Internet Explorer activated The individual image displayed in the browser window can be saved not activated When saving an image an up to date image from the camera is used instead of the one displayed in the browser Activate this checkbox to enable the display of date time in the Java applet Note The Java applet also has a pop up menu click the right ...

Страница 55: ...if one of the inputs is not connected to a camera 2 Select the property you want to change i e either Saturation Brightness Contrast Quality or Hue for NTSC cameras only 3 Adjust the settings according to your requirements Possibility 1 the 6 number buttons above the image represent the various saturation levels Click on one of the number buttons to select this level If you are satisfied with the ...

Страница 56: ...gn actions to the events that are to be triggered as a response The following actions may be possible CameraPresets at least one controllable camera must be connected Activate the preset positions that are to be taken These positions will be taken directly one after the other in the order listed Hard disk Convision V610 A only activate the checkboxes of the partitions you want to record to Frame B...

Страница 57: ...sent Activity Detection If you want to start or stop activity detection activate the corresponding box 9 3 1 Inputs You can connect various signaling devices to the inputs of the Convision Video Webserver Use this menu item to assign each input Input 1 to Input 6 the actions that are to be performed when a message is received Figure 35 Configuring the alarm inputs 1 Enter the name of the input 2 C...

Страница 58: ...is input receives a message 8 A page will be displayed on which you can assign the event actions from various groups 9 You can assign any number of actions All the actions will be listed in the table in the line associated with the respective input 10 Repeat steps 1 to 4 for other inputs if desired 11 Click Delete to cancel the assignment of actions 12 Save the data Note All the actions you want t...

Страница 59: ...ctions 1 Select a timer and enter a name for it 2 Click on a timer timers 1 to 8 in the first table column A page with a weekly schedule is displayed Figure 38 Configuring the points in time weekly schedule 3 Define how often this timer is to be activated e g how often an e mail is to be sent or an output is to be switched You can select Seconds Minutes or Hours 4 Now define one or two time period...

Страница 60: ...3 Click Delete to cancel the assignment of actions Note All the actions you want to trigger must first be configured Clicking on the actions opens the associated configuration pages Check the status on these pages to avoid assigning partitions that do not exist or messages that have not been written 9 3 4 Time Period In this menu you can configure up to eight different periods time periods 1 to 8 ...

Страница 61: ...ciated with the respective period 9 Repeat steps 1 to 8 for other periods if desired 10 Save the data 11 Click Delete to cancel the assignment of actions Note All the actions you want to trigger must first be configured Clicking on the actions opens the associated configuration pages Check the status on these pages to avoid assigning partitions that do not exist or messages that have not been writ...

Страница 62: ...fect Cameras Used 9 3 7 HD Level Convision V610 A only For all 8 possible partitions you can specify a hard disk level If this level is reached one or more actions can be performed This function is for long time and event partitions without continuous recording 9 3 8 Activity Detection Camera 6 can act as an activity detector Via this menu you can assign actions to the cameras to be performed when...

Страница 63: ...ty was reported 9 A page will be displayed on which you can assign the activity detection camera actions from various groups 10 You can assign any number of actions All the actions assigned will be listed in the table in the line associated with the respective activity detection camera 11 Save the data 12 Click Delete to cancel the assignment of actions Setting the Sensitivity Activities are shown...

Страница 64: ...event images per camera Each camera is assigned one frame buffer Thus the images from camera 1 are recorded in frame buffer 1 etc Once a frame buffer has been activated it continuously stores frames As soon as a buffer is filled it is overwritten If an event occurs refer to Chapter 9 3 the preset number of post event images are stored then the recording procedure is aborted Thus the remaining stor...

Страница 65: ...Repeat steps 1 to 7 for other frame buffers if desired Stop recording to the frame buffer by clicking the corresponding option in the table in the lower part of the page The red indicator to the right of the option will change back to black To send a frame buffer by e mail or VdS 2465 notification open the Configuration Action eMail or VdS2465 page select the desired message and activate the check...

Страница 66: ...gin information can be obtained from your administrator LAN or from your provider Figure 44 FTP upload 1 Select one of the 8 FTP uploads in the upper button bar 2 Enter a name 3 Specify the name or the IP address of the server to which the images are to be transferred 4 Enter a login name and password with access rights to this server Note If an anonymous access to a server is permitted anonymous ...

Страница 67: ...dditional needs to be entered for each digit required i e the name image jpg will copy the images image00 jpg to image99 jp to the server The image counter is reset to zero once you save the FTP message The following variables can be used in naming the image files DATE current date YEAR current year MONTH current month DAY current day TIME current time IP IP address of the IP video server SERIAL s...

Страница 68: ... mail For this purpose activate the checkbox next to the desired cameras 7 You can attach images stored in the frame buffers to the e mail For this purpose activate the checkbox next to the desired frame buffers If you append images from several frame buffers the e mail may become very large In this case it may not reach the recipient at all 8 To attach data from a connected weather station activa...

Страница 69: ...is telephone Figure 46 Configuring SMS 1 Select one of the 8 SMS in the top button bar 2 Enter a name 3 Enter the e mail address of the mobile telephone in the Recipient field If the message is to be sent to multiple recipients max 10 separate the e mail addresses using a semicolon Note Since the messages can be sent via e mail to a mobile telephone ask your mobile network operator for the e mail ...

Страница 70: ... images stored in the frame buffers to the message For this purpose activate the checkbox next to the desired frame buffers 6 Save the data 7 Repeat steps 1 to 6 for other messages if desired 9 4 9 Further action with no configuration page Camera Tour Here you can start or stop the camera tour that was previously configured under either Camera Live Optimized or Live Compatible refer to Chapter 8 1...

Страница 71: ...ges Impulse controlled for post event recordings in a preset time period Contact controlled for recordings in a time period determined by a trigger element e g for as long as a motion detector signals movements Note Once you have set up a partition you can no longer change its parameters You can however delete the partition and set up a new one If you set up further partitions later on you must de...

Страница 72: ...er e g 3 4 5 or 2 3 The connected cameras are identified by a camera icon You can record with all the cameras at the same time 4 Now specify whether the recording is to be stopped once the maximum number of images has been reached or whether it is to be continued at the beginning of the partition If the recording is continued once the maximum number of images has been reached the images already re...

Страница 73: ...ge space of the ring buffer has been used the image data are overwritten If an event occurs refer to Chapter 9 3 the previously recorded images are not overwritten but the remaining ring buffer will be filled Then this ring is locked and the next ring buffer is selected Figure 49 Setting up a ring buffer partition 1 Define the size of a ring buffer by entering a time in the first field You can sel...

Страница 74: ...ayed in real terms and as a percentage along with the remaining storage space Since the last partition can never be bigger than the available hard disk space the percentage figure can only show the maximum amount of memory available The recordings are started manually or when the first event occurs They are stopped according to your settings and the next ring buffer is started When a recording is ...

Страница 75: ... at the beginning of the partition If the recording is continued once the maximum number of images has been reached the images already recorded will be overwritten 6 Click the Add Partition button to accept the configured partition data The storage space required for the settings selected will automatically be displayed in real terms and as a percentage along with the remaining storage space Since...

Страница 76: ...al recording length of the partition You can select Seconds or Minutes 2 Select the recording speed from 25 Images 1 Second to 1 Image hour 3600 Seconds 3 Select the camera for recording The connected cameras are identified by a camera icon 4 Click the Add Partition button to accept the configured partition data The storage space required for the settings selected will automatically be displayed i...

Страница 77: ...on 9 5 3 Delete Partition Figure 52 Page for deleting individual partitions In this menu you can completely and irrevocably delete the last partition set up All the existing partitions with their set parameters the total hard disk space used and the remaining free disk space will be displayed If you want to delete all the partitions it is advisable to format the hard disk refer to Chapter 9 5 4 No...

Страница 78: ...isk space Information on the individual partitions is displayed below these general data This consists of type of partition refer to Chapter 9 5 1 cameras selected maximum number of images events that can be stored on the partition number of images events already recorded Continuous recording specifies whether the recording is terminated or continued at the beginning of the partition once the maxi...

Страница 79: ... the system report system log will still be saved when the device is turned on again The report can be accessed via FTP If the configuration section has been protected you will need to enter the admin log in and password ftp admin adminpassword IP address log The FTP server function must be activated to allow FTP access If the hard disk is reformatted the system report will be deleted Manual 79 ...

Страница 80: ... starting the first frame sequence using this program it will be installed as a plugin for the Internet Explorer on your computer Live compatible A Java applet also developed by Convision Systems GmbH is available for this and all the other browsers 10 3 FTP For transmitting images via FTP File Transfer Protocol the Convision V6xx A can be used either as an FTP server or as an FTP client It is alw...

Страница 81: ...inated with an error message in the status display refer to Chapter 9 1 12 10 6 SMTP or Mail Server An SMTP Simple Mail Transfer Protocol server forwards outgoing e mail messages to the recipient The address of the SMTP server can be obtained from the system administrator for a LAN connection and from your telecommunications provider for an ISDN connection To be able to access the SMTP server the ...

Страница 82: ...rs between 0 and 255 separated by dots e g 192 168 0 53 Every IP address is made up of 2 parts The first numbers define the network identification network ID the last define the device host ID The length of each part is defined by the network mask see below To integrate a device into your local area network properly you have to assign an IP address to the device Every device needs its own IP addre...

Страница 83: ...tifies the computer in the network Example Assuming the IP address of a computer is 192 168 100 3 And assuming the net mask is 255 255 255 0 Then the network identification is 192 168 100 The fourth number 3 identifies the computer Note Incorrectly defined IP addresses and network masks very often cause errors in TCP IP networks For this reason if you are not absolutely sure or if problems come up...

Страница 84: ...rotocol Honeywell HSD 251P Samsung SCC 641 Vicon protocol Alarm center support The VdS 2465 protocol is supported Compression JPEG up to 25 frames second PAL up to 30 frames second NTSC Approx 3 50 KB frame Frame size Resolution of 192x144 384x288 768x288 with Pixelzoom 768x576 pixels Pre post alarm frames 32 frames with a resolution of 192 x 144 pixels or 16 frames with a resolution of 384x288 pi...

Страница 85: ...Weight Convision V600 A 1 295g Convision V610 A 1 435g Temperature range 0 C to 55 C 32 F to 131 F Approvals EN50081 EN 50082 EN 55022 CE0682 Manual 85 ...

Страница 86: ...rective 1999 5 EG EG Telekommunikationsendeinrichtungen Richtlinie EC Telecommunications terminal equipment directive Zur vollständigen Einhaltung der EMV Richtlinie wurden folgende Normen herangezogen To fully comply with the EMC directive the following standards have been used EN 55022 Class B 1987 EN 50081 1 1995 EN 50082 2 1995 Dieser Erklärung liegt zugrunde Prüfungen im EMV Prüflabor This ce...

Страница 87: ...guring connections 39 Audio connections 41 Audio data transmission 41 Configuring the Convision Call server 43 Configuring Convision Call in the Convision V6xx A 43 Selecting the language 45 Update dialog box 48 The three security levels 49 FTP Server dialog box 51 Assignments of the serial ports 52 Event log 53 Gerneral camera settings 54 Setting the camera properties 1 55 Setting the camera prop...

Страница 88: ...time recording partition 72 Setting up a ring buffer partition 73 Setting up an impulse controlled partition 75 Setting up a contact controlled partition 76 Page for deleting individual partitions 77 Format menu 77 Hard disk status 78 88 Convision V600 A Series ...

Страница 89: ... Dial up networking 18 37 DNS server 35 Domain Name Service DNS 34 36 39 82 Door intercom system 40 E E Mail 67 69 eMail State 69 Ethernet 10 19 Event log 53 Events 56 F FBAS cameras 10 Firmware 20 48 Formatting the hard disk 78 FPS 23 Frame Buffer 30 49 56 64 67 FTP 80 Client 66 Server 50 79 H Hard disk 7 51 64 71 HD Level 62 Host identification 82 HTML pages 21 33 Hue 55 I Image sequence 29 Imag...

Страница 90: ...iew 21 R Record 30 Reset 9 Router 35 S Safety Instructions 6 Security settings 49 Sequencer 26 Serial interfaces 52 Serial number of the Convision V6xx 33 Serial URL port 52 Server Push 80 SMS Short Message Service 69 SMTP 81 Snapshot 23 24 Sockets controllable 32 Speed 71 State Frame Buffer 31 Hard Disk 78 Summer Time 50 Syslog Server 35 System Report 79 System settings 34 T TCP IP 82 83 Time 50 ...

Отзывы: