Compsee
54
Apex-0698-Part 2: Apex-trak
Part 2
7. Repeat Steps 2, 4, and 6 with the next item. In addition, if the item has not previously been entered,
perform Steps 3 and 5.
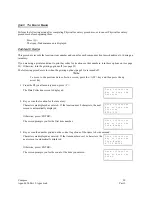
8. Repeat Step 7 until all items in this location have been inventoried. Then press <ALT><Q>.
The Physical Inventory menu is displayed.
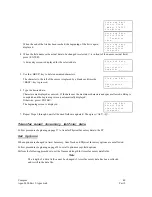
= = = P h y I n v e n t = = =
C ) o l l e c t D a t a
T ) r a n s f e r D a t a
O ) p t i o n s
Transfer Physical Inventory (PIFILE) Data
Follow procedures beginning on page 27 to transfer Physical Inventory data to the PC.
Set Options
When options are changed in Physical Inventory, Item Track and Asset Inventory options are not affected.
Follow procedures beginning on page 22 to set all options except field options.
Perform the following procedure to set the Name and length for Physical Inventory data fields.
Note
The length of a data field cannot be changed if Physical Inventory data has been collected
and is still in the data file.
1. From the Physical Inventory menu, press <O>.
The Physical Inventory options menu is displayed.
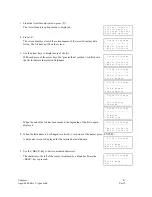
= = = P h y I n v e n t = = =
F ) i e l d O p t i o n s
P ) r i n t e r O p t i o n s
U ) p l o a d O p t i o n s
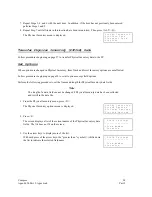
2. Press <F>.
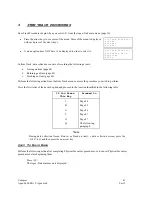
The screen displays a list of the current names of the Physical Inventory data
fields. The list does not fit on the screen.
F i e l d S e t t i n g s
_ _ _ _ _ _ _ _ _ _ _ _ _ _ _ _
> I t e m N u m b e r
L o c a t i o n
3. Use the arrow keys to display more of the list.
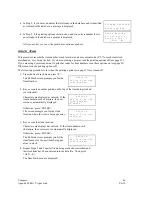
With each press of the arrow keys, the “greater than “ symbol (>) shifts down
the list to indicate the selected field name.
F i e l d S e t t i n g s
_ _ _ _ _ _ _ _ _ _ _ _ _ _ _ _
I t e m N u m b e r
> L o c a t i o n

