


Ruckus ICX 7750 Switch Hardware Installation Guide
41
Part Number: 53-1003900-10
Installing the Ruckus ICX 7750
Attaching a PC or terminal
4.
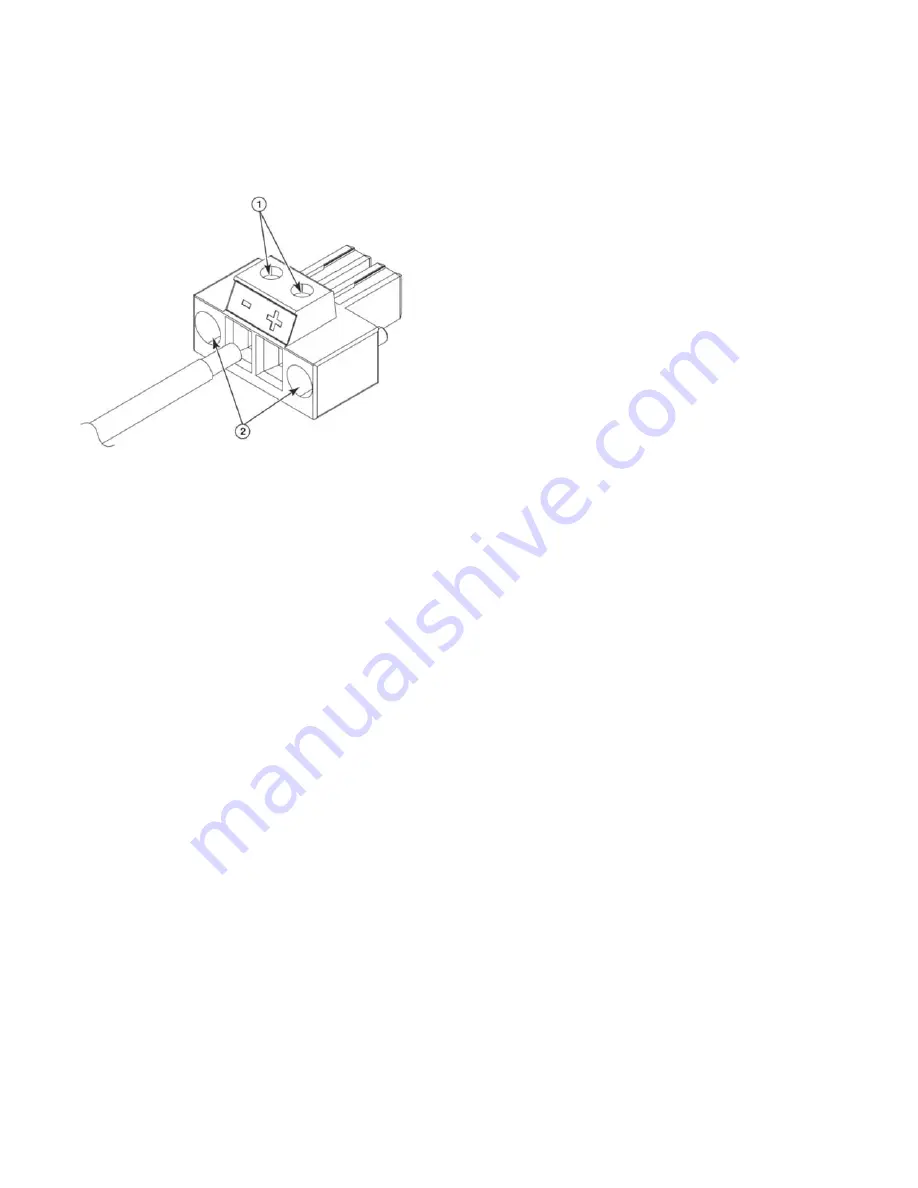
Insert the DC power supply source wires into the DC wiring assembly, matching the terminals. Refer to
.
FIGURE 30
DC power supply wiring assembly
5.
Use the wire-tightening screws to secure the wires.
6.
Insert the DC power supply wiring assembly with the wires connected into the power supply and tighten the assembly screws.
Refer to
7.
Using the handle on the power supply, hold the power supply level and guide it into the carrier rails on each side of the power
supply slot. Gently push the power supply all the way into the slot, ensuring that it firmly engages with the connector.
8.
When you are sure the power supply has properly engaged the connector, tighten the chassis attachment screws to secure the
power supply in the slot.
When the Ruckus ICX 7750 is powered on, the power LED on the front of the device should turn green to confirm that the power supply
is correctly installed and supplying power. Refer to
“Ruckus ICX 7750 front-panel LEDs”
Attaching a PC or terminal
To assign an IP address, you must have access to the command line interface (CLI). The CLI is a text-based interface that can be
accessed through a direct serial connection to the device and through Telnet connections. The CLI is described in detail in the Ruckus
FastIron Management Configuration Guide.
Access the CLI by connecting to the console port. After you assign an IP address, you can access the system through Telnet, or Ruckus
Network Advisor.
Use the following steps to attach a management station to the console port.
1.
Connect a PC or terminal to the console management port on the front of the Ruckus ICX 7750 using the mini-USB serial
console port cable and, if required, the RJ-45-to-DB-9 adapter.
For port pinout information for the mini-USB serial console port, refer to
“Serial port specifications (pinout mini-USB)”
NOTE
You must run a terminal emulation program on the PC.
1
Wire-tightening screws
2
Assembly screws


