


46
Ruckus ICX 7750 Switch Hardware Installation Guide
Part Number: 53-1003900-10
Installing the Ruckus ICX 7750
Stacking Ruckus ICX 7750 switches
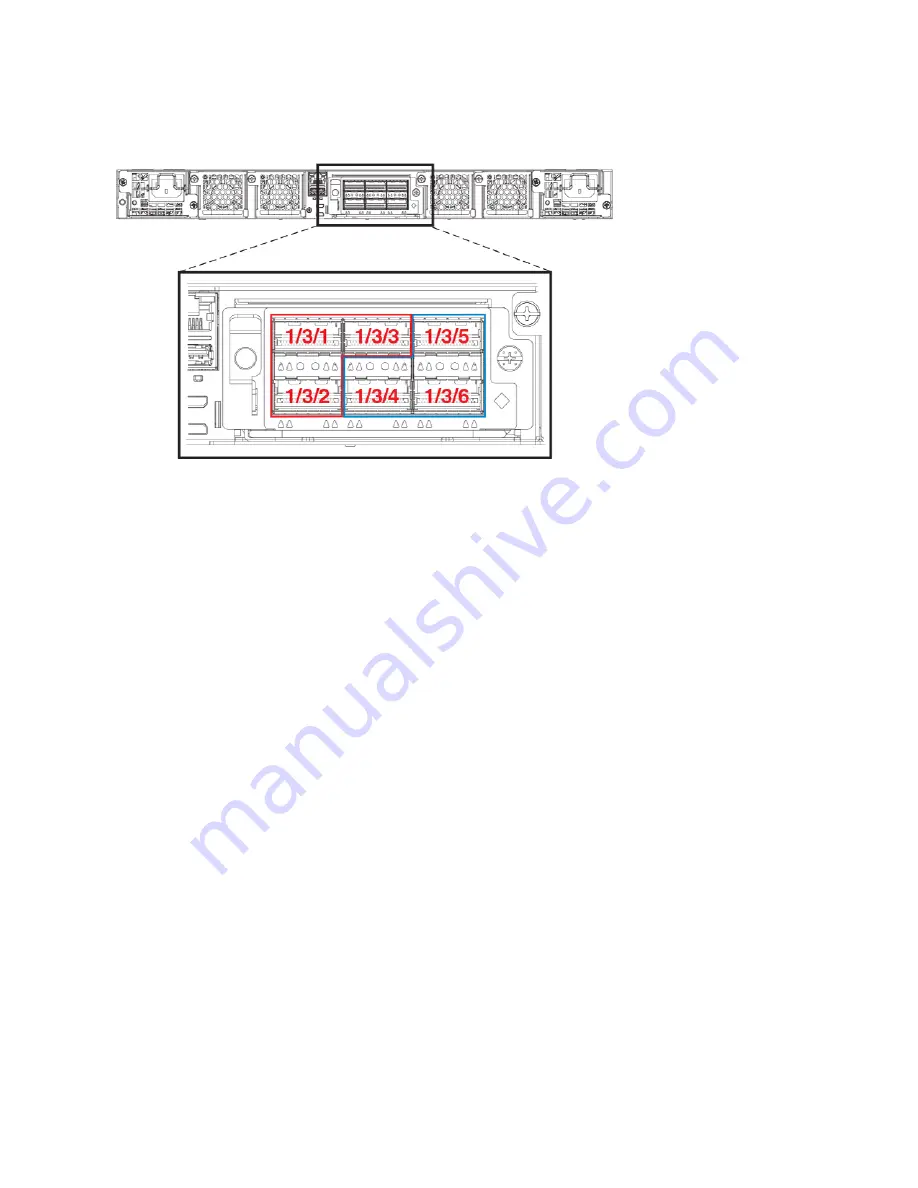
FIGURE 33
Rear panel stacking ports
The available rear panel stacking ports are ports 1/3/1 through 1/3/6.
NOTE
Unused stacking ports can be used as data ports. For example, you can elect to use only one default port as a stacking port and
use the other default port as a data port. Furthermore, when a Ruckus ICX 7750-6Q stacking module is not configured for
stacking, its ports can be used as data ports.
A stack connection can also be a trunked link consisting of multiple ports, which increases stacking bandwidth and provides resiliency. Up
to two stack trunks are supported, and each trunk can include up to three ports.
Only ports that are in sequential order can be configured as a stacking trunk. A default port; that is, either port 1/2/1 or 1/2/4 in slot 2 or
port 1/3/1 or 1/3/4 in slot 3, is always the first sequential port in a trunk.
Possible 3-port trunks:
•
1/2/1 to 1/2/3
•
1/2/4 to 1/2/6
•
1/3/1 to 1/3/3
•
1/3/4 to 1/3/6
Possible 2-port trunks:
•
1/2/1 to 1/2/2
•
1/2/4 to 1/2/5
•
1/3/1 to 1/3/2
•
1/3/4 to 1/3/5
Stacking configuration requirements
Before configuring the stack using the CLI, physically connect the devices using stacking cables. For information about configuring a
stack, refer to the FastIron Ethernet Switch Stacking Configuration Guide.


