3.4
System Features
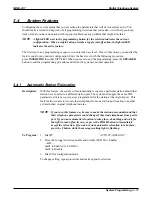
Configuring the system means that you are setting the parameters that will be true system-wide. You
should make a record in Chapter 4 of all programming decisions that you make—it will help you keep
track of what you have done and will help you troubleshoot any problem that might arise later.
NOTE:
A lighted LED next to the programming button for the selection indicates the current
configuration. When a single button provides a toggle (on/off) action, the lighted LED
indicates the active feature.
The first step in any programming sequence is to enter the base level. Once in this mode, you can dial the
feature code for any desired configuration. Enter the base level with the following procedure:
press INTERCOM then dial
✳
# 7 4 6
✳
. When you want to end the programming, press the SPEAKER
button to end the programming procedure and return the system to normal operation.
3.4.1
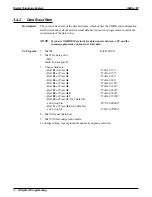
Automatic Station Relocation
Description:
With this feature, the system will automatically recognize a particular station should that
station be re-located to a different station port. The system will supply the same COS
parameters at this new port as was programmed for the station at the original port. This
feature allows users to relocate their telephone from one station port location to another
yet retain their original telephone features.
NOTE:
If you turn this feature on, be sure to make the station users understand that
their telephone parameters could change if they trade telephones from port to
port. If you want automatic relocation to take place, do nothing and wait for
the light to turn off on its own, or press the HOLD button to immediately
accept the relocation. If you do not want automatic relocation to take place,
press the # button while the message waiting light is flashing.
To Program:
1. Dial 27.
“AUTO STA RELOCAT”
2. Press A1 to toggle between enable and disable (LED On = Enable)
—OR—
dial 1 to Enable (A1 LED On)
dial 2 to Disable.
3. Dial
✳
for configuration mode.
To change setting, repeat procedure and make opposite selection.
IMI66–107
Digital Telephone System
System Programming 3 – 17
Содержание Air Impact DSU
Страница 2: ...Printed in U S A GCA47 157 ...
Страница 30: ......
Страница 85: ...Figure 2 26 Installing The Batteries batt1 cdr IMI66 107 Digital Telephone System Installing The DSU 2 55 ...
Страница 91: ...Figure 2 28 Detailing The ATI D Dimensions IMI66 107 Digital Telephone System Installing The DSU 2 61 ...
Страница 112: ......
Страница 192: ...Digital Telephone System IMI66 107 3 80 System Programming ...
Страница 283: ......
Страница 284: ......
Страница 285: ......
Страница 286: ......
Страница 287: ......
Страница 288: ......
Страница 289: ......
Страница 290: ......
Страница 291: ......
Страница 292: ......
Страница 293: ......
Страница 294: ......
Страница 295: ......
Страница 296: ......
Страница 297: ......
Страница 298: ......
Страница 299: ......
Страница 300: ......
Страница 301: ......
Страница 302: ......
Страница 303: ......
Страница 304: ......
Страница 305: ......
Страница 306: ......
Страница 307: ......
Страница 308: ......
Страница 309: ......
Страница 310: ......
Страница 311: ......
Страница 312: ......
Страница 313: ......
Страница 314: ......
Страница 315: ......
Страница 316: ......
Страница 317: ......
Страница 318: ......
Страница 319: ......
Страница 320: ......
Страница 321: ......
Страница 322: ......
Страница 323: ......
Страница 324: ......
Страница 325: ......
Страница 326: ......
Страница 327: ......
Страница 328: ......
Страница 329: ......
Страница 330: ......
Страница 331: ......
Страница 332: ......
Страница 333: ......
Страница 334: ......
Страница 335: ......
Страница 336: ......
Страница 337: ......
Страница 338: ......
Страница 339: ......
Страница 340: ......
Страница 431: ......
Страница 436: ......
Страница 437: ......
Страница 438: ......


